Configuring an ethernet module – Impulse 463N User Manual
Page 73
©Sealevel Systems, Inc.
SL9049 - 11/2010
SeaI/O Manual
73
This section applies only to Ethernet (E-series) SeaI/O modules. For all other SeaI/O
modules, refer to the Configuring a “Base” SeaI/O Module and Configuring Expansion
Modules sections on the previous pages.
Verify that SeaMAX software has been installed successfully and that an Ethernet SeaI/O module is
connected directly to your computer using the yellow crossover cable supplied with your module.
This module will become the “base” module.
All Ethernet SeaI/O modules are shipped with DHCP enabled. When you first connect an Ethernet
SeaI/O module to the network, the status LEDs on the front of the module will blink while it
searches for a DHCP server. Once it receives an IP address, the status LEDs will remain on.
If no DHCP server is available, the Ethernet SeaI/O module will default to a random IP address in the
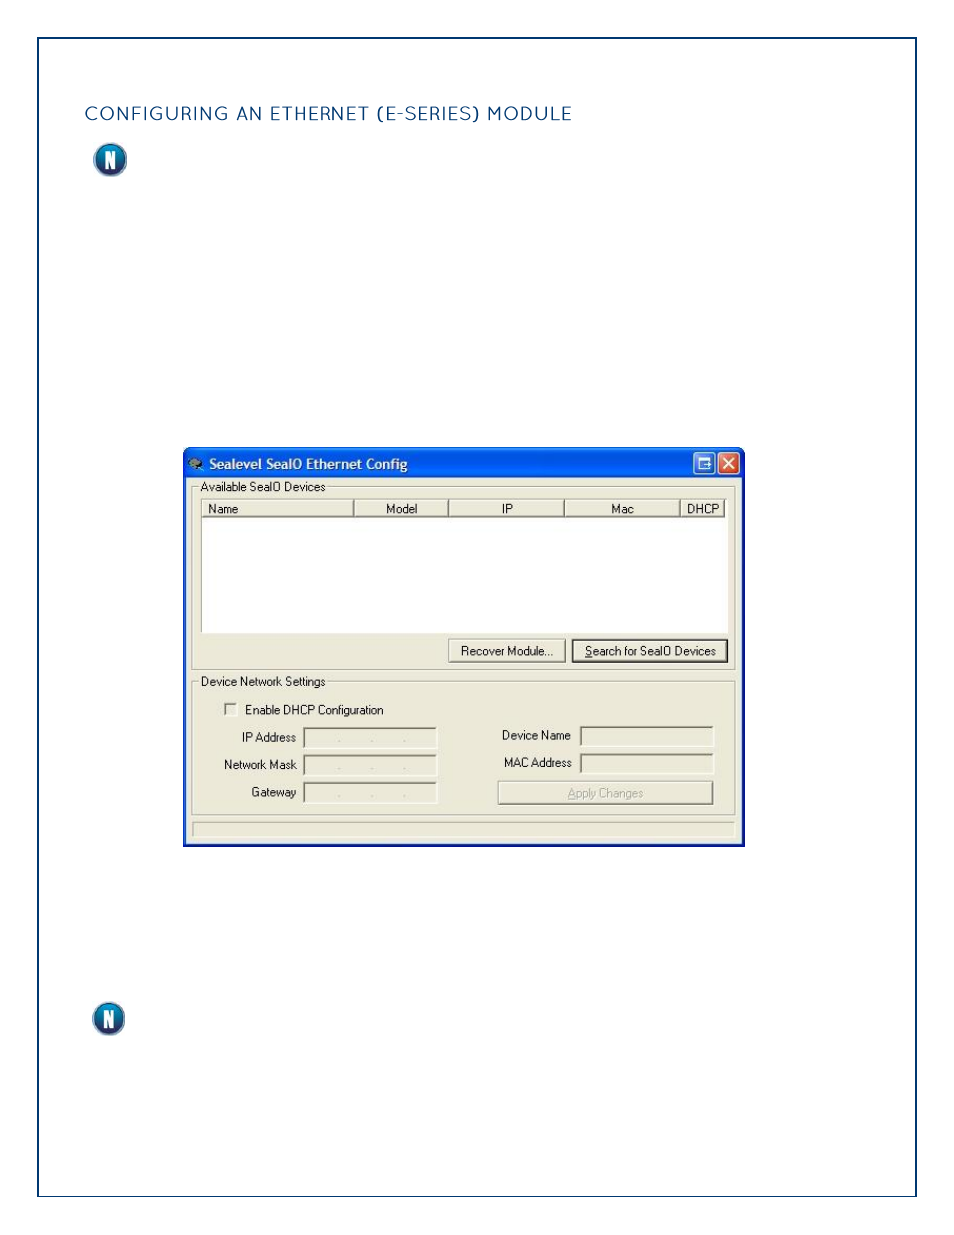
range 169.254.x.x. To discover the SeaI/O module‟s IP address, start the Ethernet Config utility
(Start All Programs Sealevel SeaMAX Ethernet Config) installed with SeaMAX.
Click on the “Search for SeaI/O Devices” button and the „Available SeaI/O Devices‟ pane should
refresh with any Ethernet or Wireless SeaI/O modules that are found on the network. Select one of
the modules in the list by clicking on it. You can update the settings in the Device Network
Settings pane and then confirm these changes by clicking the “Apply Changes” button. The module
list should refresh, indicating that your changes were successful.
If the module does not change or respond, the PC and the module may be on different
subnets. Proceed to the Resetting An Ethernet SeaI/O Module section on the following
page.