Setting operator usage class and handing – Controlled Products Systems Group 222EX43 User Manual
Page 37
19
© 2012 Installation and Reference Manual D0119 Rev. J
Section 3
— Setting Operator Usage Class and Handing
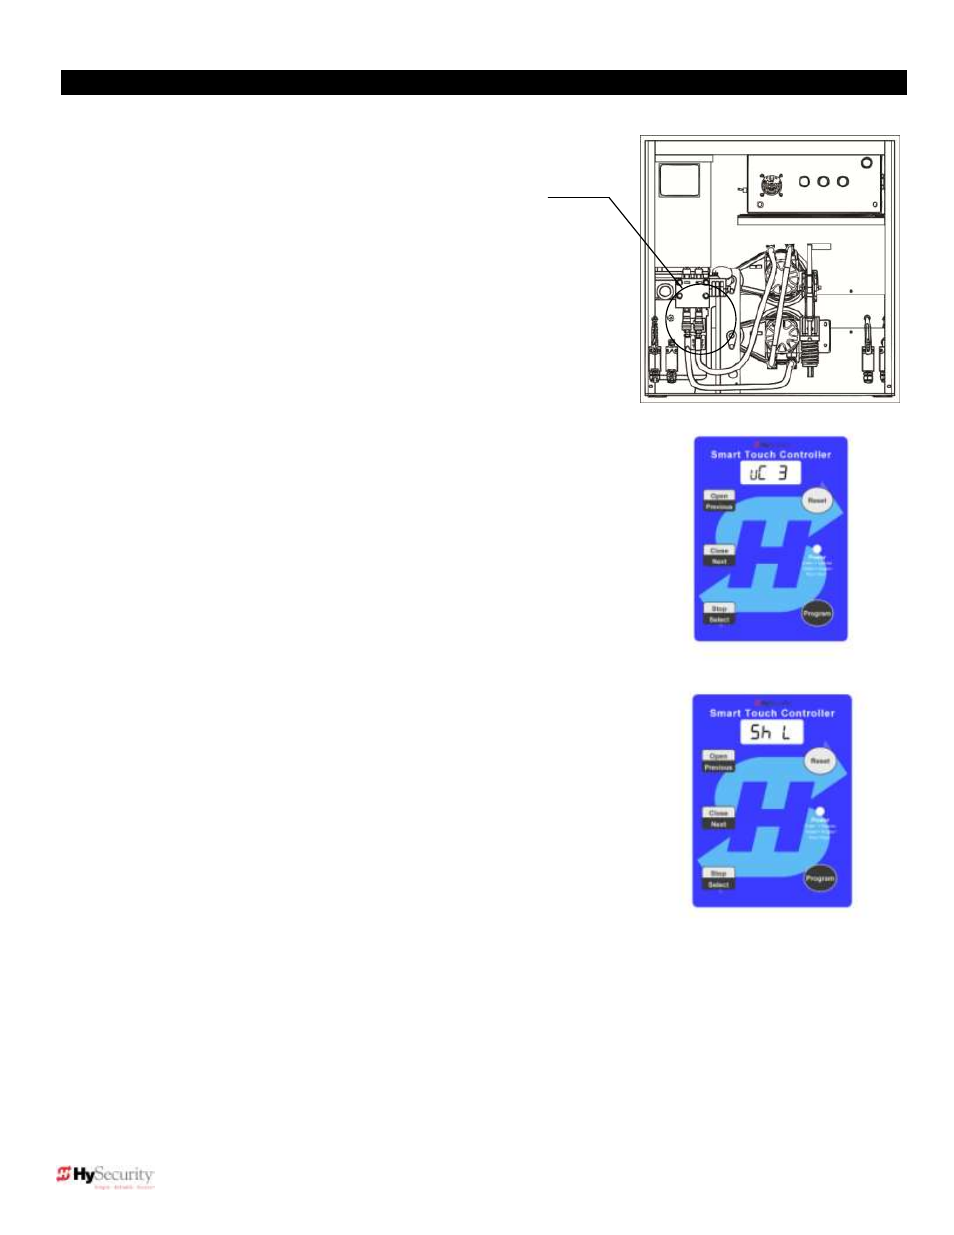
NOTE: Make sure the hydraulic hoses are connected
properly to the quick disconnect fittings on the manifold. A
label near the connection point describes this procedure. If
the hoses are connected incorrectly, the gate will run
backwards (close when the OPEN button is pressed) and
this may trigger an error [
] on the display. If this occurs,
the hoses need to be reconnected properly and the RESET
button must be pressed to reset the operator).
1. Turn the power switch ON. The operator status displays scroll past. The
display directly enters the Installer Menu and the usage class [
] menu
item appears.
NOTE: If the operator has been configured, the Installer Menu must be
accessed in order to reach the system configuration menu items. See steps
3c and 3d on page 18.
2. While the usage class [
is being displayed), set the user class as
defined by UL. Press SELECT, and then press NEXT to choose
between [
] or [
]. See page Error! Bookmark not defined. for
UL usage class definitions. Refer to page 18 for a reminder on how to
use the Menu Mode buttons.
3. When the appropriate usage class is displayed, press SELECT to accept
it. The characters on the display stop blinking.
NOTE: The Installer Menu cannot be exited and the operator will not
function until the selection for usage class and gate handing have been
entered.
4. To set the gate
“hand,” press the NEXT button. The handing menu item
appears [
]. Press SELECT, and then press NEXT to choose
between “ ” for right hand or “ ” for a left-hand gate opening.
5. When the appropriate handing is displayed, press SELECT to accept it.
NOTE: Never disconnect the limit switch wires from the Smart Touch
Controller or rearrange the limit switch hardware on the chassis to affect
the handing of the gate.
6. At this point, you should exit the Installer Menu by pressing the
PROGRAM button. The display jumps to the Close Timer [
] setting
in the User Menu, Either set the Close Timer by the same programming
sequence described on the previous page or press the PROGRAM
button again to exit to Run Mode.
7. Test for proper handing by observing which way the gate moves. Cycle
the gate close and open using the CLOSE and OPEN buttons on the
keypad. Note what appears on the display. If the display states that the
gate is OPENING, when in reality, it is closing, then you need to correct gate handing through the Installer Menu.
NOTE: If you press the CLOSE button and the gate remains open, further test the operator. Press STOP and then
press OPEN. If the gate begins to close, then you need to press STOP to halt gate travel, turn the power switch OFF,
and swap the hydraulic hoses on the operator. See the illustration above.
8. When you have completed testing the operator, press RESET to clear the display and reset the operator to RUN
mode.
To change handing
connect hoses
according to the
label on the pump
pack.