Baron Air & Fuel_BIG AIR KIT STEALTH Road_Stratoliner & Raider User Manual
Page 7
Page: 7
BA-2021-00
STEALTH BIG AIR KIT - Yamaha Roadliner/Stratoliner and
Raider
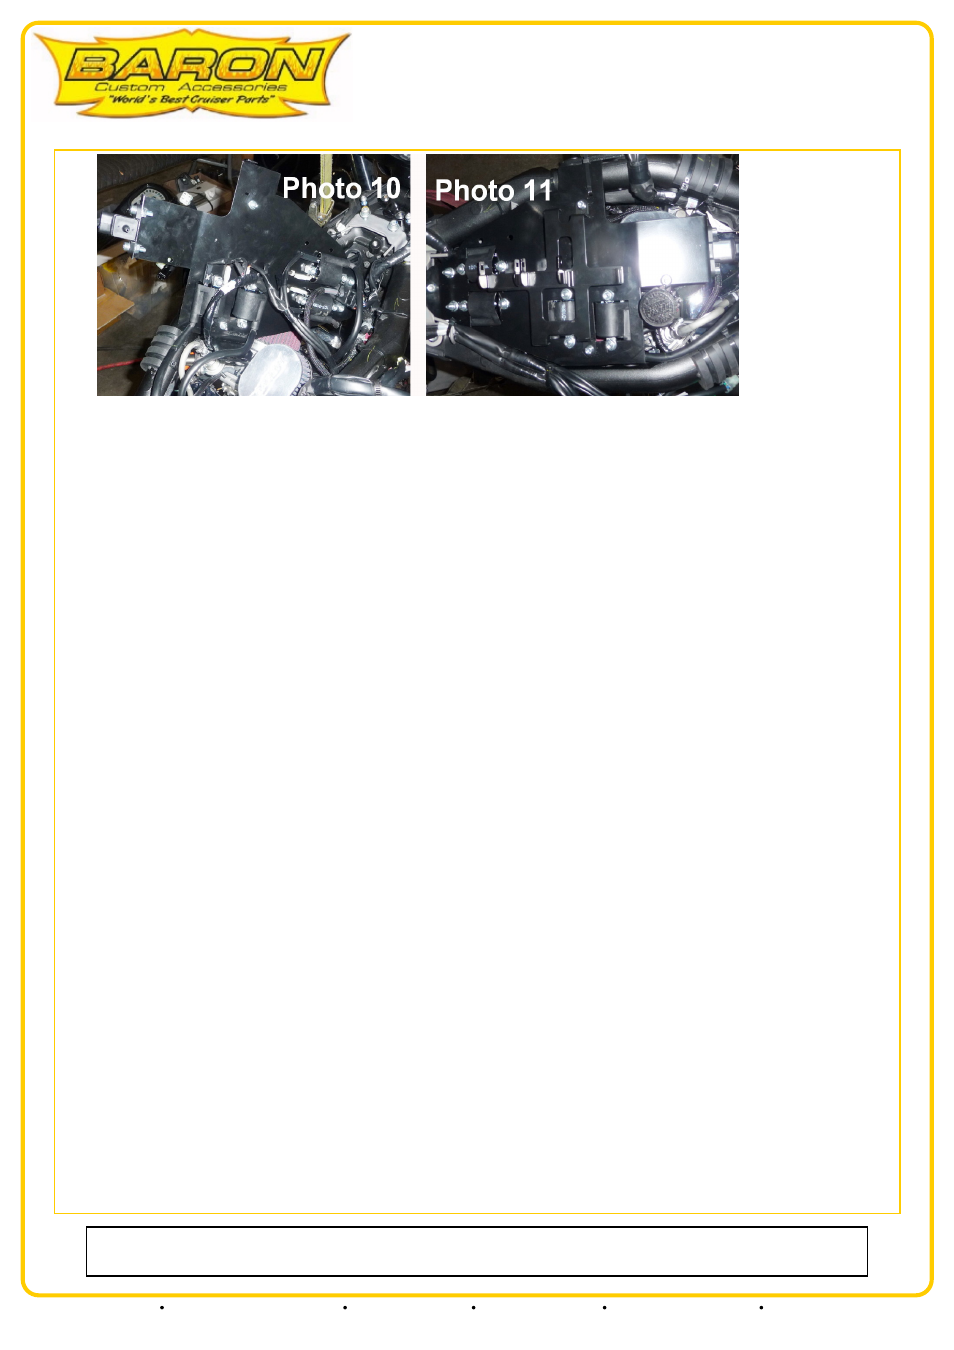
RAIDER COILS: The front coil/s mount in the two cutouts at the front of the coil mount plate with the plug wires extending towards the front of
the bike. Attach the coils so they sit over their respective cylinders FL & FR . The rear coils attach in the remaining cutouts with the wires
extending towards the left side of the bike. The left rear coil attaches to the cutout closest to the front of the bike.
LINER COILS: The front coils remain in place inside the frame neck. The rear coils should be located in the cutouts on the left of the coil
mount plate
ELECTRICAL CONNECTIONS: Connect the White and Black electrical connection back to their coordinating coils as you marked earlier.
PLUG WIRES: Connect each of the plug wires to the appropriate spark plug being sure the spark plug boot slides firmly and completely on to
the plug.
RAIDER ELECTRICAL CONNECTION MOUNT BRACKET: Take the wiring bracket you removed from the top of the stock air box and
attach it to the top of the coil mount plate using the two holes that align with the bracket mount tabs using the m5 x 15 cap head screws and m5
flange nuts and tighten firmly.
INSTALLING THE COIL MOUNT PLATE:
16. Take the coil mount plate and rotate it into position above the filters bringing the front of the mount into place over the front mount hole of
the frame. Be sure all plug wires route around and between the filters and the coil mount plate can sit down into place without binding any lines,
wires or hoses. Be sure the wiring looms are in their correct positions and are not pinched by the coil mount plate.
17. Place the dome head allen bolt removed earlier from the front air box mount through the front coil mount plate hole and get the threads
started but do not tighten.
18. Using an 8mm allen wrench thread the supplied M10-1.25 x 35mm cap head allen bolt and 10mm flat washer into the front left motor mount
hole until the head of the stud is even with the inside of the frame. From the left rear of the coil mount plate look towards the front of the bike
under the coil mount plate locate the new bolt head and align it with the 10mm hole in the coil mount plates large 90 degree mount flange then
thread the bolt in and tighten into the frame fully. This will secure the left side of the coil mount plate. NOTE: There are two holes in the right
flange of the coil mount plate. The correct hole naturally aligns with the front motor mount bolt of the Raider and 'Liners.
NOTE: Raiders align with the rear hole, Liners align with the front hole.
19. Align and slide the small 90 degree flange on the right side of the coil mount plate down into the slot between outside of the frame rail and
the inside of the right motor mount bracket.
20. Notice the small rectangular slot in the top of the coil mount plate located 1.5" to the left of the right side at the mount inside of the small
flange. Insert one of the zip ties (supplied) downward through the slot behind the right motor mount while reaching under the coil mount plate
with your fingers and re-directing the zip tie around the frame rail and then up through the small hole in the coil mount plate. Zip the tie
through the head and tighten being sure the zip tie head is sitting directly over the slot in the frame rail on the outside of the coil mount plate
once tightened.
21. Tighten the allen bolt at the front coil mount plate.
ELECTRICAL CONNECTIONS:
RAIDER: Reconnect the wiring leads on the right side of the frame to the stock wiring bracket now attached to the coil mount plate then
reconnect the leads from the left side of the frame being sure they all connect fully and lock firmly. Reconnect the three small leads towards the
rear of the wiring bracket and lock them in place under the rubber strap. CAUTION: These smaller connections have terminals that bend
easily. Use caution when working with these, it may be necessary to align the terminals if they become bent as they may not slide into their
receivers properly in which case the male and female connectors will not lock in place.
LINER: Requires no other stock wiring be connected at this time in order to install the tank.
Our install guides provide a basic outline on the proper installation of our products. Further tuning and/or
fitment may be required. Barons bears no responsibility on installation costs associated with this product.
© 2013 Barons Custom Accessories
5221 Oceanus Drive
Huntington Beach, CA 92649
(925)583-2499 - Ph.
(714)901-0520 - Fax
www.baronscustom.com