Time & date stamp – Toshiba E-STUDIO230/280 User Manual
Page 133
131
5
11. TIME & DATE STAMP
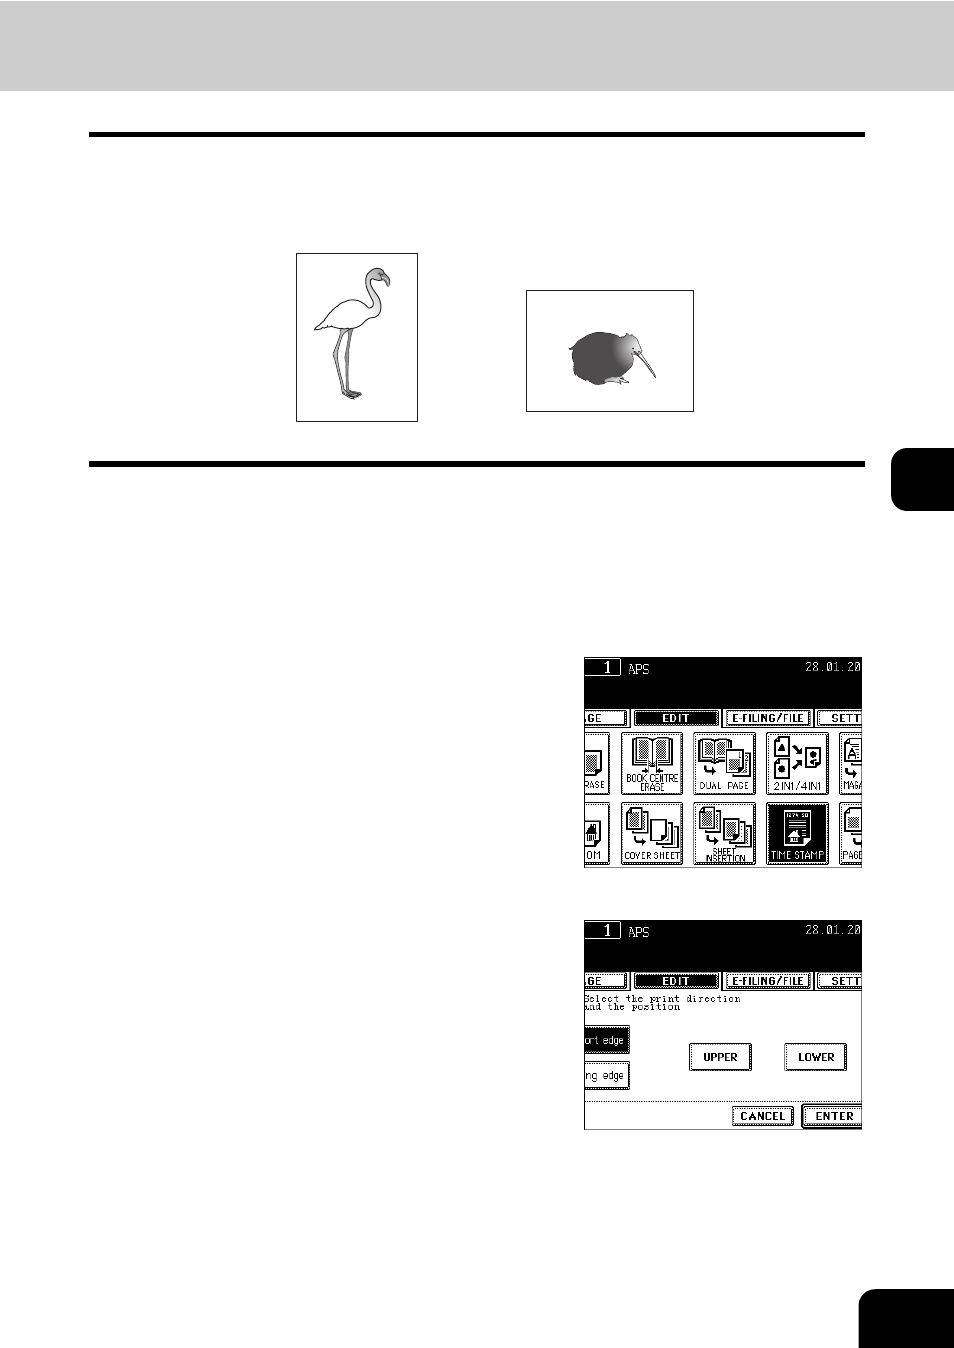
The time and date of the scanning can be added to the copies.
1: Printed at the bottom of the portrait copy
2: Printed at the top of the landscape copy
1
Place paper in the drawer(s).
- "4.SETTING COPY PAPER" Page 36
2
Place the original(s).
- "1.SETTING ORIGINALS" Page 48
3
Press the [EDIT] button to enter the edit
menu, and then press the [TIME STAMP]
button.
4
Select the orientation ([Short edge] or
[Long edge]) and position (UPPER or
LOWER) of the date and time to be
printed, and then press the [ENTER]
button.
z
Select other copy modes as required.
5
Press the [START] button.
DD.MM.YYYY 14:54
DD.MM.YYYY 14:54
1
2
See also other documents in the category Toshiba Printers:
- e-STUDIO222cp (16 pages)
- e-STUDIO382p (22 pages)
- Copier (78 pages)
- e-Studio Imaging 5520c (288 pages)
- multifunctional digital color systems e-STUDIO4540C (282 pages)
- B-852 Advance (2 pages)
- GA-1121 (118 pages)
- 720T (8 pages)
- 305 (168 pages)
- TEC EO1-32004 (94 pages)
- TEC DRJST-51 (19 pages)
- MULTIFUNCTIONAL DIGITAL COLOR SYSTEMS 2830C (178 pages)
- B-SP2D (50 pages)
- R-TH10 (86 pages)
- B-682-QP (157 pages)
- B-680-QQ (32 pages)
- e-STUDIO 281C (8 pages)
- TEC EO1-33027E (122 pages)
- MULTIFUNCTIONAL DIGITAL COLOR SYSTEMS e-STUDIO5520C (210 pages)
- 7FM03281000 (34 pages)
- B-570 (90 pages)
- GD-1270 (120 pages)
- ESTUDIO 230L (382 pages)
- 520 (7 pages)
- TEC EM1-33043D (46 pages)
- B-EP2DL (28 pages)
- TRST-A15 SERIES (31 pages)
- TEC B 452 (184 pages)
- TEC EO1-33016E (34 pages)
- B-670-QQ (34 pages)
- REMOTE RECEIPT PRINTER TRST-A00 (35 pages)
- e-STUDIO Printer/Fax/Scanner/Copier (4 pages)
- 282 (48 pages)
- B-480-QP (170 pages)
- B-450-QQ (28 pages)
- B-480-QQ (30 pages)
- B-SA4TP SERIES (114 pages)
- TEC EO1-13016 (24 pages)
- B-450-HS-QQ (34 pages)
- E.STUDIO 603 (216 pages)
- e-STUDIO 170F (244 pages)
- B-SA4 (2 pages)
- TEC EM1-33039E (34 pages)
- B-852 (2 pages)
- B-570 SERIES (158 pages)