Toshiba RAS-B13GKVP-E User Manual
Page 84
– 84 –
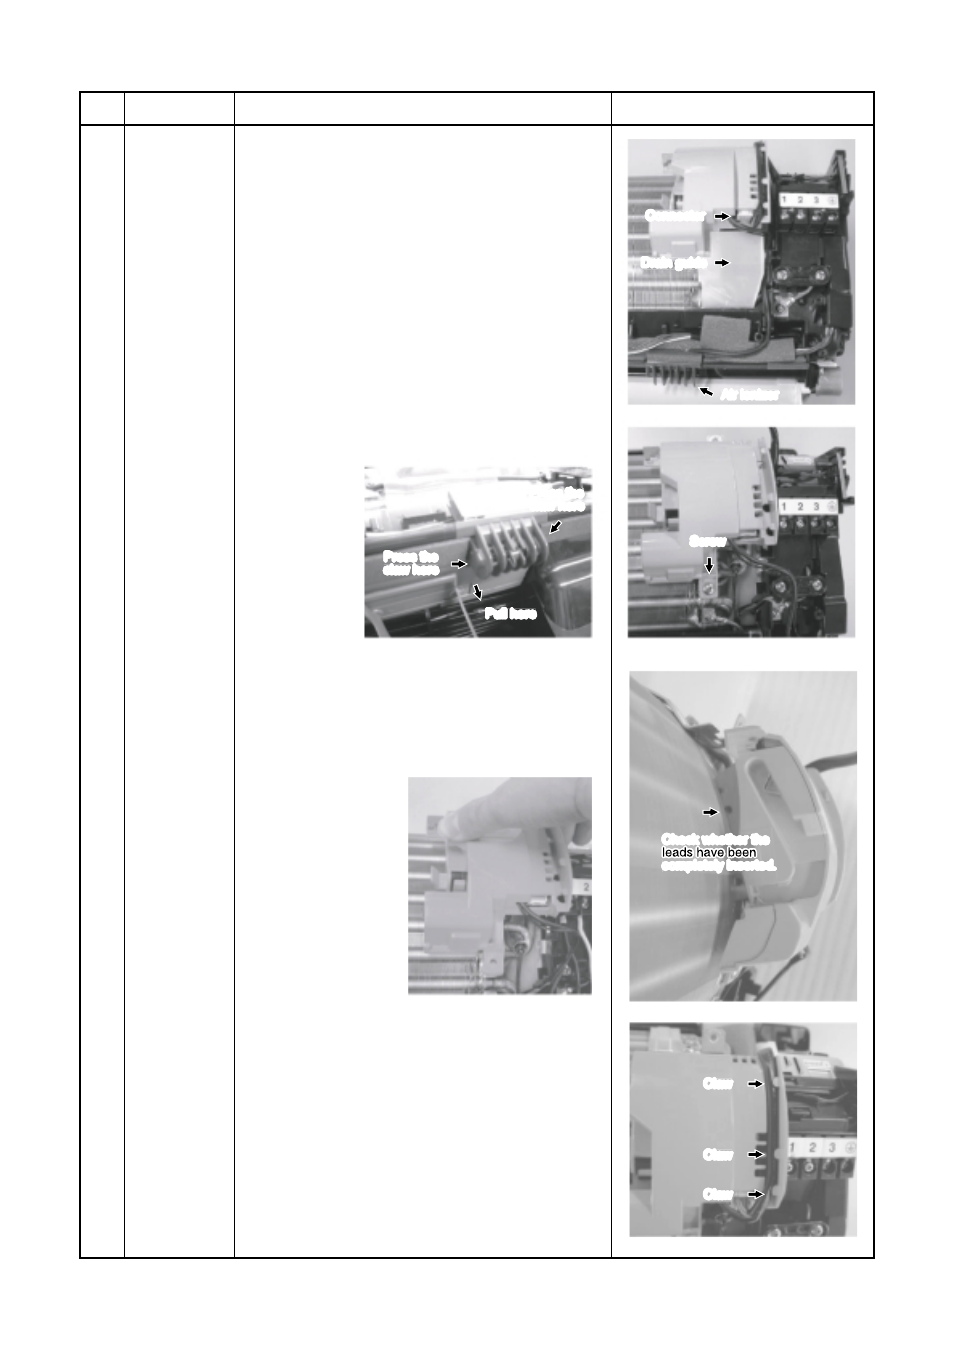
Air ionizer
Connector
Drain guide
Press the
claw here
Press the
claw here
Pull here
Screw
No.
Part name
High voltage
generator
Procedures
1) Follow to the procedure in the item
.
2) Remove the drain guide.
3) To remove the air ionizer from the back body,
pull it toward you while pressing down on its left
and right claws.
Disconnect the two leads (black) connected to
the air ionizer from where they are fitted into
the other components.
(Caution: do not remove the Faston.)
4) Disconnect the connectors of the high-voltage
generator, and disconnect the four leads from
where they are fitted into the other compo-
nents.
5) Remove the fixing screw which secures the
high voltage generator, and remove the high
voltage generator from the evaporator.
Remarks
1) Insert the high voltage generator straight into
the evaporator, and secure it using the fixing
screw.
Claw
Claw
Claw
Check whether the
completely inserted.
2) Pass the leads of the high voltage generator
through the area designated and insert them
into its connectors.
3) Attach the air ionizer to the back body, and
pass the two leads (black) through the area
designated on the electric parts box assembly.
4) Attach the drain guide.