Toshiba RAS-B13GKVP-E User Manual
Page 77
– 77 –
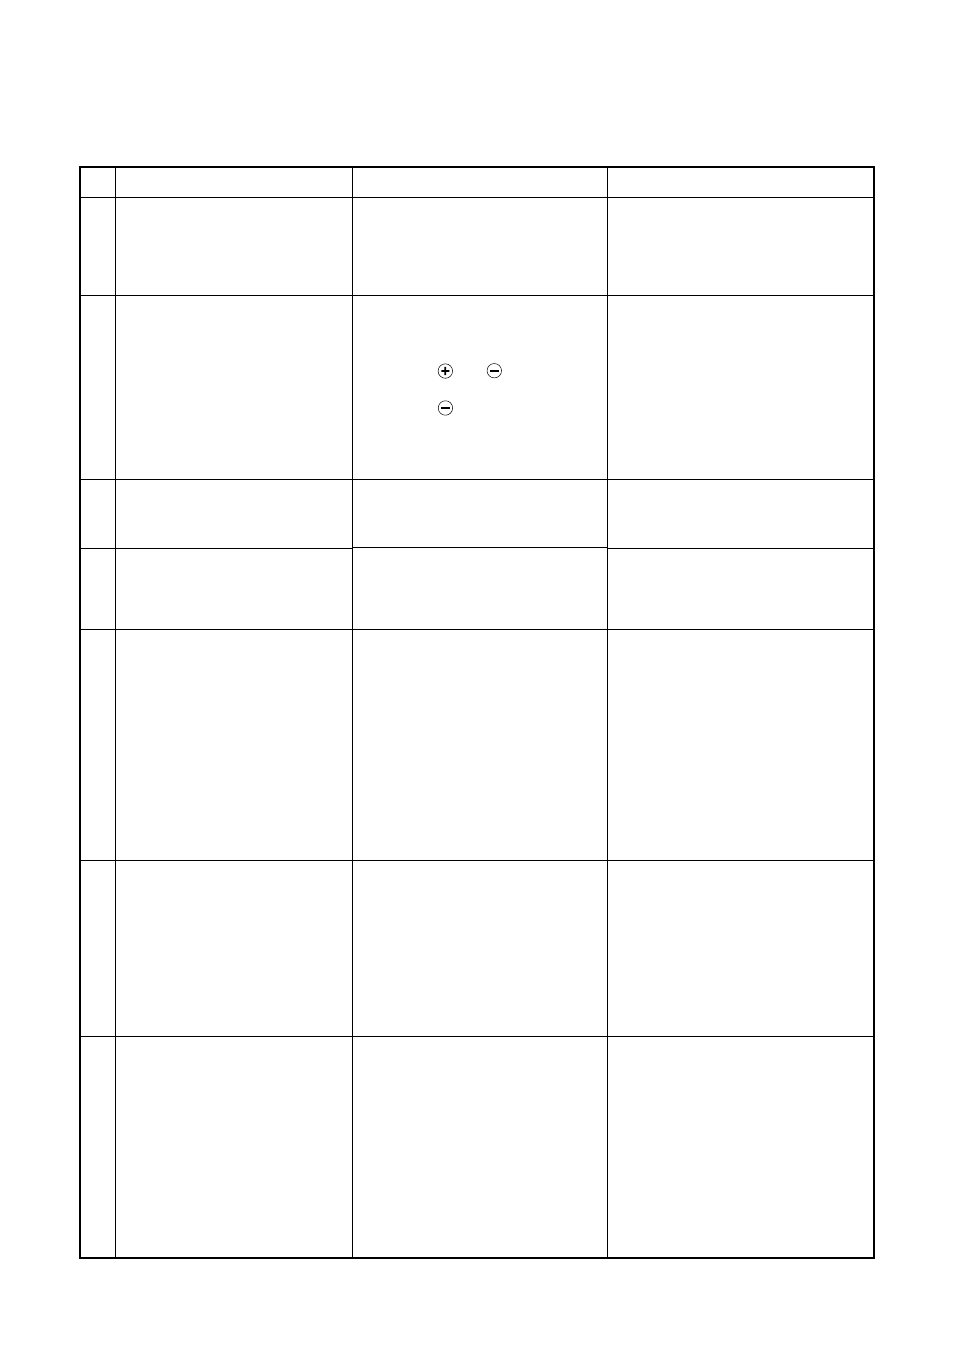
(3) Check procedures
Table 11-9-1
No.
1
2
3
4
5
6
7
Procedure
Turn off the power supply breaker
and remove the P.C. board
assembly from electronic parts
base. Remove the connecting
cables from the terminal block.
Remove the connector of the
motor and turn on the power
supply breaker. If OPERATION
indicator flashes (once per
second), it is not necessary to
check steps (1 to 3) in the right
next column.
Push [START/STOP] button once
to start the unit. (Do not set the
mode to On-Timer operation.)
Shorten the restart delay timer
and start unit.
Push [START/STOP] button once
to start the unit,
• Shorten the restart delay timer.
• Set the operation mode to
COOL.
• Set the fan speed level to
AUTO.
• Set the preset temperature
much lower than the room
temperature. (The unit (com-
pressor) operates continuously
in the above condition.)
If the above condition (No. 5) still
continues, start the unit in the
following condition.
• Set the operation mode to
HEAT.
• Set the preset temperature
much higher than room tem-
perature.
Connect the motor connector to
the motor and turn on the power
supply.
Start the unit the following
condition.
• Set the fan speed level to HIGH.
(The unit (compressor) operates
continuously in the above
condition in No. 5.)
Check points
Check whether or not the fuse (F01)
is blown.
Check power supply voltage :
1. Between No. 1 and No. 3 of CN23
(AC 220–240V)
2. Between
and
of C03
(DC 310–340V)
3. Between
of C10 and output
side of IC08 (DC 15V)
4. Between 12V and GND
5. Between 5V and GND
Check power supply voltage :
1. Between CN21 and
No. 1 of CN23 (DC 15–60V)
Check whether or not all indicators
(OPERATION, TIMER, FILTER,
PURE) are lit for 3 seconds and they
return to normal 3 seconds later.
1. Check whether or not the com-
pressor operates.
2. Check whether or not the OP-
ERATION indicator flashes.
1. Check whether or not the com-
pressor operates.
2. Check whether or not the OP-
ERATION indicator flashes.
1. Check it is impossible to detect
the voltage (DC 15V) between 3
and 4 of the motor terminals.
2. The motor does not operate or
the fan motor does not rotate with
high speed.
(But it is possible to receive the
signal from the remote controller.)
3. The motor rotates but vibrates
strongly.
Causes
Impulse voltage was applied or the
indoor fan motor short-circuited.
1. The terminal block or the crossover
cable is connected wrongly.
2. The capacitor (C01), line filter
(L01), resistor (R05), or the diode
(DB01) is defective.
3. IC01, IC08 and T01 are defective.
4. IC01, IC08 and T01 are defective.
5. IC01, IC08, IC07 and T01 are
defective.
IC03 and IC04 are defective.
The indicators are defective or the
housing assembly (CN13) is defective.
1. The temperature of the indoor heat
exchanger is extremely low.
2. The connection of the heat ex-
changer sensor is loose.
(The connector is disconnected.)
(CN01)
3. The heat exchanger sensor and the
P.C. board are defective.
(Refer to Table 11-4-1.)
4. The main P.C. board is defective.
1. The temperature of the indoor heat
exchanger is extremely high.
2. The connection of the heat ex-
changer sensor short-circuited.
(CN01)
3. The heat exchanger sensor and the
P.C. board are defective.
(Refer to Table 11-4-1.)
4. The main P.C. board is defective
1. The indoor fan motor is defective.
(Protected operation of P.C. board.)
2. The P.C. board is defective.
3. The connection of the motor
connector is loose.