Remote mode, Function button, Audio setting – Panasonic TQBJ0350 User Manual
Page 67: Remote mode function button, Projector setup menu, English, Buttons, Volume, Balance, Audio in select
PROJECTOR SETUP menu
ENGLISH -
67
Settings
REMOTE MODE
You can customize the [REMOTE IN] terminal
function.
Press ▲▼ to select [REMOTE MODE].
1 )
Press ◄► to switch [REMOTE MODE].
2 )
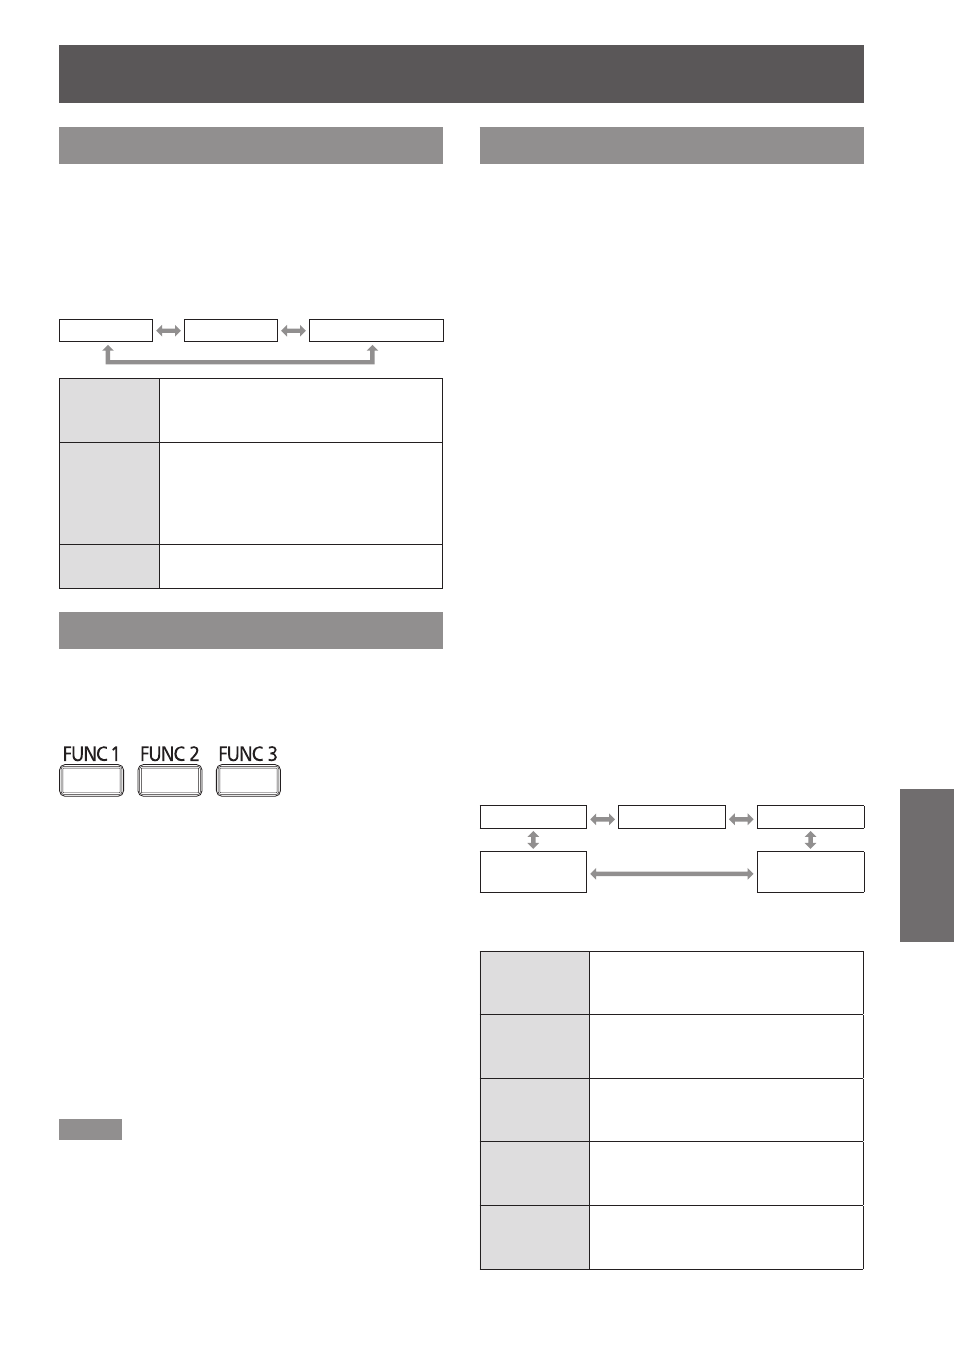
The setting will change as follows each time
z
◄► is pressed.
DEFAULT
USER
F SERIES
DEFAULT
The pin assignment of the [REMOTE
IN] terminal is used as the projector
default setting. (
Æ
page 86)
USER
This is used for changing the settings
for the REMOTE terminal.
Any settings you make for pins 2
to 8 become valid once you press
F SERIES Use the setting for F Series-compatible
REMOTE terminal.
FUNCTION BUTTON
Three function buttons (
remote control and the
projector can be assigned to any frequent operations.
They can be used as a useful shortcut button.
buttons
Press any of the
1 )
buttons on the remote control or the
Press
2 )
control or the projector to select a
menu option (Main Menu, Submenu or
Advanced Menu).
For the on-screen menu selection, see
z
“On-
screen menu". (
Æ
page 40)
Hold down any of the
3 )
to 3> buttons on the remote control
or the
projector more than 3 seconds.
Note
For details, see
z
“FUNCTION BUTTON” section of
“PROJECTOR SETUP”. (
Æ
page 67)
AUDIO SETTING
VOLUME
J
You can adjust the volume of the VARIABLE AUDIO
OUT terminal.
◄ Decrease
z
► Increase
z
BALANCE
J
You can adjust to hear the sound played equally
through both right and left from VARIABLE AUDIO
OUT, or shift the balance so more sound plays
through the left or right side.
◄ More sound plays through the left side
z
► More sound plays through the right side
z
IN STANDBY MODE
J
You can switch on/off the sound output in standby
mode.
OFF No sound in standby mode.
z
ON Output audio in standby mode.
z
J
AUDIO IN SELECT
A sound input terminal of [AUDIO IN 1], [AUDIO IN
2], [AUDIO IN 3], [HDMI AUDIO IN] and [NETWORK
AUDIO IN] can be selected.
Press ▲▼ to select a [AUDIO IN
1 )
SELECT] terminal.
Press ◄► to switch [AUDIO IN
2 )
SELECT].
The setting will change as follows each time the
z
button is pressed.
AUDIO IN 1
AUDIO IN 2
AUDIO IN 3
NETWORK
AUDIO IN
*2
HDMI AUDIO
IN
*1
An input terminal having the HDMI port only
*1 :
An input terminal having the network port only
*2 :
AUDIO IN 1
Sound is output from AUDIO IN 1
terminal when video of preset input
terminal is projected.
AUDIO IN 2
Sound is output from AUDIO IN 2
terminal when video of preset input
terminal is projected.
AUDIO IN 3
Sound is output from AUDIO IN 3
terminal when video of preset input
terminal is projected.
HDMI
AUDIO IN
Sound is output from HDMI terminal
when video of preset input terminal is
projected.
NETWORK
AUDIO IN
Sound is output from NETWORK
terminal when video of preset input
terminal is projected.