SATO CT410 User Manual
Page 48
30 PRINT #1,CHR$ (2);
Sends an
decimal “2”) to the printer instructing it
to prepare to receive a message.
50 PRINT #1,E$;"A";
Sends an “
Print Port #1 opened by statement 20
above.
60 PRINT #1, E$;"H400";E$;"V100";E$;"XL1SATO"; Sends the data “SATO” to be placed
400 dots horizontally and 100 dots
vertically on the label and printed in the
“XL” autosmoothed font.
50 PRINT #1, E$;"Q1";
Instructs the printer to print a quantity of
one label.
60 PRINT #1, E$; “Z”;
Tells the printer that the last command
has been sent. The printer can now
create and print the job.
70 PRINT #1,CHR$ (3);
Sends an
“3”) to the printer telling it that this is the
end of the message.
THE PRINT AREA
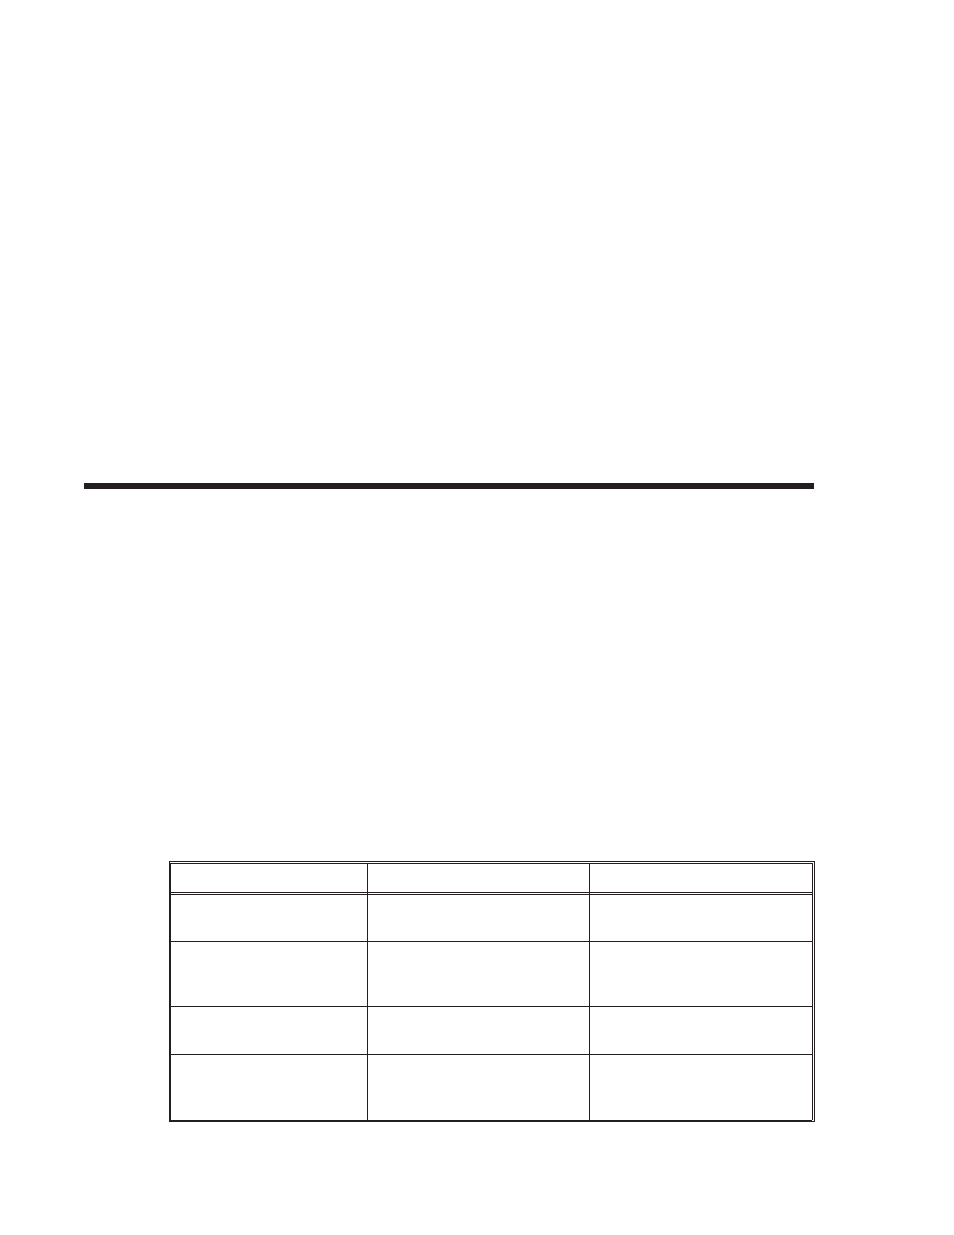
The maximum print area for the various CT Series printers is listed in Table 4.1, Print
Area. Most of your label applications will not require labels that fill the entire print
area. To make label design simplier, the media on the CT Series printers is center
justified, i.e. the label is always centered on the print head. An
command is then used to specify the length and width of the label. The CT printer
uses this information to automatically calculate an “offset” that will move the
Horizontal Reference point to coincide with the first printable dot position on the
specified label. It is extremely important to use the Media Size command. If you do
not, you will have to manually calculate the offset and send it to the printer using the
The diagram below illustrates the maximum print area and a sample 2 inch wide by 3
inch long label placed within this area. As can be seen, your label will be oriented in
the middle of the print head as viewed from the front of the printer. The normal
CT400
CT410
Resolution
203 dpi
8 dpmm
305 dpi
12 dpmm
Max Print Width
832 dots
4.1 in.
104 mm
1248 dots
4.1 in.
104 mm
Max Label Width
4.5 in.
115 mm
4.5 in.
115 mm
Print Length
3200 dots
15.7 in.
400 mm
4800 dots
15.7 in.
400 mm
Table 4.1, Print Area
Section 4. Programming Reference
Page 4-4
9001069
A
SATO CT Series Printers