Camera setup, Chapter 4.3, Chapter – AVer CMS User Manual
Page 140
133
4.3
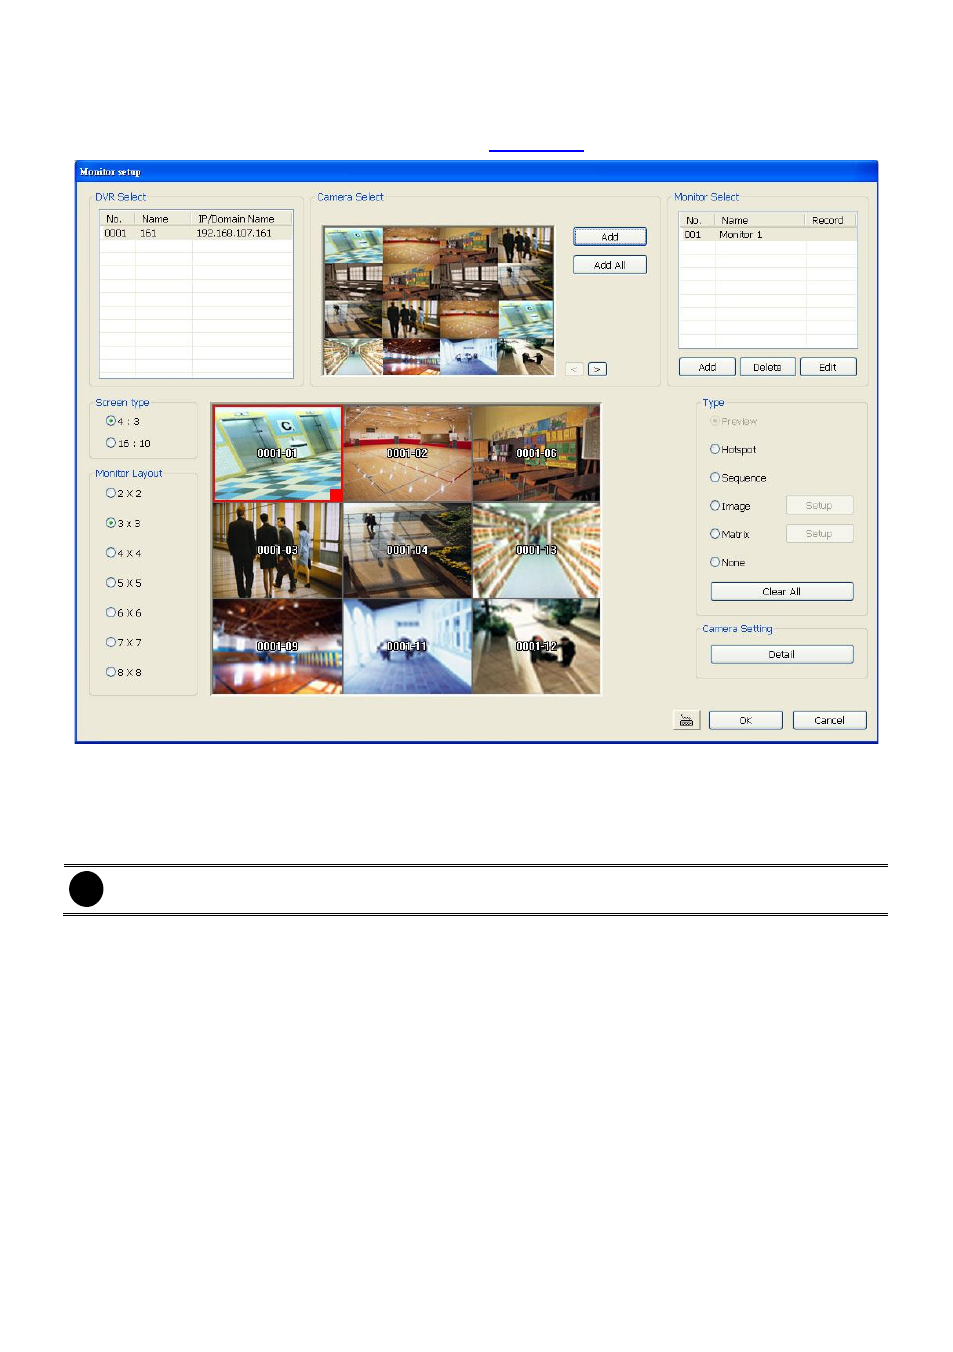
Camera Setup
Select the camera from different DVR servers in order to monitor on same screen. The selected
cameras will be played on Monitor screen (see also
1.
Click Setup from CMS main interface.
2.
In the Authorization dialog box, enter the administrator User ID and Password.
3.
Click Camera.
4.
Click Add to create a monitor set. Enter a name in Name column (12 characters only).
i
The maximum number of Monitor is 128.
5.
Mark Enable Autoscan and click Detail to select the monitor set for sequential display on the
Monitor. When monitor set is an auto scan monitor set, it is no need to select any cameras for
monitoring.
6.
Enable Add into Autoscan list will make the monitor set became one of auto scan list.
7.
To record the cameras video, mark the Record box. Otherwise, the cameras video will not be
saved on the CMS system hard disk.
8.
Mark Show Server Time to display the time on Monitor screen.
9.
If user wants to playback the recorded video of monitor set, mark Enable Playback and enter
the time (sec.) in Start Playback Before that is when start playback will start from the present
time backward the time user has setup. To display the POS information on monitor screen, mark
Show POS message. User can set the camera transmitting Frame Rate, but the real
transmitting frame rate depends on camera setting.
10. Click OK to save the setting.