Clear jams – HP CM3530 User Manual
Page 222
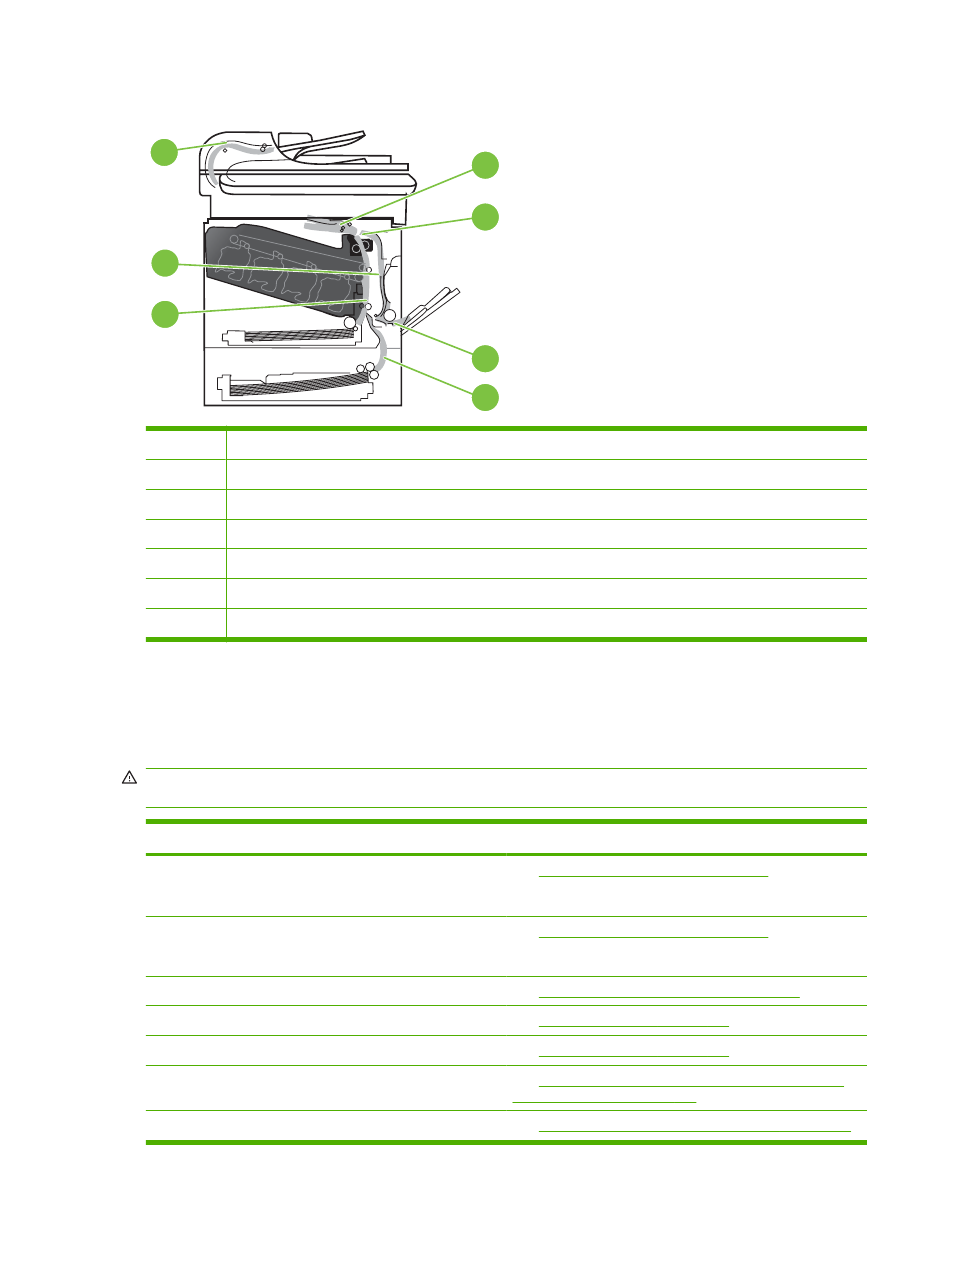
Figure 14-1
Jam locations
7
3
1
2
4
5
6
1
Output-bin area
2
Fuser area
3
Tray 1 area
4
Optional 500-sheet paper and heavy media tray (Tray 3)
5
Tray 2 pickup area
6
Duplexing area
7
Document feeder area
Clear jams
When a jam occurs, a message appears on the control-panel display that describes the location of the
jam.
WARNING!
To avoid electrical shock, remove any necklaces, bracelets, or other metal items before
reaching into the inside of the product.
Type of jam
Procedure
13.XX.YY - Jam inside right door
13.XX.YY - Jams inside right door
See
Clear jams in the right door on page 209
13.XX.YY - Fuser area jam
13.XX.YY - Fuser wrap jam
See
Clear jams in the right door on page 209
.
13.XX.YY - Jam below control panel
See
Clear jams in the output bin area on page 213
13.XX.YY - Jam in tray 1
See
Clear jams in Tray 1 on page 214
13.XX.YY - Jam in tray 2
See
Clear jams in Tray 2 on page 216
13.XX.YY - Jam in tray 3
See
Clear jams in the optional 500-sheet paper and heavy
media tray (Tray 3) on page 217
13.XX.YY - Jam inside lower-right door
See
Clear jams in the lower right door (Tray 3) on page 218
208 Chapter 14 Solve problems
ENWW