Attach the rear extension bracket, Figure 6 attaching the rear extension bracket, Attach the rails to the network storage router – HP N1200-320 User Manual
Page 16: Figure 7 attaching the rails to the router
16
Installation, cabling, and setup
Attach the rear extension bracket
1.
Loosen the screw on the rear extension bracket of the outer rail assembly.
2.
While holding the outer rail assembly level, extend the rear extension bracket to the inside of the rear
of the rack.
3.
Attach the rear extension bracket to the rear of the rack using two of the 10-32 x 6 Phillips screws.
4.
With the outer rail assembly in place, tighten the screw that connects the rear extension bracket to the
outer rail.
5.
Repeat this process to attach the remaining outer rail assembly to the other side of the rack.
Figure 6
Attaching the rear extension bracket
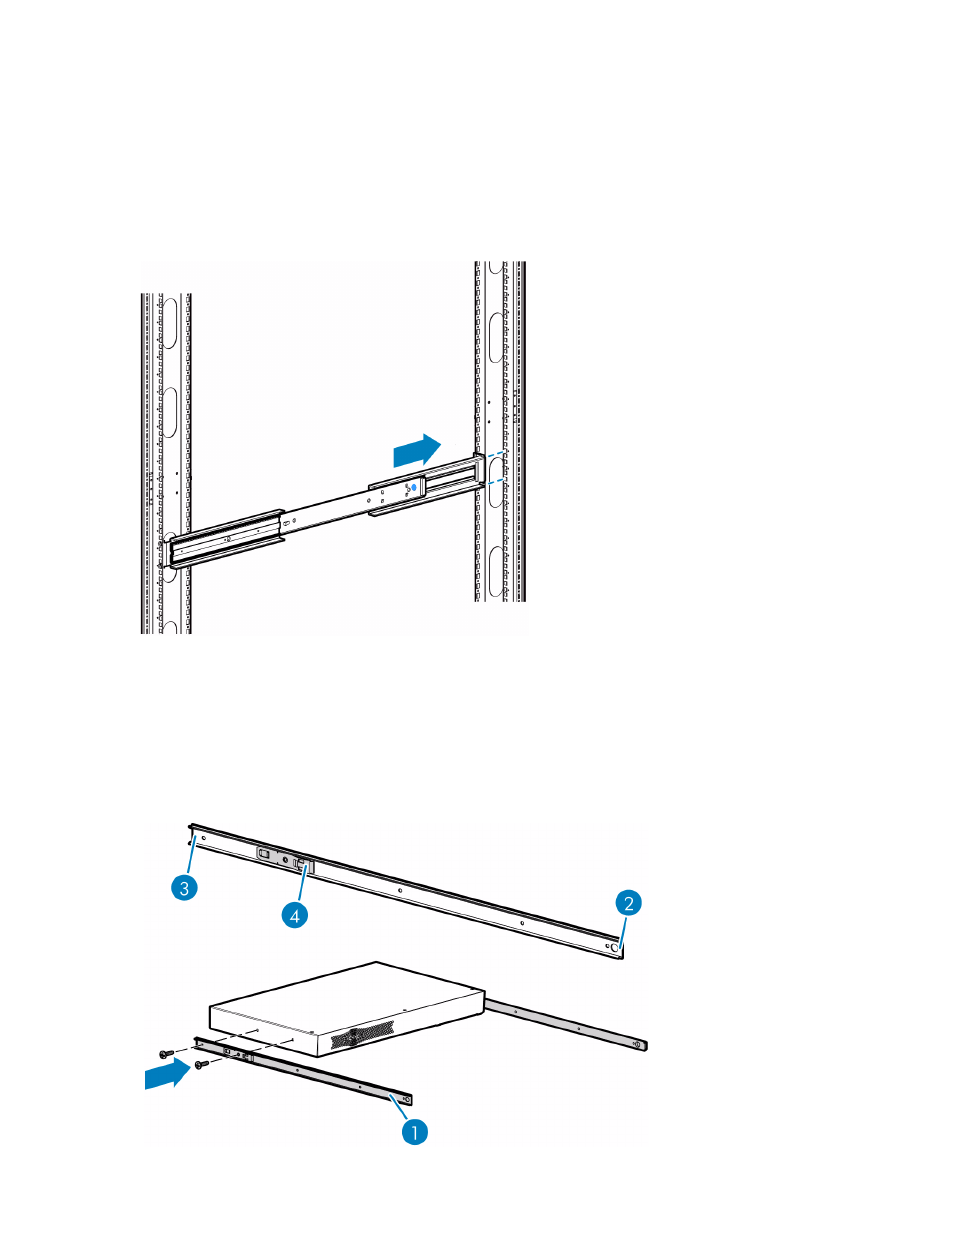
Attach the rails to the network storage router
1.
With the spring latch facing away from the router (4 in
) and the circular hole facing the front
of the router (2 in
), align the first screw hole on the rail (3 in
) with the center screw
hole on the router. Using this alignment, two screw holes will be aligned and the rail will extend out
from the front of the router approximately eight inches (1 in
).
2.
Secure the rail to the router using two 6-32x 312 Phillips screws.
3.
Repeat this process to attach the inner rail to the other side of the router.
Figure 7
Attaching the rails to the router