Cleaning the internal projector filter – High End Systems DL.2 User Manual
Page 236
CHAPTER 17
Maintenance and Troubleshooting
214
DL.2 Digital Light User Manual
9. If the HEPA filter is discolored with particulates, replace it with the part listed in Related
Products and Optional Accessories on page 4.
Reassemble the Fixture
Place HEPA
filter with gasket
against plenum
10. Reinstall the HEPA Filter with the rubber gasket
down.
11. Reattach the filter bracket with the two philips pan
screws.
12. Replace the prefilter over the bracket on velcro
tabs.
13. Replace the top cover, fastening it with the two
quarter-turn screws.
14. Carefully replace the rear bezel, making sure to
position (but do not force) the gasket against the
lamp cover located on the back of the projector.
and Relatch the rear bezel assembly.
Gasket
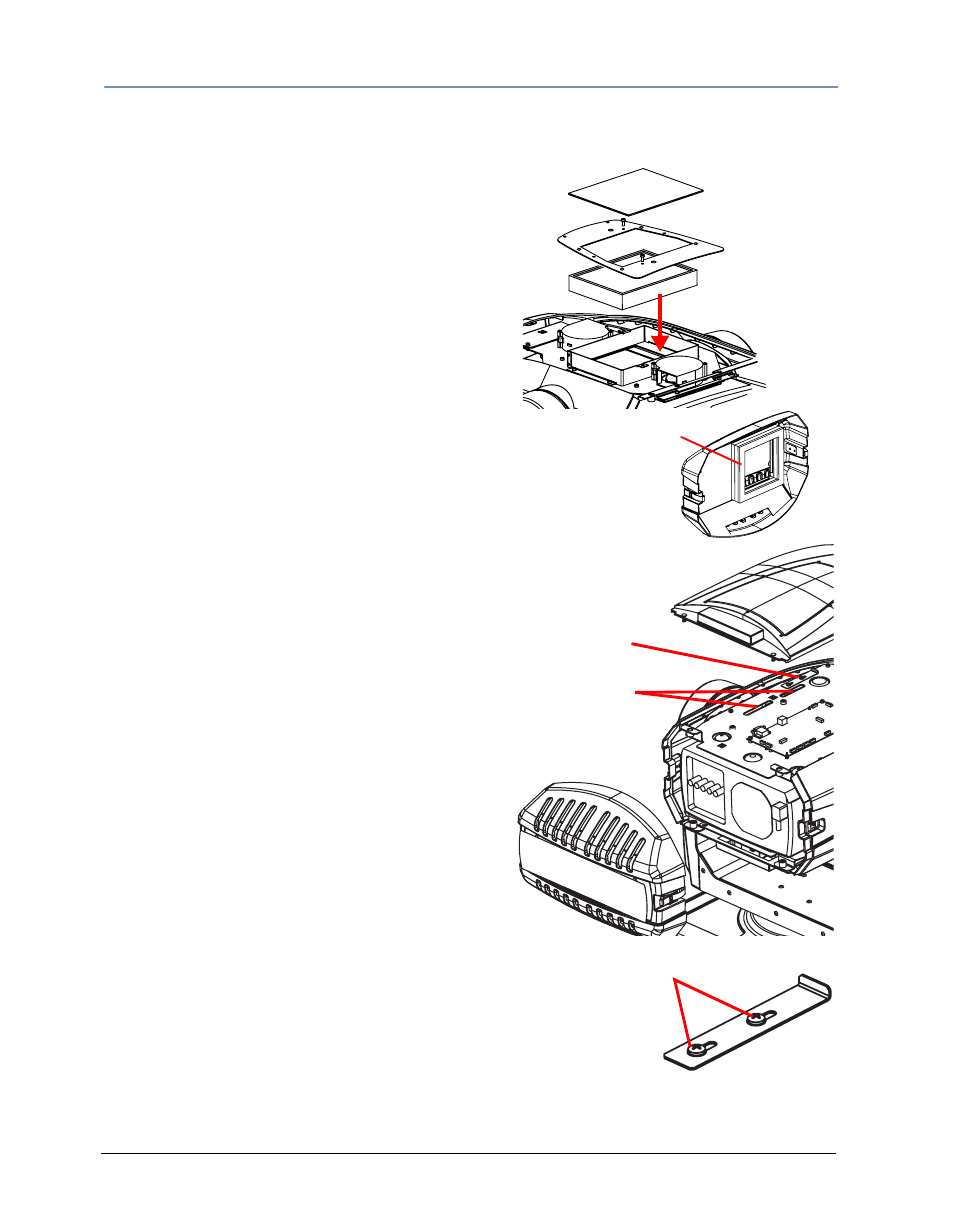
Cleaning the Internal Projector Filter
Internal projector air filters prevent dust from
accumulating on surface of Projection Lens and
Projection Mirror. If the projector Air Filter becomes
clogged with dust particles, it will reduce the cooling
fans' effectiveness and may result in an internal heat
build up that can shorten projector life.
Projector
Filters
Filter
Removal
Tool
Clean the projector air filter using the following steps:
1. Disconnect the fixture from power.
2. Rotate and lock the fixture head in the or 90° tilt
position.
3. Unlatch and remove the rear bezel.
4. Loosen two quarter-turn screws to remove the
bottom cover and locate the filter removal tool
mounted on the chassis.
5. Loosen the 2 phillips head screws to remove the tool and use it
Loosen screws to
remove tool
to
grasp and lift the two air filters from the internal projector.
6. Clean air filter with compresses air, a brush or wash out dust and
particles with mild soap and water.
7. If the filter damaged, replace it only with the part listed in Related
Products and Optional Accessories on page 4.
8. Replace completely dry filters in slot. The filters are keyed for positioning. Make sure that
both filters are fully inserted.