HP CM6049F MFP User Manual
Page 213
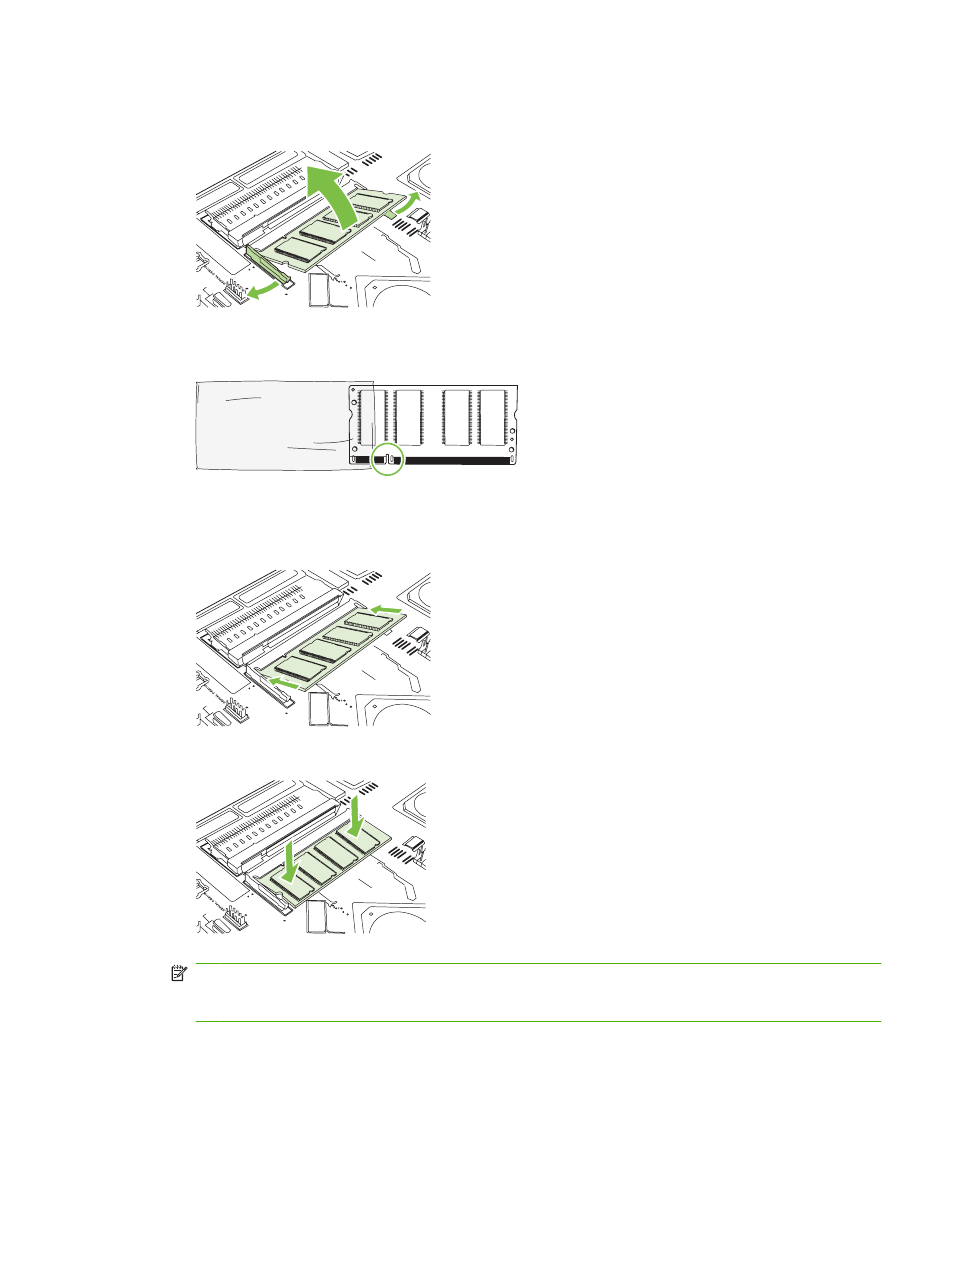
6.
To replace a DIMM that is currently installed, spread the latches apart on each side of the DIMM
slot, lift the DIMM up at an angle, and pull it out.
XO
XO
XO
XO
XO
XO
XOXOXOXOXOXO
XOXO
XOXO
XO
XOXO
XOXO
XO
XOXO
XOXO
XO
XOXO
XOXO
XO
XOXOXOXOXOXO
XOXO
XO
XO
XO
XOXOXO
XOXOXO
XOXOXO
XOXOXO
XOXOXO
XOXOXO
XOXOXO
XOXOXO
XOXOXO
XO
XO
XO
XO
XO
XO
XOXOXOXO
XO
XO
XO
XO
XO
XO
XOXOXO
7.
Remove the new DIMM from the antistatic package. Locate the alignment notch on the bottom
edge of the DIMM.
8.
Holding the DIMM by the edges, align the notch on the DIMM with the bar in the DIMM slot at an
angle and firmly press the DIMM into the slot until it is fully seated. When installed correctly, the
metal contacts are not visible.
XO
XO
XO
XO
XO
XO
XOXOXOXOXOXO
XOXO
XOXO
XO
XOXO
XOXO
XO
XOXO
XOXO
XO
XOXO
XOXO
XO
XOXOXOXOXOXO
XOXO
XO
XO
XO
XOXOXO
XOXOXO
XOXOXO
XOXOXO
XOXOXO
XOXOXO
XOXOXO
XOXOXO
XOXOXO
XO
XO
XO
XO
XO
XO
XOXOXOXO
XO
XO
XO
XO
XO
XO
XOXOXO
9.
Push down on the DIMM until both latches engage the DIMM.
XO
XO
XO
XO
XO
XO
XOXOXOXOXOXO
XOXOXOXOXOXO
XOXO
XO
XO
XO
XOXOXO
XOXOXO
XOXOXO
XOXOXO
XOXOXO
XOXOXO
XOXOXO
XOXOXO
XOXOXO
XO
XO
XO
XO
XO
XO
XOXOXOXO
XO
XO
XO
XO
XO
XO
XOXOXO
XIO
XIO
XIXO
OX
IX
O
XIO
XIO
XIO
XIO
XIXO
OX
IX
O
XIO
XIO
XIO
XIO
XIXO
OX
IX
O
XIO
XIO
XIO
XIO
XIXO
OX
IX
O
XIO
XIO
NOTE:
If you have difficulty inserting the DIMM, make sure the notch on the bottom of the DIMM
is aligned with the bar in the slot. If the DIMM still does not go in, make sure you are using the
correct type of DIMM.
ENWW
Replace supplies 197