Installation to a high ceiling, Installation procedure – Canon REALiS 4K501ST Pro AV 5000-Lumen LCoS Projector User Manual
Page 44
Installation Procedure
44
■
Installation to a High Ceiling
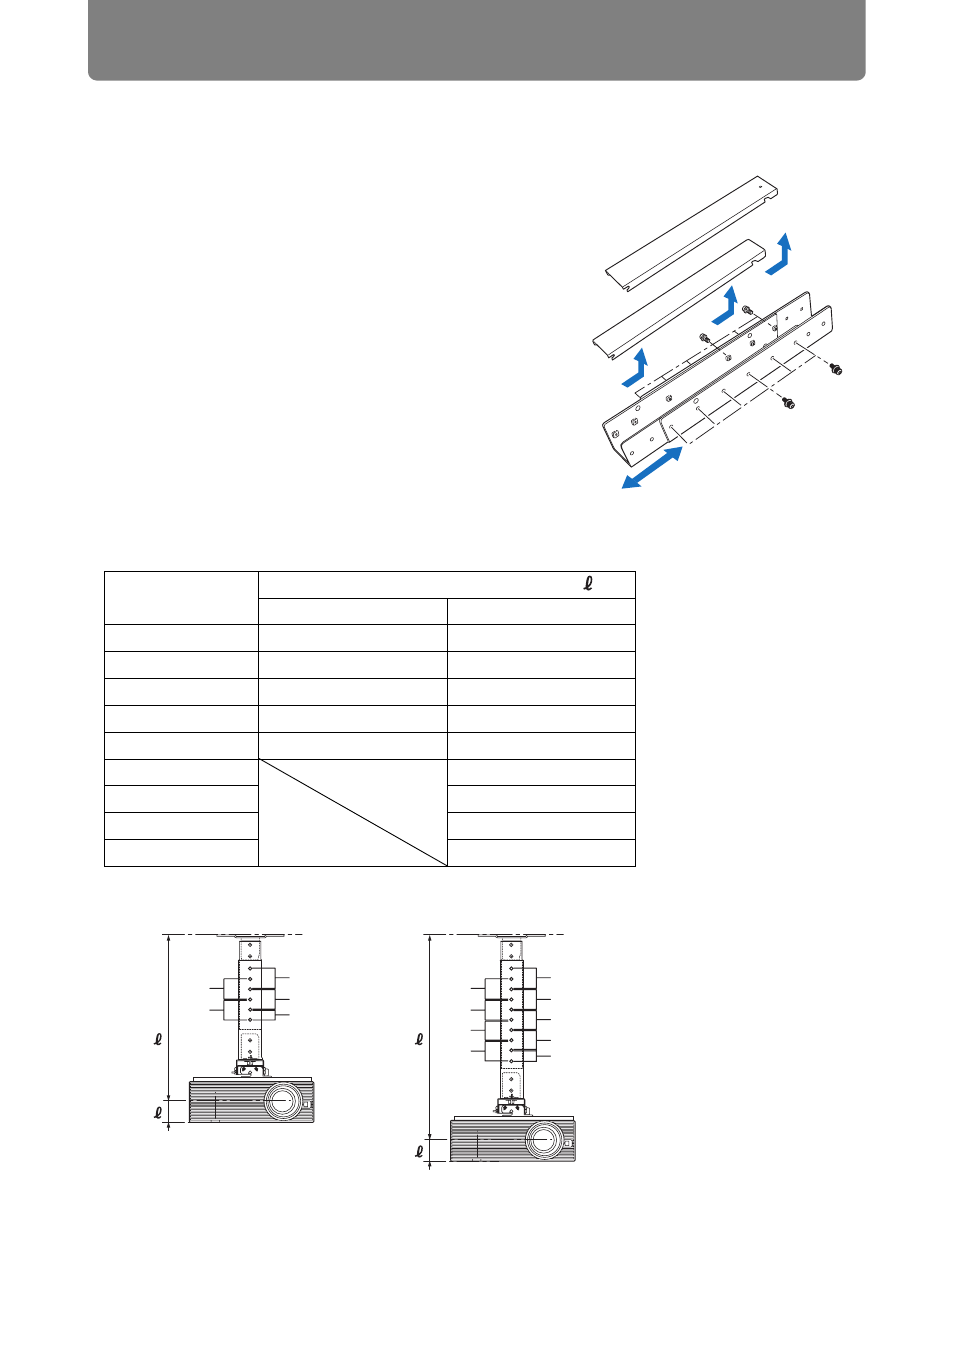
Use optional extension pipe RS-CL08 or RS-CL09 for high ceiling.
Preparation: Adjust the pipe length
according to the ceiling height
1 Remove the covers of outer and inner pipes by
slightly sliding them and lift up as shown.
2 Adjust the pipe to the extended length for
projector attachment, referring to the following
table, and then secure it using four supplied
M5 screws, as shown.
•
When attaching screws in step 2, insert the
screws and leave an unused screw hole
between them. When the extension pipe is
stretched to its maximum length, insert the
screws in two adjacent screw holes.
Extended length when extension pipe is attached (when lens shift is 0%)
Mounting hole
position
Distance from ceiling to lens axis ( )
RS-CL08
RS-CL09
a
57.9 cm (22.8")
77.9 cm (30.7")
b
62.9 cm (24.8")
82.9 cm (32.6")
c
67.9 cm (26.7")
87.9 cm (34.6")
d
72.9 cm (28.7")
92.9 cm (36.6")
e
77.9 cm (30.7")
97.9 cm (38.5")
f
102.9 cm (40.5")
g
107.9 cm (42.5")
h
112.9 cm (44.4")
i
117.9 cm (46.4")
1
2
a
c
e
g
i
b
d
f
h
'
a
c
e
b
d
'
RS-CL08
RS-CL09