Setting up the network, Displaying the network configuration screen – Canon REALiS 4K501ST Pro AV 5000-Lumen LCoS Projector User Manual
Page 143
143
Using the Projector on a Network
Ad
va
nc
ed
G
uid
e
Using
the
Pr
oje
ctor
on a Networ
k
Setting Up the Network
■
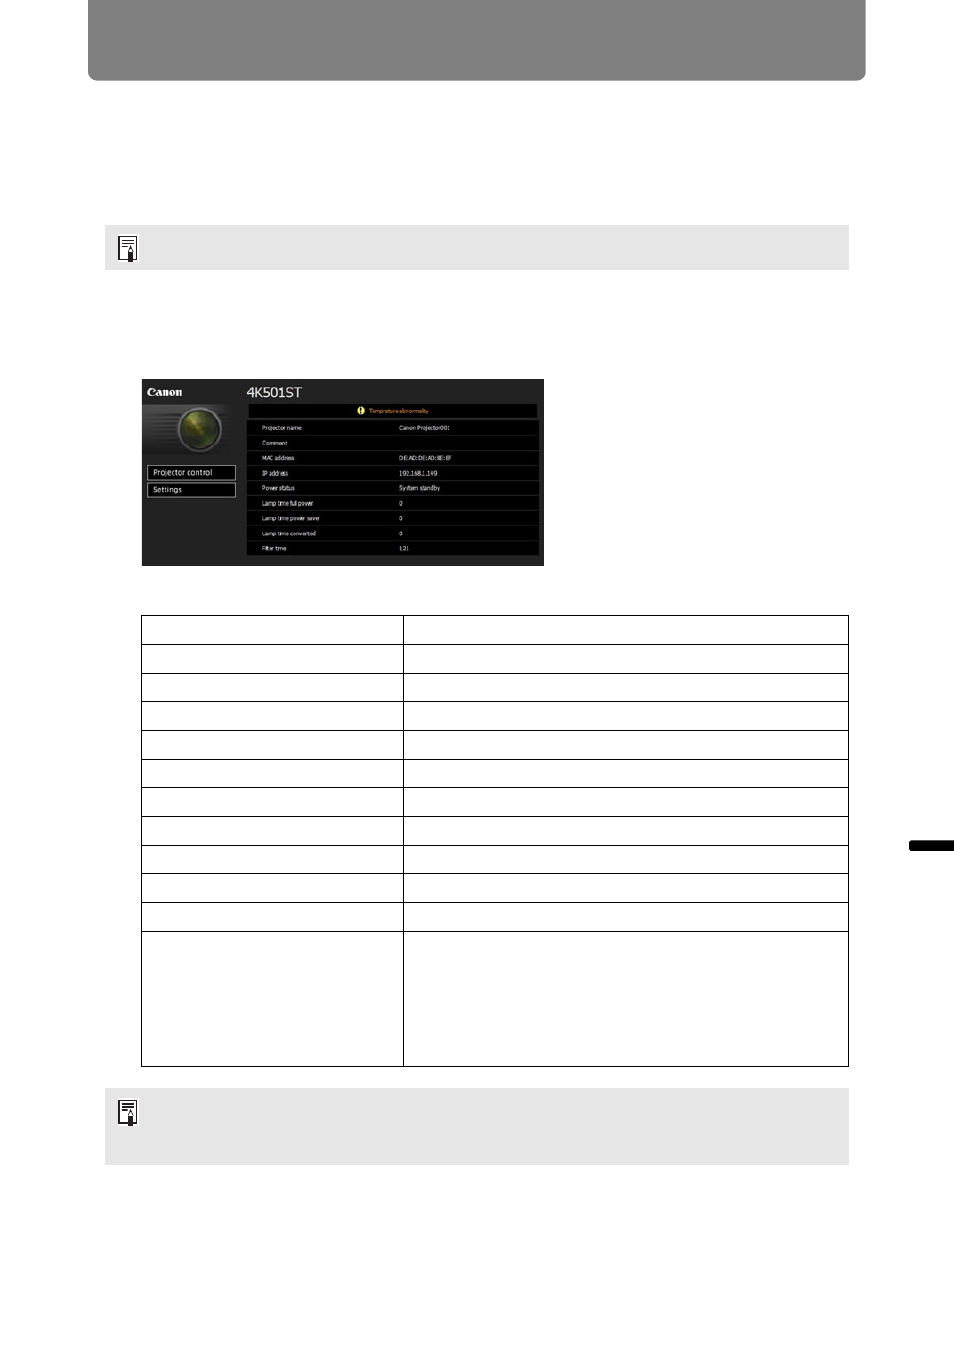
Displaying the Network Configuration Screen
1
Turn on the computer and projector.
2
Launch a web browser, enter “http://(projector IP address)” in the
address bar, and press the Enter key.
The projector web screen appears.
The following information is displayed.
3
Click [Settings] on the web screen.
The password input window appears.
Network functions are not available for the first 40 seconds after projector startup.
Projector control
Displays the projector control screen.
Settings
Shows the settings screen.
Projector name
The name of the projector on the network
Comment
Relevant notes, such as where the projector is installed
MAC address
The MAC address of the projector
IP address
The IP address of the projector
Power status
The power status of the projector
Lamp time full power
Lamp operating time in [Full power] lamp mode
Lamp time power saver
Lamp operating time in [Power saver] lamp mode
Lamp time converted
Lamp operating time (converted value)
Filter time
Air filter operating time
Alert
Error message (if an error has occurred)
Temperature abnormality
Faulty lamp
Faulty cooling fan
Faulty power supply
Faulty air filter unit
The factory default IP address is “192.168.254.254”. If DHCP settings are used, ask the
network administrator for the projector IP address. It is possible to check the IP address
from the projector menu. (