Changing the structure of a song, Recording the vocals, Mixing down – Roland VERSELAB MV1 Music Production Workstation User Manual
Page 12
12
Listening to and Rearranging the Demo Songs
Changing the Structure of a Song
Rearranging sections
This shows you to rearrange the sections of the song.
In this example, we show you how to change the placement of the
sixth section in the song.
1 .
Press the [SONG] button to set the workflow to “SONG.”
2 .
Press the [SECTION SELECT] button to switch the pads to
Section Select mode.
3 .
Press the [REC] button to make it light.
4 .
Press the STEP SEQUENCER [6] button to specify where to
place the section.
The STEP SEQUENCER [6] button blinks.
5 .
Press pads [1]–[8] to select the sections.
The song is now rearranged, with the selected section placed in
sixth position.
6 .
Press the [REC] button to make it go dark.
Changing the length of a section
Here we’ll change the length (the number of measures) of a section.
This example shows you how to change the number of measures for
section 1.
1 .
Press the [SECTION] button to set the workflow to “Section.”
2 .
Press the [SECTION SELECT] button to switch the pads to
Section Select mode.
3 .
Press pad [1] to select section 1.
STEP SEQUENCER buttons [1]–[8] light up to show section 1’s
length (in measures).
Each button corresponds to one measure (16 steps).
4 .
Press the STEP SEQUENCER [4] button.
The length of section 1 changes from eight measures to four.
Recording the Vocals
Now, let’s record the vocals for our song using the built-in mic while
listening to the song.
1 .
Press the [EDIT] button, and then press the MIC [ON] button.
The MIC SETTING screen appears.
2 .
Use the [VALUE] dial to select “Mic In,” and set it to “BUILT-IN”
(the built-in mic).
3 .
Press the [SONG] button to set the workflow to “SONG.”
4 .
Press the [VOCAL] button to select the VOCAL track.
5 .
Press one of the pads [1]–[16] that are unlit (the unrecorded
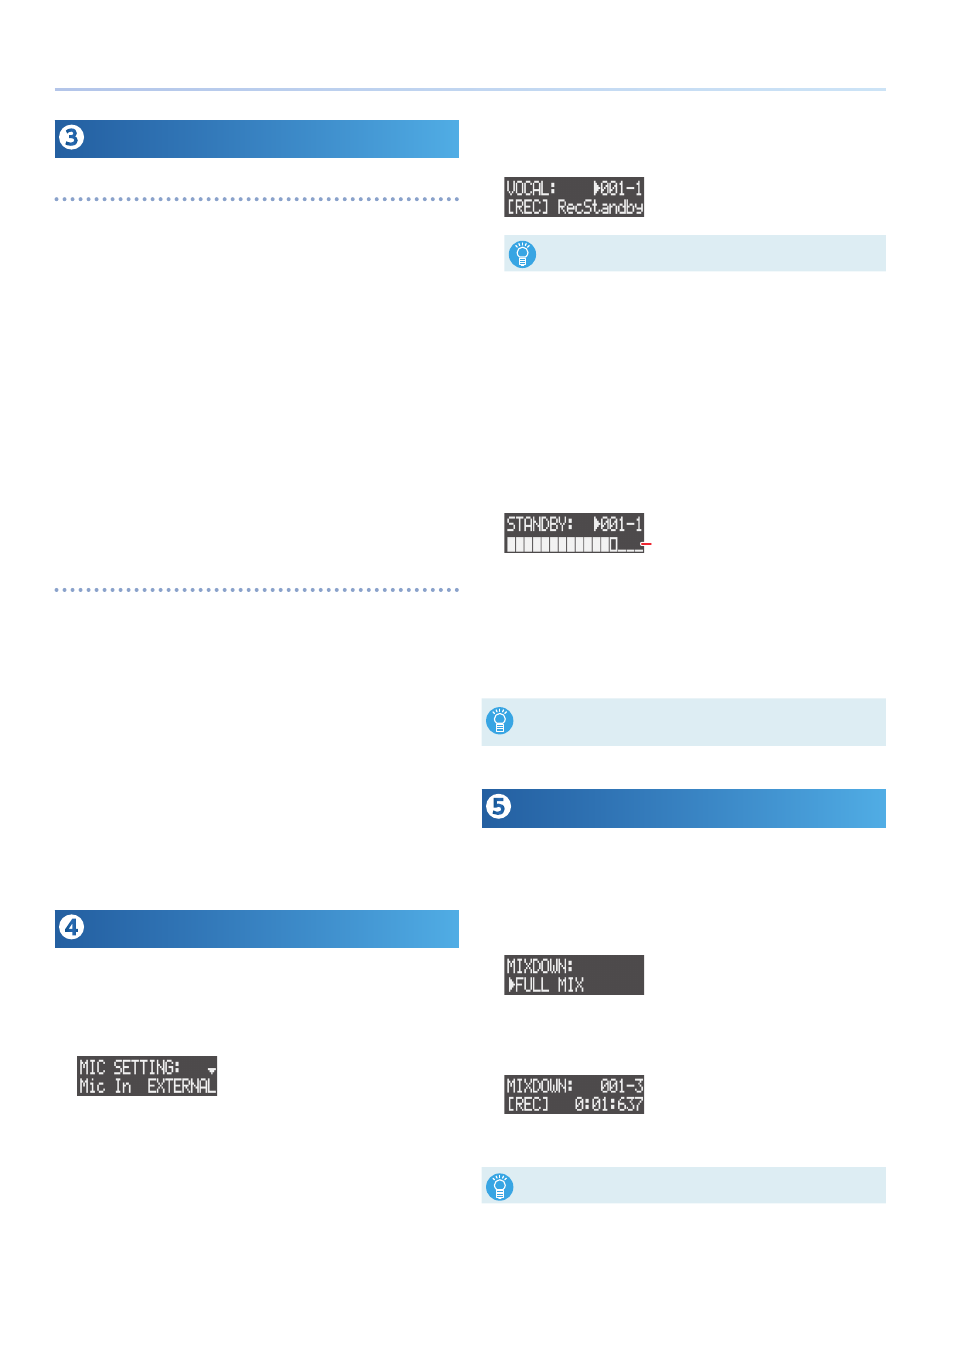
vocal takes) to select where to record your vocal.
“[REC] RecStandby” appears on the screen.
The vocal you recorded is assigned as a vocal take to an individual pad.
6 .
Press one of the STEP SEQUENCER [1]–[10] buttons to set the
timing at which you want to start recording.
The timing for starting the recording (measure-beat) is shown at the top
right-hand of the screen.
7 .
Press the [REC] button to enter record standby.
8 .
Press the MIC [ON] button to make it light.
Audio can now be input through the built-in mic.
9 .
Use the [GAIN] knob to adjust the recording volume.
Make some sound to input audio through the mic, and adjust the
volume as high as possible without letting the level meter reach
full scale.
Level meter
10 .
Press the [
A
] (START/STOP) button to begin recording.
11 .
Press the [
A
] (START/STOP) button to stop recording.
When you play back the song, you can also hear the vocal takes you
recorded that go along with the song.
12 .
Press the MIC [ON] button to make it go dark.
5
To delete a vocal take, hold down the [CLEAR] button and press the pad
[1]–[16] (p. 39) corresponding to the vocal take.
5
You can use the vocal processor to add effects to the vocal audio (p. 40).
Mixing Down
Now, let’s export your song and the vocals you recorded to an SD card
and create a WAV file.
* Mixing a song down takes the same amount of time as playing it back.
1 .
Press the [MIXDOWN] button.
The MIXDOWN screen appears.
2 .
Use the [VALUE] dial to select “FULL MIX” (SONG + vocal
takes) and then press the [VALUE] dial.
Mixdown begins and playback starts.
The mixdown ends automatically when the song finishes playing
back.
After mixdown ends, select “PREVIEW” on the MIXDOWN screen and press
the [VALUE] dial to preview the WAV file that was created.
3 .
Press the [EXIT] button to close the MIXDOWN screen.