4 resetting the inverter, 1 performing an inverter reset (i.e., soft reset), 2 performing a power reset (i.e., power reset) – Magnum Energy MS-G Series User Manual
Page 61
©
2015 Sensata Technologies
Page 53
Maintenance and Troubleshooting
4.4 Resetting the Inverter
Under some fault conditions (e.g., an internal fault), the inverter will need to be reset. Prior to
performing any reset, ensure all AC power (utility, generator, shorepower) is removed from the
inverter’s input.
CAUTION: If AC is connected while performing an inverter reset, damage may occur.
4.4.1
Performing an Inverter Reset (i.e., soft reset)
To perform an inverter reset (also known as a “soft reset”):
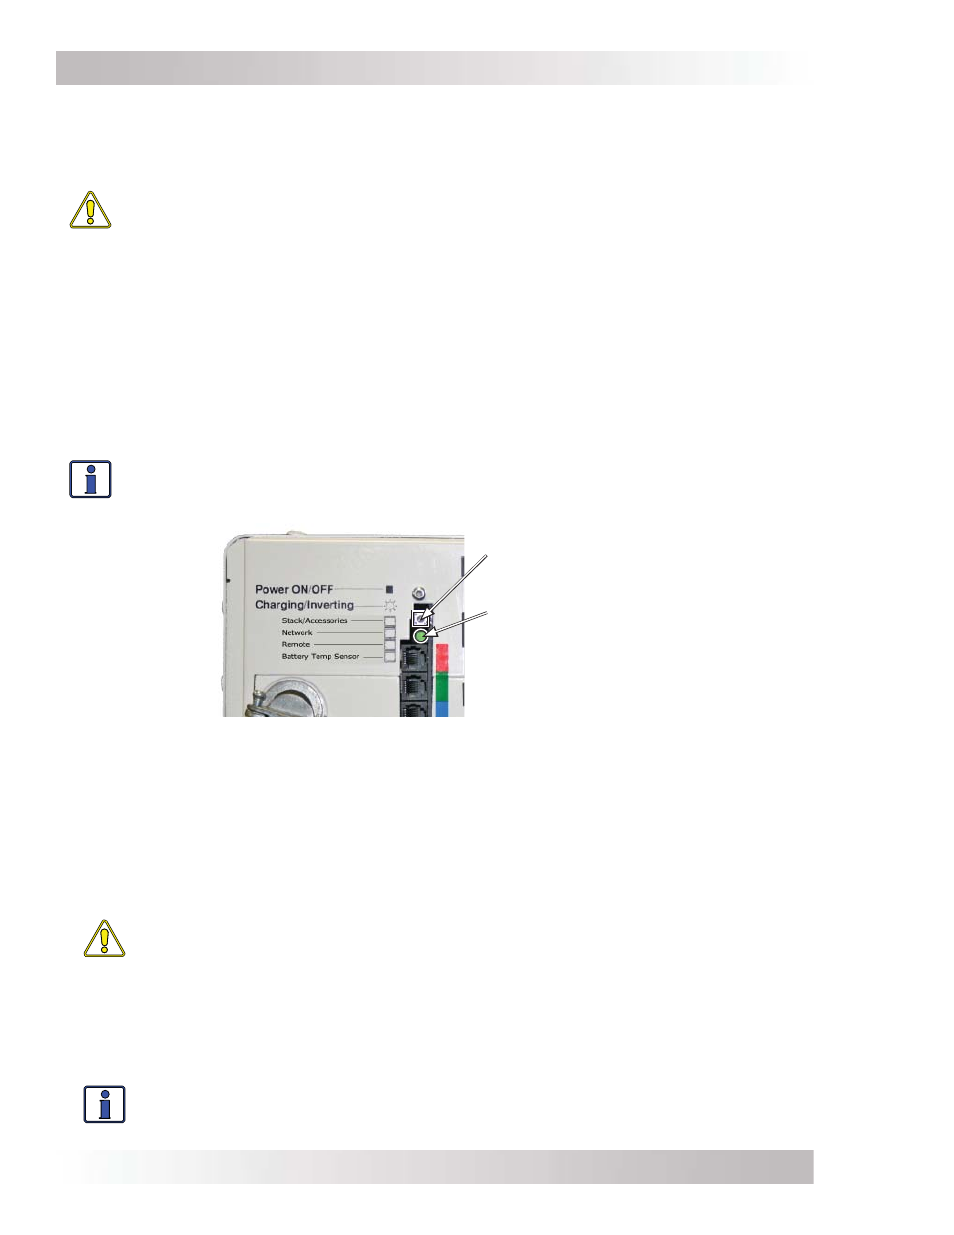
1. Press and hold the Power ON/OFF pushbutton (see Figure 4-1) for approximately fi fteen (15)
seconds until the Charging/Inverting Status LED comes on and fl ashes rapidly.
2. Once the rapid fl ashing has begun, release the Power ON/OFF pushbutton. The Status LED will
go off after the pushbutton is released.
3. After the inverter reset is completed, press the ON/OFF pushbutton to turn the inverter ON.
If the inverter reset fails, you will need to perform a power reset using the procedure below in
Section 4.4.2. In either case, if an internal fault does not clear, the inverter will require repair at
an Authorized Service Center (ASC).
Info: The Power ON/OFF pushbutton is a small momentary type switch which operates
by lightly pressing and releasing. Be careful not to apply too much force when pushing
or the switch might break.
1. Press and hold the Power
ON/OFF pushbutton.
2. Watch the Charging/Inverting
Status LED, after approximately
15 seconds it should come on
and fl ash rapidly to indicate the
inverter has reset. The Status LED
will go off after the pushbutton is
released.
Figure 4-1, Performing an Inverter Reset
4.4.2
Performing a Power Reset (i.e., power reset)
To perform a power reset (also known as a “hard reset”):
1. Open the inverter’s positive DC disconnect (or disconnect the positive battery cable to the
inverter).
Note: If parallel stacked with multiple inverters, open all the inverters’ DC disconnects at the
same time.
CAUTION: If removing all battery power (positive and negative) to the inverter, do
not remove the DC negative connections to the inverter or any accessory until after
all positive battery connections have been disconnected. This will prevent damage to
the inverter or to any network connected accessory.
2. Ensure the inverter and the remote are disconnected from all AC and DC power (the remote
display will be blank).
3. After the inverter has been disconnected from all power for 30 seconds, reconnect the inverter
DC disconnects (or reconnect the positive battery cable) and resume operation.
Info: If DC disconnects are not used, there may be a momentary spark when the
positive battery cable is connected to the inverter’s terminal. This is normal and
indicates that the inverter’s internal capacitors are being charged.