Mounting the antenna to a mast, Mounting the antenna to a mast -25 – Enterasys Networks ROAMABOUT RBT-1602 User Manual
Page 57
Mounting the Antenna
RoamAbout Antenna Site Preparation and Installation Guide 3-25
To attach the antenna bracket to the wall, perform the following steps:
1.
Place the antenna bracket against the wall where you want to attach antenna.
2.
Secure the antenna bracket to the wall with screws (user provided) in the four screw holes in
the pivot bracket.
3.
Rotate the pivot of the bracket end attached to the wall to adjust the antenna position. Lock
bracket end in desired position by tightening nuts on either side of bracket end with
wrenches.
Mounting the Antenna to a Mast
Mounting the antenna to a mast requires the following major steps:
•
Attaching the mast brackets to the antenna bracket
•
Attaching the antenna bracket to the antenna
•
Mounting the antenna to the mast
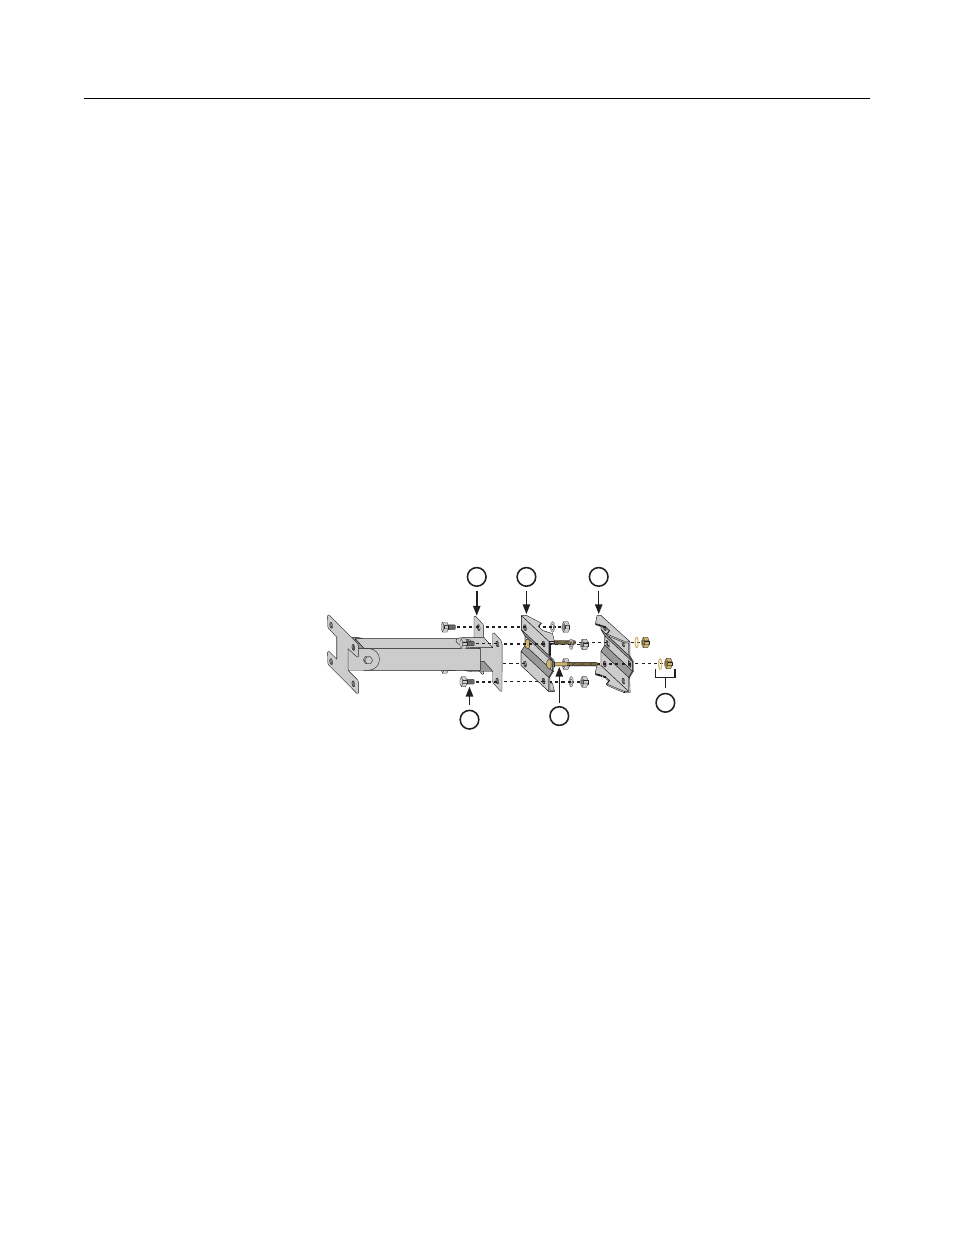
Attaching the Mast Brackets to the Antenna Bracket
illustrates how to attach mast brackets to the 5.8 GHz panel antenna bracket.
lists the components for this procedure.
Figure 3-13 RoamAbout 5.8 GHz Panel Antenna Mast Mounting Configuration
Prior to attaching the mast bracket to the antenna bracket, you must first determine which end of
the antenna bracket you will attach to the antenna.
Determine which end of the antenna bracket to attach to the antenna as follows:
1.
Place the antenna so that the side with screw holes is facing up.
2.
Use the polarization label on the upper left corner of the antenna to orient the antenna with
the correct polarization.
3.
Situate the antenna bracket against the antenna so that the end against the antenna pivots in
the same plane as the desired polarization. For example, if using vertical polarization, this
antenna bracket end should pivot up and down. If using horizontal polarization, this antenna
bracket end should pivot from side‐to‐side.
4.
When ready, attach the mast bracket to the end of the antenna bracket opposite the end that
you determined you will attach to the antenna by following the steps in the next procedure.
1
3
4
2
5
6