Opening the image editor, Zooming in/out and repositioning the image – Grass Valley Xplorer Vertigo Suite v.4.8 User Manual
Page 71
Xplorer User Manual
5-5
Previewing assets in Xplorer
The following sections provide functional descriptions and instructions for how to use the
Image Editor to edit image asset:
•
•
Zooming in/out and repositioning the image
•
•
•
Adjusting the sharpness of an image
•
Using the Image Modification buttons to flip an image
Opening the Image Editor
To open the Image Editor from within Xplorer:
1.
Select the XMS or a connected device from the Device Viewer.
2.
Navigate through the Asset Browser until the desired asset is displayed in the Asset Gallery.
3.
Right-click on the image asset in the Asset Gallery and select the M
ODIFY
I
MAGE
command.
The Image Editor window immediately opens and displays the image.
Zooming in/out and repositioning the image
When editing an image, it is often necessary to view the image, or a portion of the image,
in greater detail. It is for this reason that the Image Editor allows you to magnify, or zoom in
on the image, as well as zoom out to get an expanded or distanced view of the image.
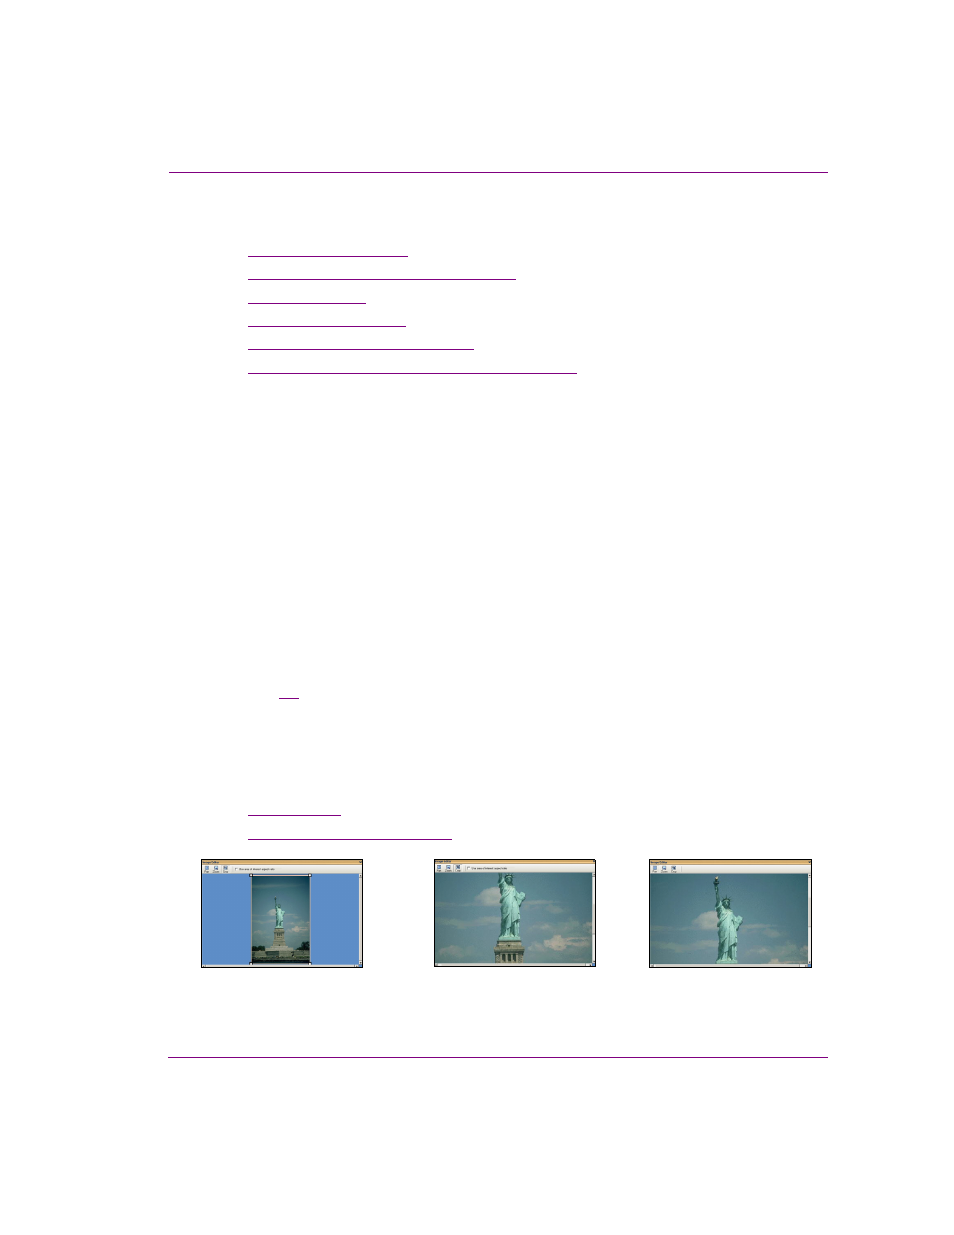
As figure
5-5
demonstrates, when an image is opened in the Image Editor it is placed
directly in the center of Editor’s canvas. However, when you zoom in on the image, you may
not see certain areas of the image. To reposition the image within the display, while
maintaining the zoom scale, you can pan across the image to the area that is otherwise
outside of the window’s display.
Instructions for zooming in/out and panning across the image are provided below.
•
Zooming in/out
•
Reposition the image by panning
Figure 5-5. Zooming in and panning across the canvas
Original image displayed (centered)
Zoom in on the Image, but the upper
portion is now is not visible
Panned up to view the whole
statue, while still zoomed in.