Grass Valley Xplorer Vertigo Suite v.4.8 User Manual
Page 54
4-14
Xplorer User Manual
Moving assets to/from the Xmedia Server and other devices
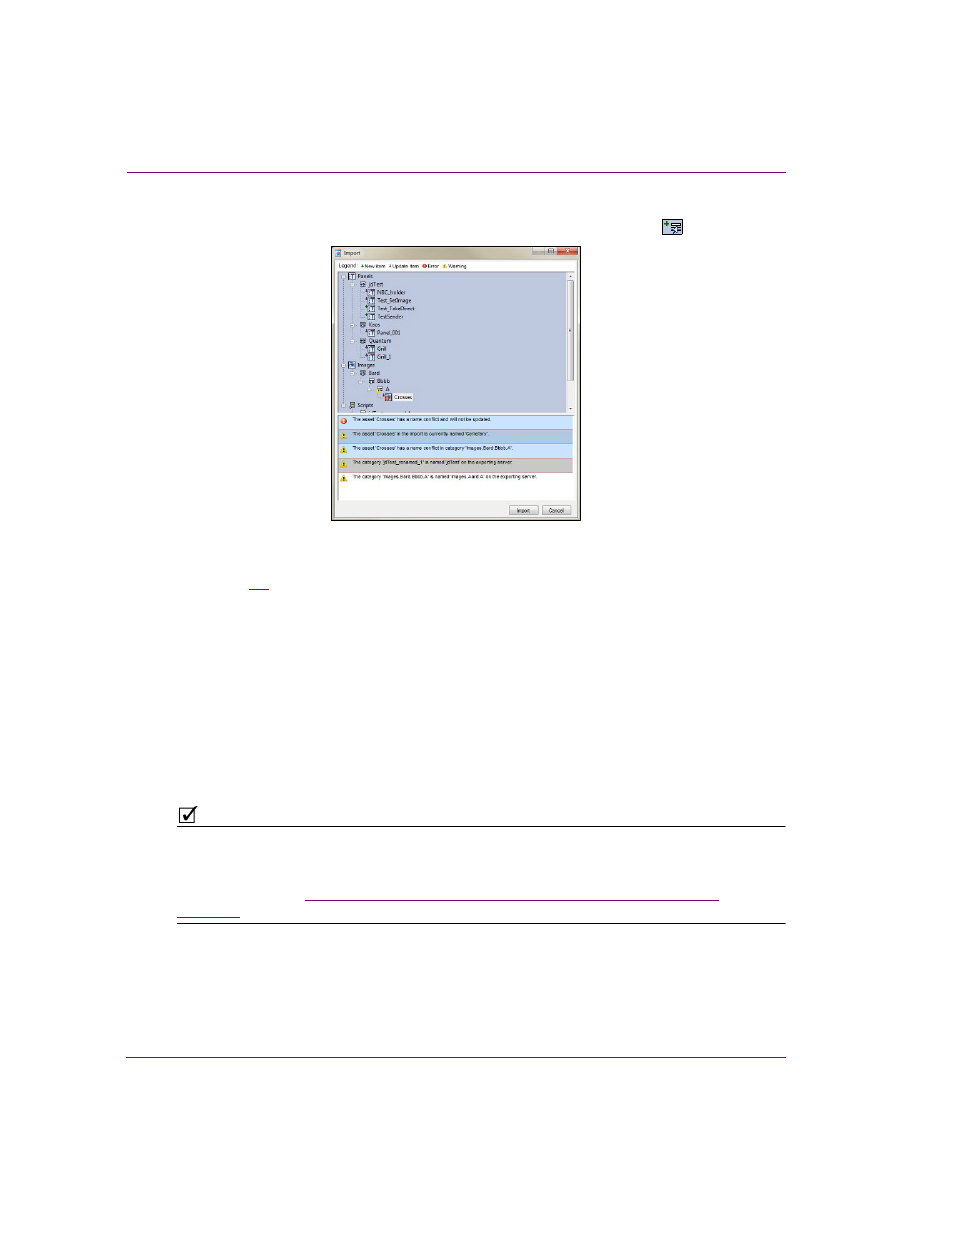
The assets are displayed in a tree-structure that represents the assets’ destination among
the target server’s categories. Newly created categories are indicated the
icon.
Figure 4-3. The Import window provides a verification step before the import operation is performed
Figure
4-3
also demonstrates that the Import window can also contain a list of error or
warning messages to alert users of problems that may occur if the import is performed.
For example, some categories may have to be renamed and some assets will not be
able to be categorized because of name conflicts. Clicking on an asset that shows
either an error or warning icon highlights the associated messages. Similarly, clicking
on a message will select the corresponding asset or category in the tree.
6.
After inspecting the import contents, select the I
MPORT
button to proceed with the
import or select C
ANCEL
to abort the import.
The Import window remains open after I
MPORT
is clicked so that it can be referenced when
looking for newly imported assets. Select the C
LOSE
button to close the I
MPORT
window.
7.
Optional: Verify that the asset was properly imported by opening the Asset Browser
and navigating to the category where you expected the asset to be stored.
N
OTE
Transferring assets by exporting assets from one XMS and then importing them into
another XMS manually is ideal for low volume and infrequent transfers. However, if you are
frequently transferring assets between servers, we recommend using propagation to
transfer assets. See
“Propagating assets from the Xmedia Server to another server” on