Creating a new system description – Grass Valley SiteConfig v.2.1 User Manual
Page 26
Creating a new system description
1. Open SiteConfig and proceed as follows:
•
If a dialog box opens that gives you the choice of creating or importing a system description,
it means SiteConfig does not have access to a system description file. Click
Create
.
•
If the SiteConfig main window opens, click
File | New
.
The Create New System Description dialog box opens.
2. In the Create New System Description dialog box, enter the name of the file for the system
description you are creating.
It is recommended that you store the system description file in the default location, rather than
browsing to store the file in a different location. SiteConfig always accesses the default location.
3. Click
OK
.
A blank system description loads, which displays just the top-level System node in the tree view.
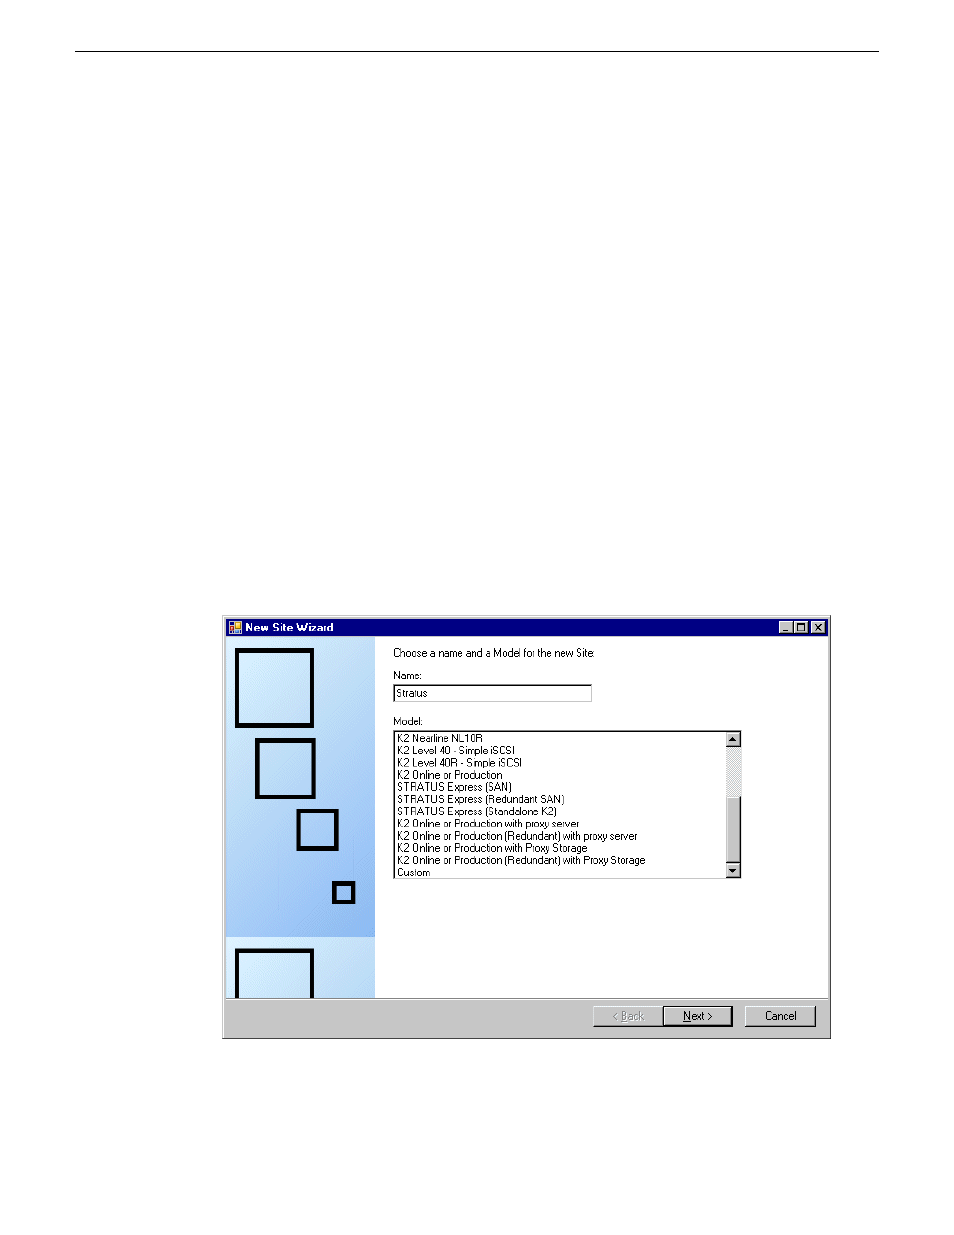
4. In the
Network Configuration | Devices
tree view, right-click the
System
node or a
Site
node and
select
Add Site
.
In this context, "Site" is a distinct system, such as a K2 SAN or an Aurora Browse system.
The New Site Wizard opens.
26
SiteConfig 2.1 User Manual
11 October 2011
Working with network configuration