Tips for using the zoom controls, Changing the timeline view manually – Grass Valley Aurora Edit LD v.7.0 User Manual
Page 99
Tips for using the zoom controls
Aurora Edit provides you with multiple methods for using the zoom controls when
viewing media.
There are a few ways to zoom in on media in the viewing window:
•
The fastest way to zoom is to hover over the clip timeline, hold the CTRL key
down, then move the mouse wheel forwards or backwards. You can also move the
mouse wheel forward and backward without holding the CTRL key, which moves
the position of the pointer, thus increasing the speed when used in conjunction with
the CTRL zoom.
•
Another way to zoom is to hover over the zoom dial and move the mouse wheel
forwards or backwards.
•
You can also zoom by manually moving it. Click the zoom dial with your mouse
and drag the zoom dial clockwise or counterwise. It's best to hold the mouse and
pull away from the dial as you move, providing greater granularity.
Once a clip has been zoomed in, the zoom indication bar provides you with a visual
representation of the zoom percentage. You can select and drag this bar through the
entire clip. This works as a zoom window that can be placed wherever you like within
a clip. Once stopped, you can easily access the clip timeline scrubber above and move
easily within the zoom window.
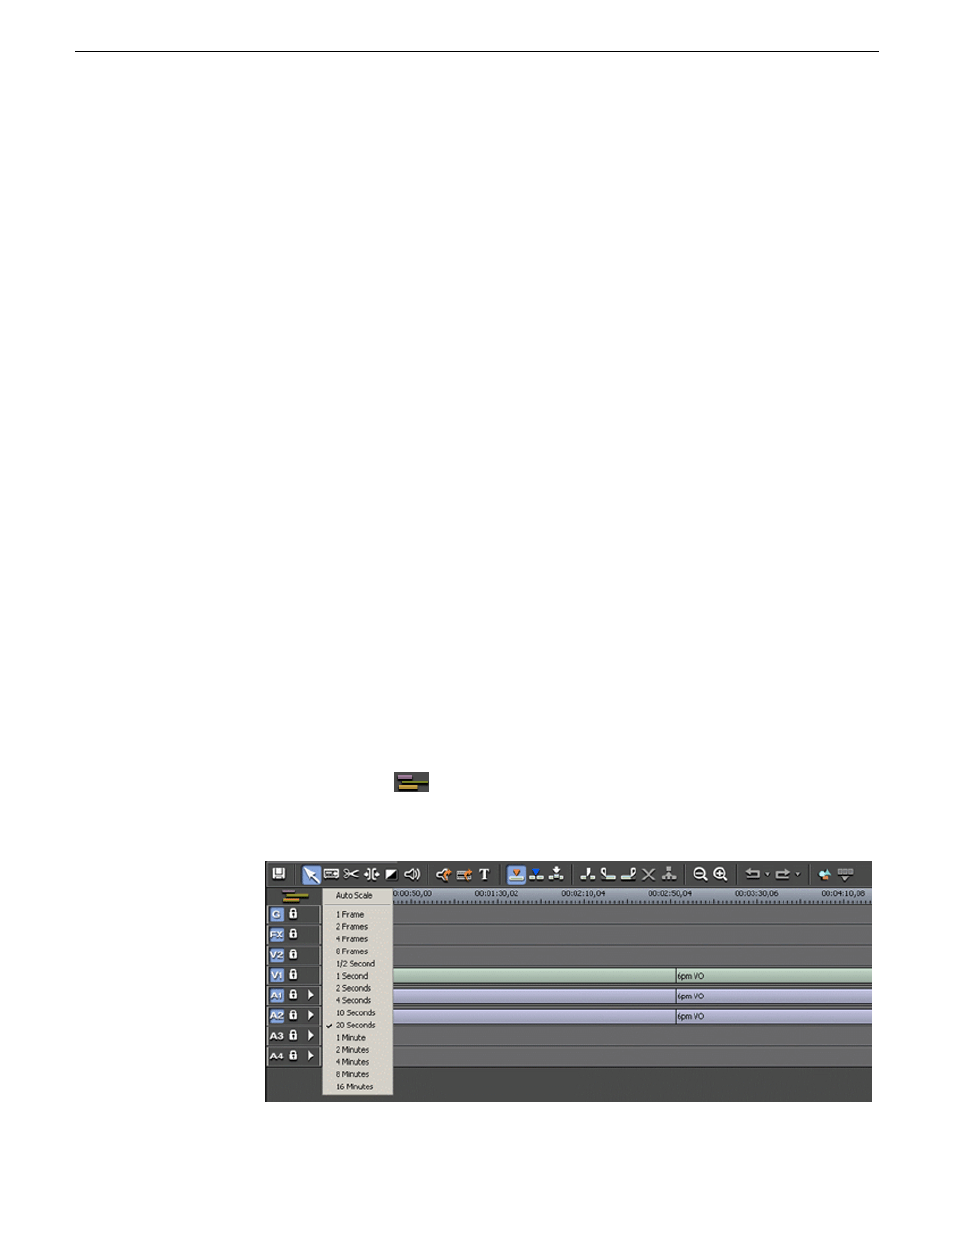
Changing the Timeline view manually
You can zoom in and out of the Timeline to see a specific area of the Timeline or to
get an overall perspective of your sequence.
Use one of these methods to change the Timeline view:
•
Right-click the
Turn Auto-Scale On/Off
button (shown in Auto-Scale Off
) and select an increment for the Timeline view to display
08 April 2010
Aurora Edit LD User Guide
99
Working in the Timeline