Naming source tapes, Routing audio tracks, Naming source tapes routing audio tracks – Grass Valley Aurora Edit LD v.7.0 User Manual
Page 82
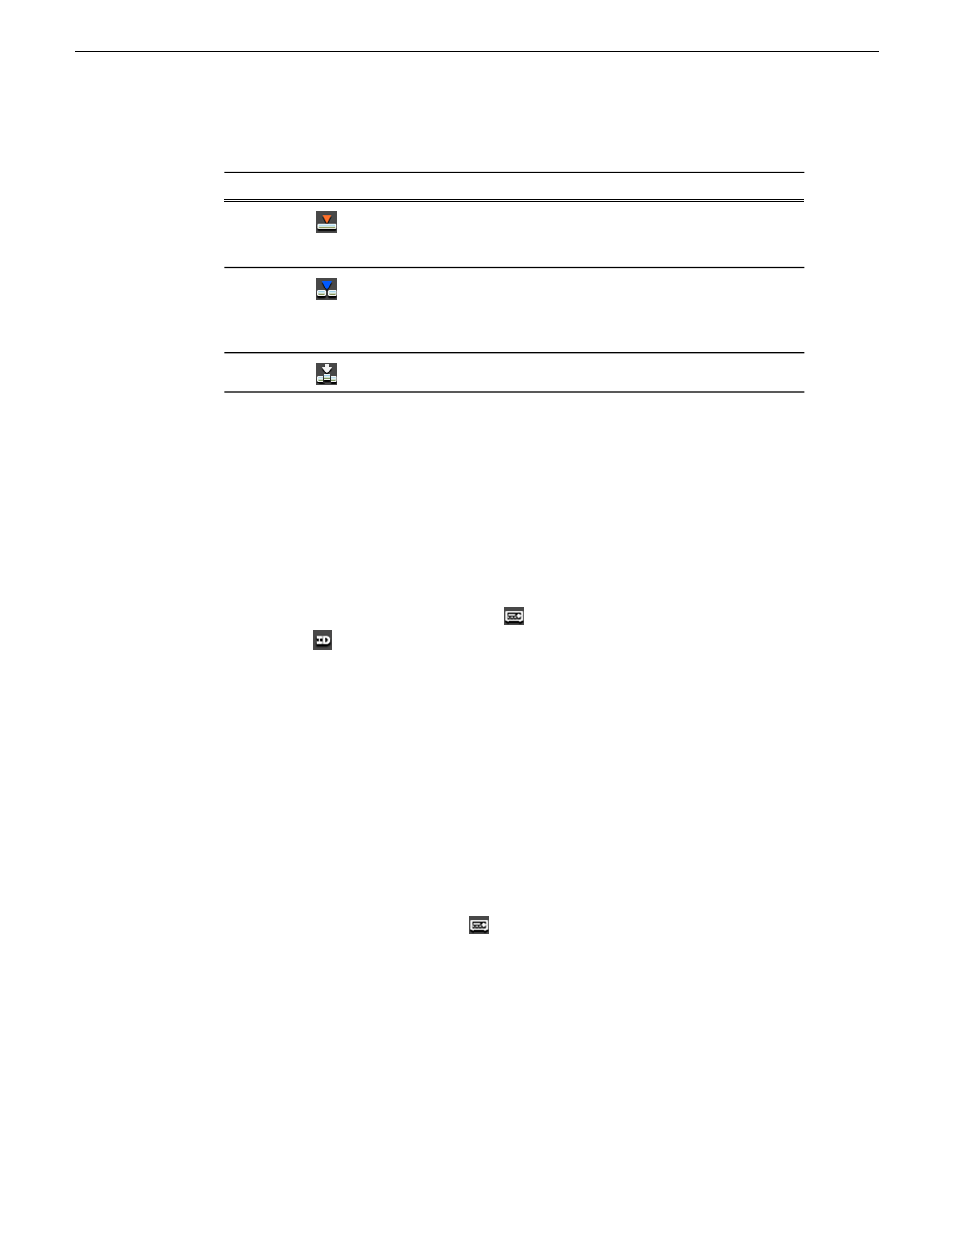
The Aurora Edit editing modes are:
Description
Keypad
Icon
Tool
Replaces existing sections of a sequence with new
material, leaving the sequence duration unchanged.
Similar to an insert edit in a tape-based system.
F9
Overwrite
Splices a clip between two existing clips in the
Timeline by moving the two clips apart and inserting
F10
Splice
the new clip between. All clips after the edit point move
downstream and lengthen the sequence.
Fits a clip into a duration you specify in the Timeline.
F11
Fit To Fill
Naming source tapes
You can identify which Source tape source video material comes from using Tape ID.
Tape ID lets you add a name for the Source tape before recording; you can view the
tape name in the Properties tab for the clip.
1. Enable Tape ID by choosing
Tools | Options | General
and clicking
Use Tape ID for
Capture
.
2. Press
2
on your keyboard or click the
Source Tool
button.
3. Click the
Tape ID
button; the Tape ID window appears.
4. Enter a name for the tape and click
OK
.
You can view the Tape ID by highlighting the clip in the Bin, right-clicking and
selecting
Properties
.
Routing audio tracks
You can edit audio from any source track onto any record track in the Timeline.
You can work with up to eight audio tracks in the Timeline, though you can record
only four tracks per clip. If you have two audio inputs, you may need to assign a
different track to your audio source.
1. Press
2
on the keyboard or click
Source Tool
to select the Source Tool.
2. Click the
Timeline Track
box for the Audio Input channel you need to reassign.
82
Aurora Edit LD User Guide
08 April 2010
Preparing to edit