Replacing the front panel – Epson EISA Desktop User Manual
Page 73
7. Connect the necessary power supply and drive cables to the
backs of all your drives, as described in Chapter 6.
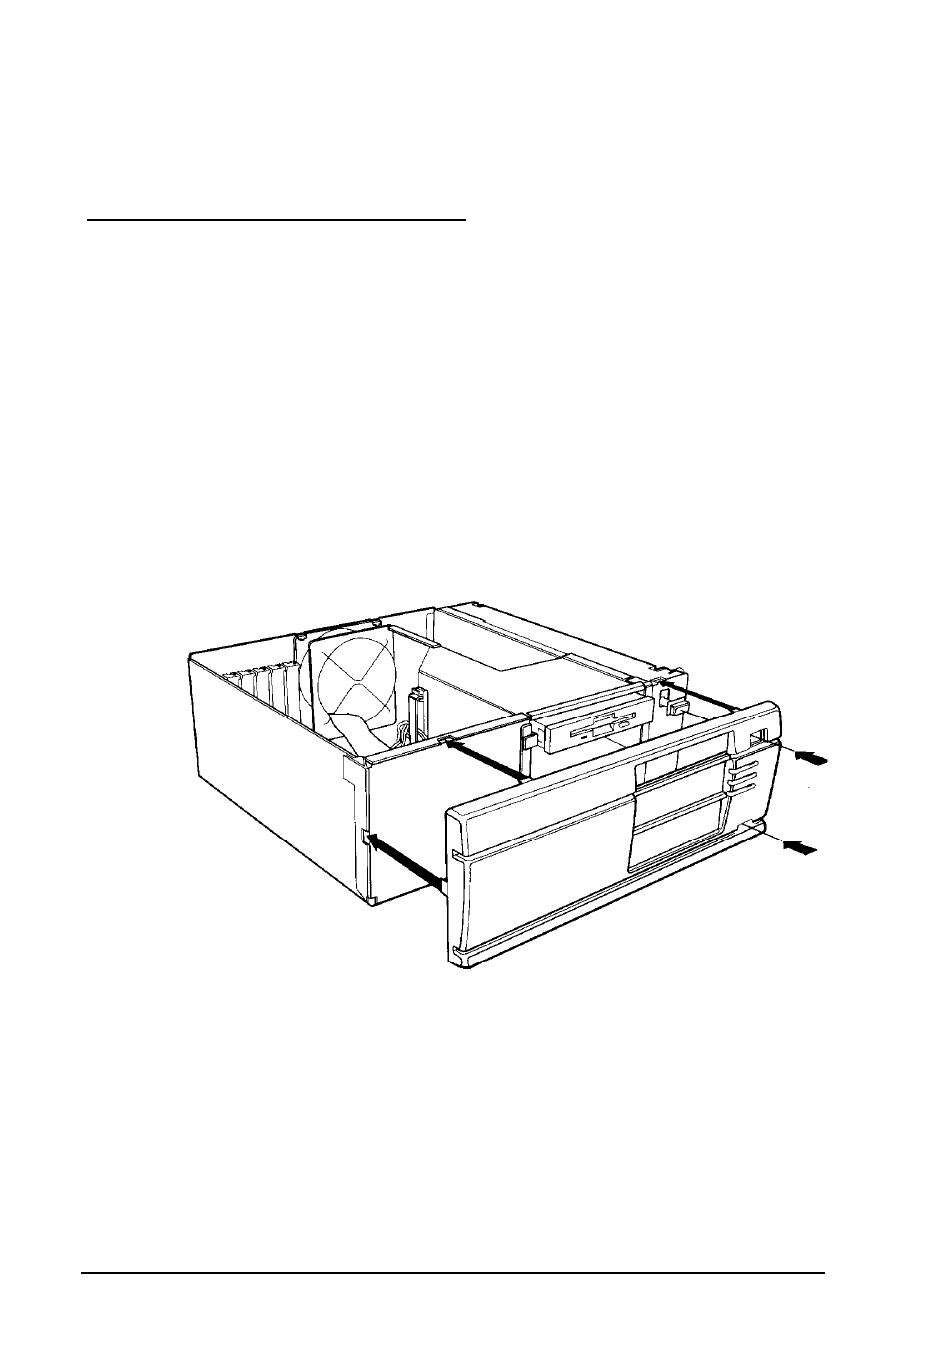
Replacing the Front Panel
Follow these steps to replace the computer’s front panel:
1. Turn the computer so you are facing its front side.
2. Align the openings in the front panel with the power button,
RESET button, and drives that extend out from the front of
your computer case. Also align the front panel tabs with
their corresponding notches in the case. Then guide the
front panel straight onto the computer case, as shown
below.
3. Press the front panel onto the computer to fully insert all the
tabs into the notches on the computer case. If all the front
panel tabs do not snap into position, remove the front panel
and try again.
4-10
Accessing Internal Components