Measurement Computing DaqBoard 1000 Series User Manual
Page 71
For cPCI DaqBoard/2000c Series Boards [cPCI Type]
If you a installing the cPCI DaqBoard/2000c Series Board for the first time, refer to chapter 2 of this
manual; or to the cPCI DaqBoard/2000c Series Quick Start Guide, prior to installing the board.
1.
Turn the compact PC’s power OFF.
2.
Turn power OFF to externally connected
equipment.
3.
UNPLUG the compact PC and all
externally connected equipment.
4.
With the board’s injector/ejector down,
slide the board into the compact PC.
Make sure you use the PCs card guides.
5.
After the board is inserted, pull the cPCI
board’s injector/ejector up to engage the
board.
6.
Tighten the upper and lower lock screws.
Upper Lock Screw
Injector/
Ejector
Lower Lock Screw
Installing a cPCI DaqBoard/2000c Series Board
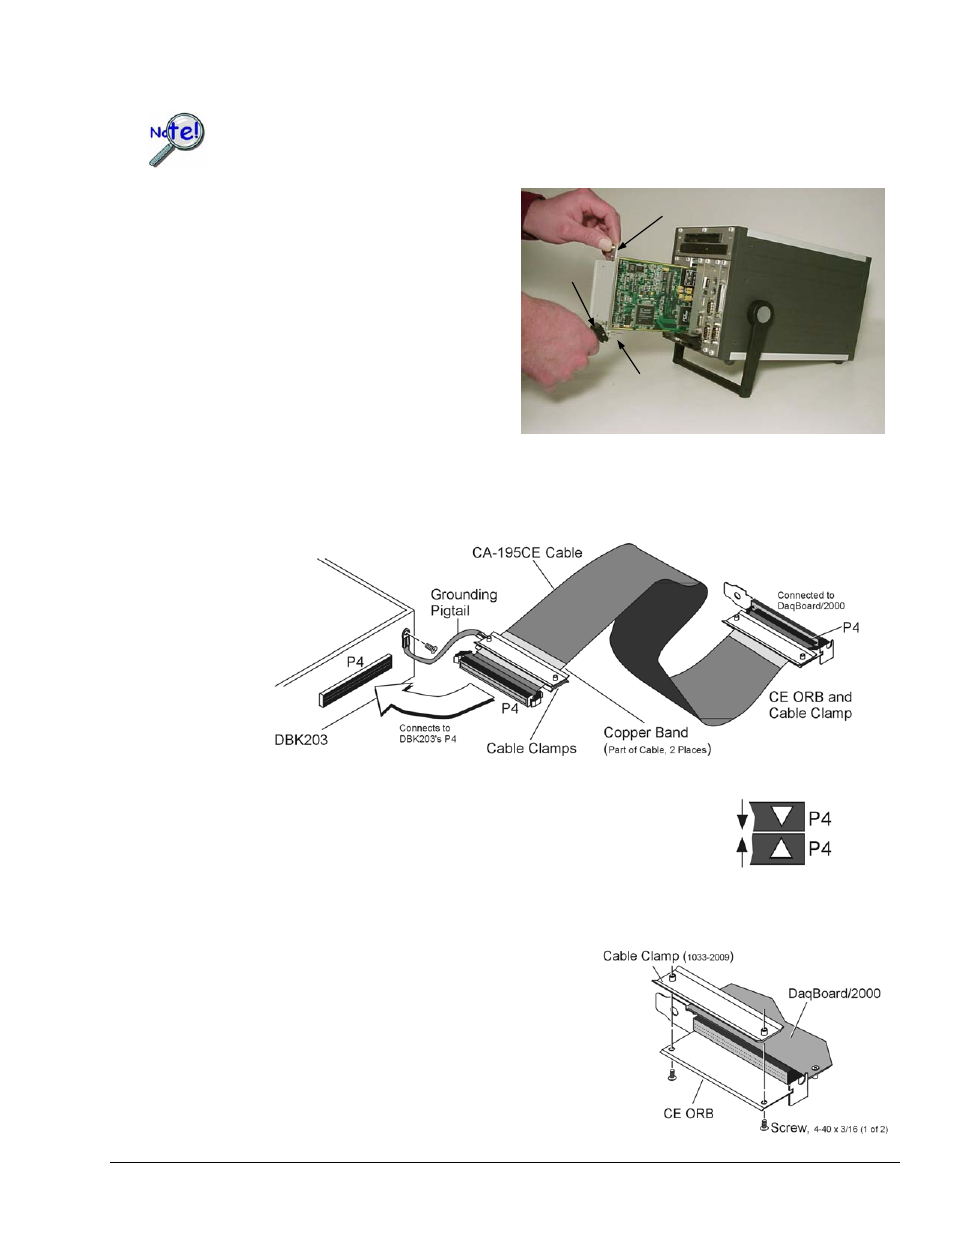
Connect the CA-195CE Cable to the Board
Note: This section includes illustrations depicting the DaqBoard/2000; but apply to both the
DaqBoard/2000 Series Boards and the cPCI DaqBoard/2000c Series Boards.
Note: When mating P4 connectors, ensure that the P4 white locator triangles
point to each other. The triangles locate pin A1.
1. Connect one end of the CA-195CE Cable to DaqBoard/2000 Series [or /2000c Series] Board’s P4
connector. Note that either end of the cable can be connected to the board; however, the white locator
triangles must align with each other.
2.
Align the Cable Clamp (1033-2009) with the
CE ORB and secure the items with two
4-40 x 3/16 screws (provided).
Note: In the right hand figure, the cable is not shown to
allow for greater clarity of parts.
DaqBoard/1000 and /2000 Series User’s Manual
959495
CE-Compliance 4-5