2 instructions for replacing parts – Daktronics AF-3700-34 RGB User Manual
Page 43
Parts Replacement
37
8.2 Instructions for Replacing Parts
Module Replacement
If LEDs have failed, do not attempt to replace individual LEDs.
Return a failed module to Daktronics for replacement and/or repair.
Each module can be removed separately without moving other components of the display.
1. Turn off power to the display.
2. Follow the instructions in Section 6.1 to release the module from the display cabinet
(Figure 49).
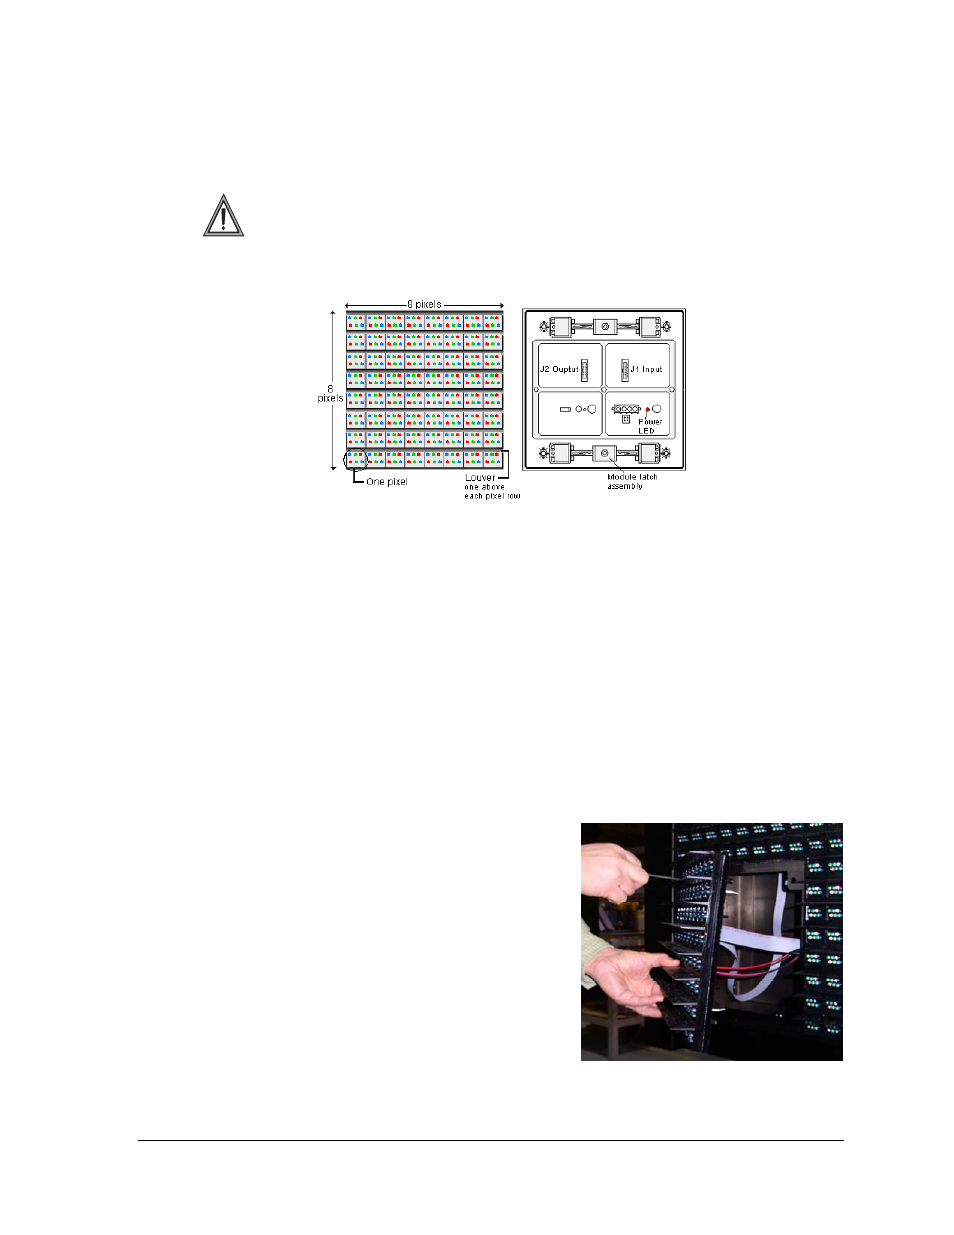
3. Disconnect the two ribbon cables from the module, noting how they are connected to
the back. Release ribbon cables by spreading the tabs on the sides and then lifting the
cable head from the jack (Figure 48).
4. Unplug the power cable by squeezing the tabs on the sides of the plug head and
pulling out.
5. Connect all three cables to the new module, making sure that the ribbon cable tabs
are tightly pushed against the cable head. Carefully push the ribbon wires back into
the cabinet so they are clear of the module edges.
6. Place the module into its proper location, checking that the weather stripping is in
place. Latch the module tightly both top and bottom by turning the hex wrench a
quarter turn clockwise.
Notes:
• The weather-stripping on the back edge of
the module must be in good condition and
returned to its proper position if it is to
prevent water from seeping into the display.
• The module latches must be fully engaged to
create a watertight seal around the edge of
the module. The module should be firmly
seated against the display when the latches
are fully engaged.
Figure 48: Module, Front/Back
Figure 49: Removing a Module