Printhead installation and removal procedures, Printhead removal procedure, Printhead installation procedure – Avery Dennison SNAP 656 User Manual
Page 79
Users Manual Model 656/636
Appendix E •
••
• 73B
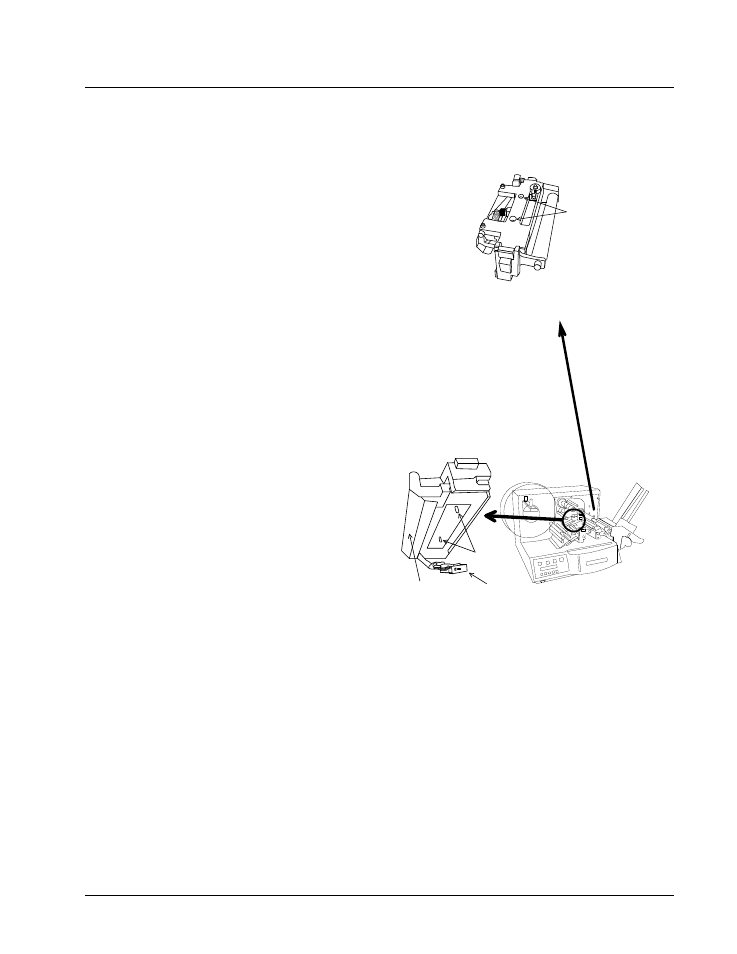
Printhead Installation and Removal Procedures
Printhead removal procedure
1. Attach the grounding strap to your wrist and the printer.
2. Turn the machine off.
3. Leaving the printhead shut, completely loosen the two tangent
locking screws but leave them loose in the holes.
4. Slowly open the printhead carriage assembly. Maneuver the
printhead down and to the right, pulling the wire pack out from
the shield.
5. Disconnect the wire pack and carefully remove the printhead.
Printhead installation procedure
1. Position the printhead loosely under the printhead
carriage assembly.
2. Connect the wire pack.
3. Position the printhead in the printhead carriage
assembly so that the alignment pegs match up
and the printhead fits snugly.
4. Shut the printhead while maintaining snug fit on
the printhead.
5. Tighten the tangent set screws.
Tangent locking
screw locations
Printhead Carriage Assembly
Printhead
alignment
pegs
Wire pack
Shield
Open Printhead Carriage