Printhead cleaning procedure, Printhead cleaning when removed from the printer – Avery Dennison SNAP 656 User Manual
Page 78
72B •
••
• Appendix E
Users Manual Model 656/636
Printhead Cleaning Procedure
Printhead performance and life are influenced by proper handling and cleaning.
• Dirt on the printhead that causes problems is often too small to see.
• Exercise care in handling printheads, as they are very susceptible to static. Use the wrist grounding strap
and anti-static gloves when handling.
• It is OK to scrub the printhead HARD to clean it. Use rubbing alcohol and the “loop side” or “wool side” of
Velcro, followed by drying with rough, brown paper towels.
• If the printhead doesn’t work, take it out and clean it again.
• For maximum printhead life, clean the printhead after every roll change of ink or every 20,000 inches.
In Machine Cleaning Procedure
1. Stop the machine after the last batch has printed to avoid
loosing data.
2. Turn the machine off.
3. Open the printhead carriage assembly.
4. Soak a small amount of rubbing alcohol on a cotton swab and
apply to the printhead.
5. Scrub the printhead several times with hard force using the
“wool side” of Velcro.
6. Dry the printhead with a dry, brown paper towel.
7. Shut the printhead carriage assembly and resume printing.
8. If a problem continues, remove the printhead and clean it.
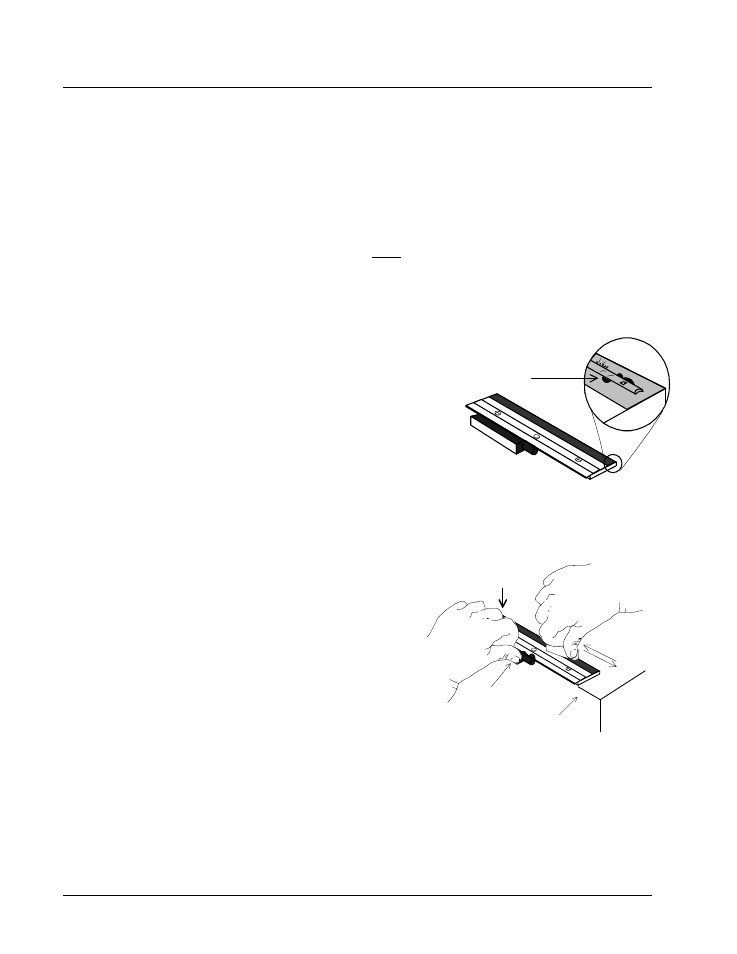
Printhead cleaning when removed from the printer
1. Remove the printhead.
2. Place the printhead upside down on the edge of a clean
table with the connector pug over the edge of the table.
3. Soak a small amount of rubbing alcohol on a cotton swab
and apply to the print line.
4. Scrub the printhead several times using HARD pressure
with the “loop side” of Velcro.
5. Dry with a dry, brown paper towel.
6. Replace the printhead.
Dirt along the
print line.
Heavy finger
pressure here
Thumb here to
hold against
the table
Table edge
Scrub here,
hard pressure