KBC Networks Mesh2HT User Manual
Page 22
Mesh2HT User Manual
Manual-MESH2HT-Rev1311
Copyright © KBC Networks 2012
Page 22 of 59
www.kbcnetworks.com
2.3.2.2
Mounting Kit Procedure
•
Remove all packaging material
•
All parts are pre-assembled and ready for mounting. For more fine-tuned alignment,
see next step. Otherwise skip to bullet point 4 below.
•
Up/Down Alignment offers one position when using the pre-fabricated channel lock
grooves on parts B and C. Directional antennas may require additional up/down
alignment angles than are allowed on the pre-fabricated grooves. To achieve different
angles, remove the bolt which connects parts B & C and separate. Insert the longer
bolt through part B and add star washer. Re-connect part C and tighten.
•
Remove U-Bolt and attach to the pole/mast, re-attach washers and nuts for secure
tight mount positioning.
•
Attach Mesh2HT to part C using screw and lock washer
•
If using the omni-directional antennas no further mounting steps are needed. If also
mounting directional antennas, use procedure as noted under section 4.1.1.2
•
When in the best position tighten all mounts for protection against anything that can
knock the antennas/Mesh2HT out of desired positioning.
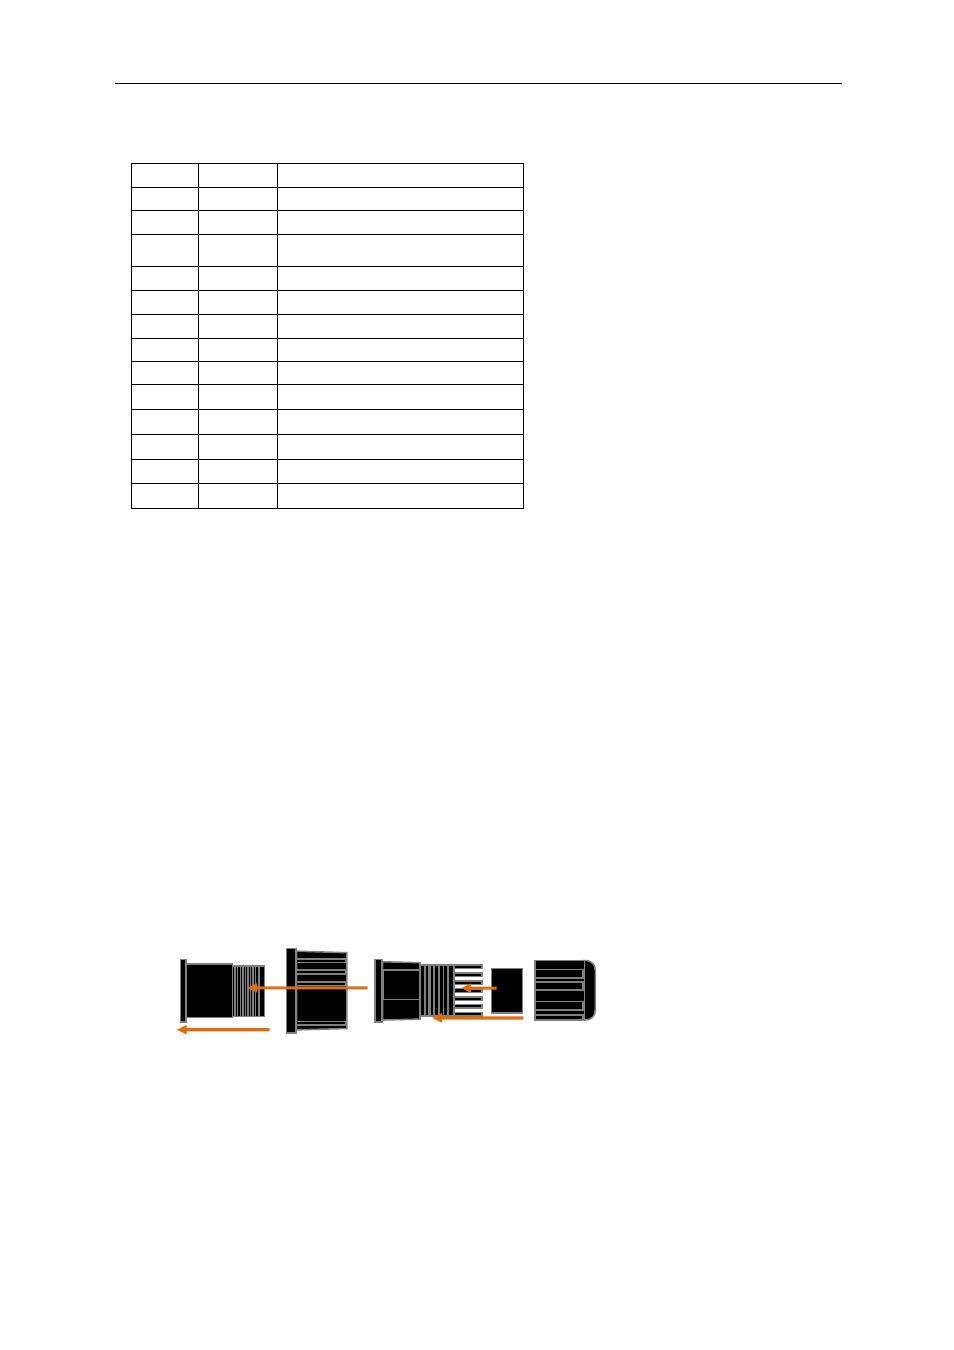
2.3.3 Strain Relief Assembly
•
Insert A into the large tightening knob (B)
•
Thread piece C to the end of A. Do not tighten completely until connected to the
Mesh2HT LAN port and power is confirmed.
•
Insert the rubber grommet (D) into the open end of C
•
Attach E to threaded portion of C. As E is tightened, the grommet will squeeze against
the Ethernet cable jacket. Leave E loose enough for the cable to wiggle slightly.
Item
Qty
Description
A
1
Mounting Base
B
1
Left/Right Swivel Bracket
C
1
Up/Down Swivel Bracket &
Mesh2HT Mounting Platform
1
1
U-bolt
2
1
Mast Clamp
3
1
2” Phillips Hex Head 8x30 Screw
4
1
Lock Washer
5
1
1.5” Hex Head 8x30 Bolt
6
1
Star Washer
7
3
Flat Washer
8
3
Hex Nut
9
1
1/4” Lock Washer
10
1
1/4”-20 Phillips Pan Head Screw
A
B
C
D
E