Charge air cooler installation, Cont’d – Vortech 2005-2010 Ford 4.6L 3v Mustang GT User Manual
Page 48
P/N: 4FU020-010 v6.2, 06-08-10
©2010 Vortech Engineering, LLC
All Rights Reserved, Intl. Corp. Secured
26
8. CHARGE AIR COOLER INSTALLATION
(CHARGE COOLED KITS ONLY)
, cont’d
NOTE: Leave these screws loose for
adjustment when attaching the
assembly to the vehicle.
NOTE: Refer to Fig. 8B-q throughout
the following steps:
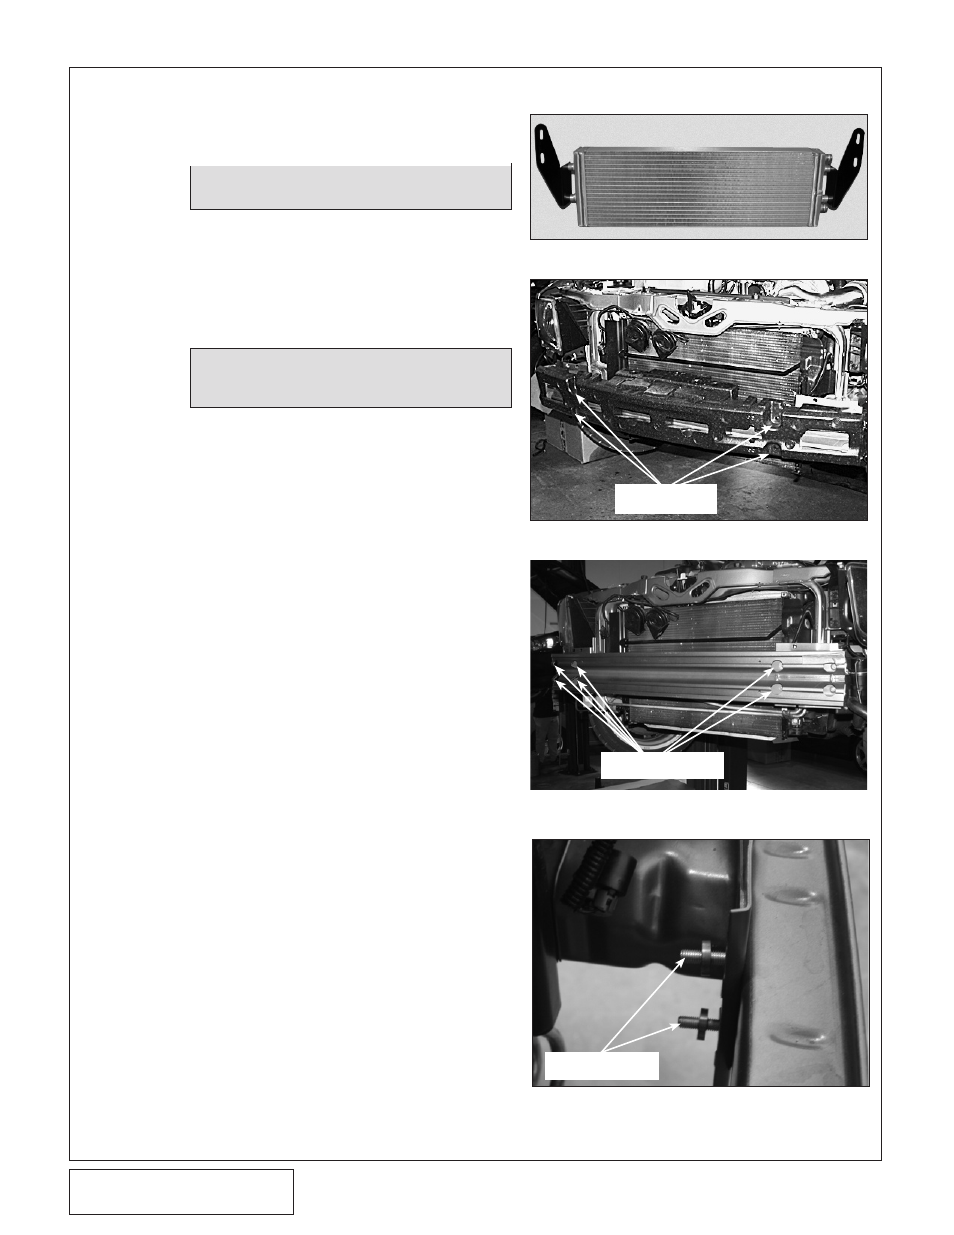
1.
Locate the water cooler assembly 8N106-135.
2.
Install the two mounting bracket 8N010-171
and 8N010-173 to the water cooler using the
supplied 1/4-20 x 1/2" screws, washers. (See
Fig. 8B-a.)
3.
Remove four nylon push pins from the styro-
foam bumper support and set the support and
the pins aside to be reinstalled. (See Fig.
8B-b.)
4.
Remove six of the eight 13mm headed inset
bolts retaining the metal bumper support.
(See Fig. 8B-c.)
5.
2005-2009 models: Replace the bolts previ-
ously removed with the six 8mm x 1.25" x
35mm long bolts and washers provided.
2010 models: install four M8x1.25x75mm
studs into the four inner bumper bolt holes.
6.
2005-2009 models: Install the four 2A017-
036 spacers (two each side) onto the bolts
that will secure the water cooler. (See Fig.
8B-d.)
2010 models: use four 2A017-753-02 spac-
ers (slightly longer than those depicted in Fig.
8B-d) four 5/16" fender washers, and four
nylock nuts
B.
WATER COOLER ASSEMBLY
INSTALLATION
NYLON PUSH
PINS
13mm HEADED
BOLTS
Fig. 8B-d
Fig. 8B-c
Fig. 8B-b
Fig. 8B-a
SPACERS
PROVIDED