Experiment #24: 9 volt battery tester – Elenco Basic Electronic Experiments User Manual
Page 37
37
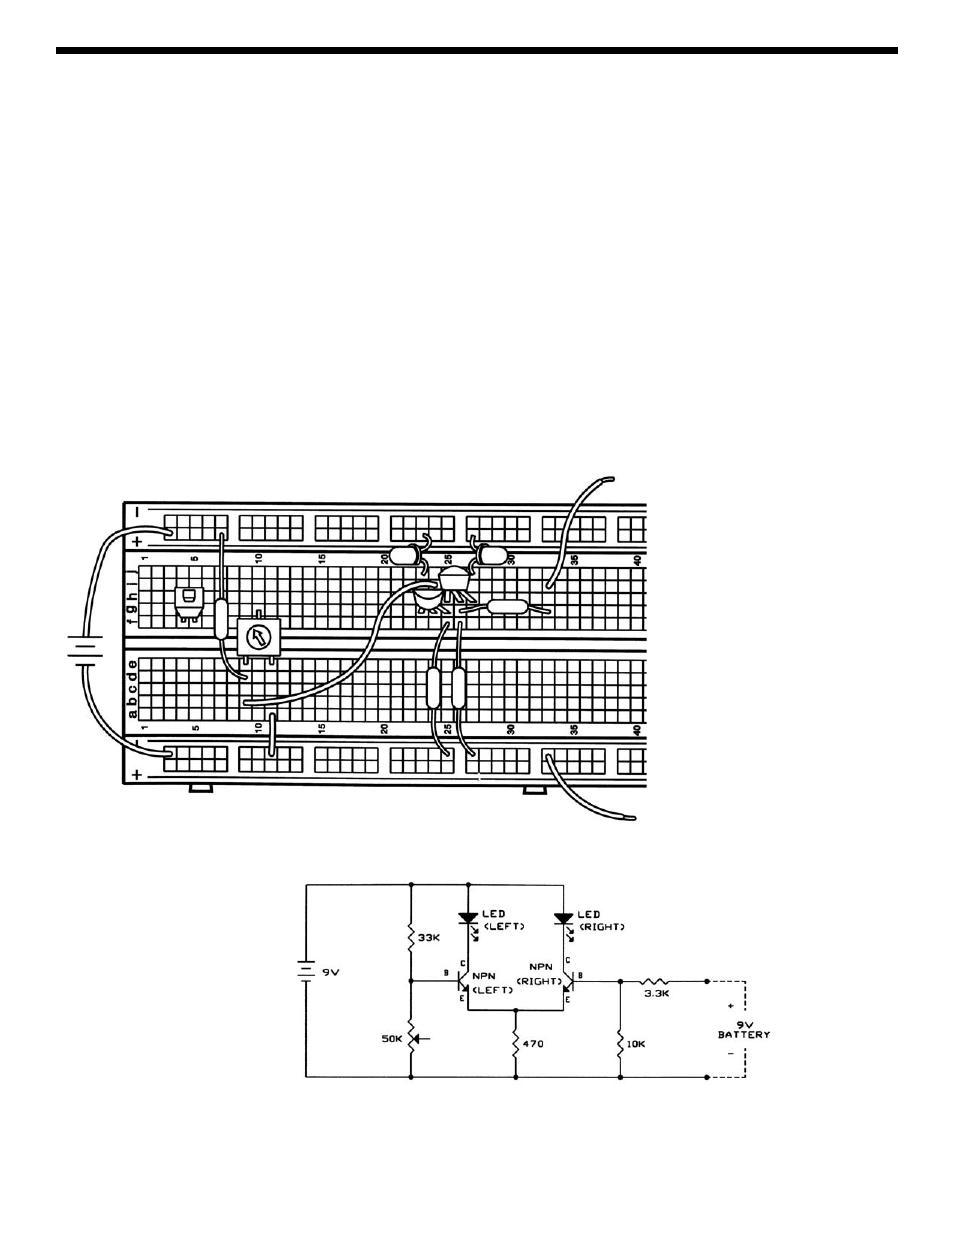
EXPERIMENT #24: 9 VOLT BATTERY TESTER
Make sure you have a strong 9V battery for this experiment. Connect the circuit, and connect the wire to the battery last
since this will turn on the circuit. And be sure to disconnect this battery wire when you’re not using the circuit to avoid
draining the battery. This time you will measure 9V batteries, just like the one you may be using to power your PK-101.
Take the battery you want to test and hold it between the loose wires (the 3.3k
Ω resistor and ground, be sure to connect
to the (+) and (–) battery terminals as shown). If LED-right is bright and LED-left is off then your battery is good, otherwise
your battery is weak and should be replaced soon. Don’t throw any weak batteries away without making sure some
measure good with this test because all batteries could fail if your circuit is wired incorrectly.
As you’d expect, this circuit is similar to Experiments 22 and 23. From the schematic you can see that we are using resistors
to set the voltages at the bases of the transistors. The resistor values were selected so that if the two battery voltages are
equal then the right transistor’s base will have a higher voltage and only LED-right will be lit (as in Experiment 23 when we
had a good 1.5V battery). In fact, LED-left will only be on if your PK-101’s battery voltage is at least 2V higher than that of
the battery you are testing. We do this because we don’t want to reject a good battery that’s just not as good as our
reference battery. Of course, if our reference battery is weak then any battery tested will appear good.
Remember to disconnect the battery (or turn off your power supply) when you’re not using the circuit to avoid wasting
energy.
Now it’s time to introduce another component.....
+9V
3.3k
Ω
to (+) side of battery
to (-) side of battery
470
Ω
10k
Ω
33k
Ω