Experiment #8: slow light bulb – Elenco Basic Electronic Experiments User Manual
Page 20
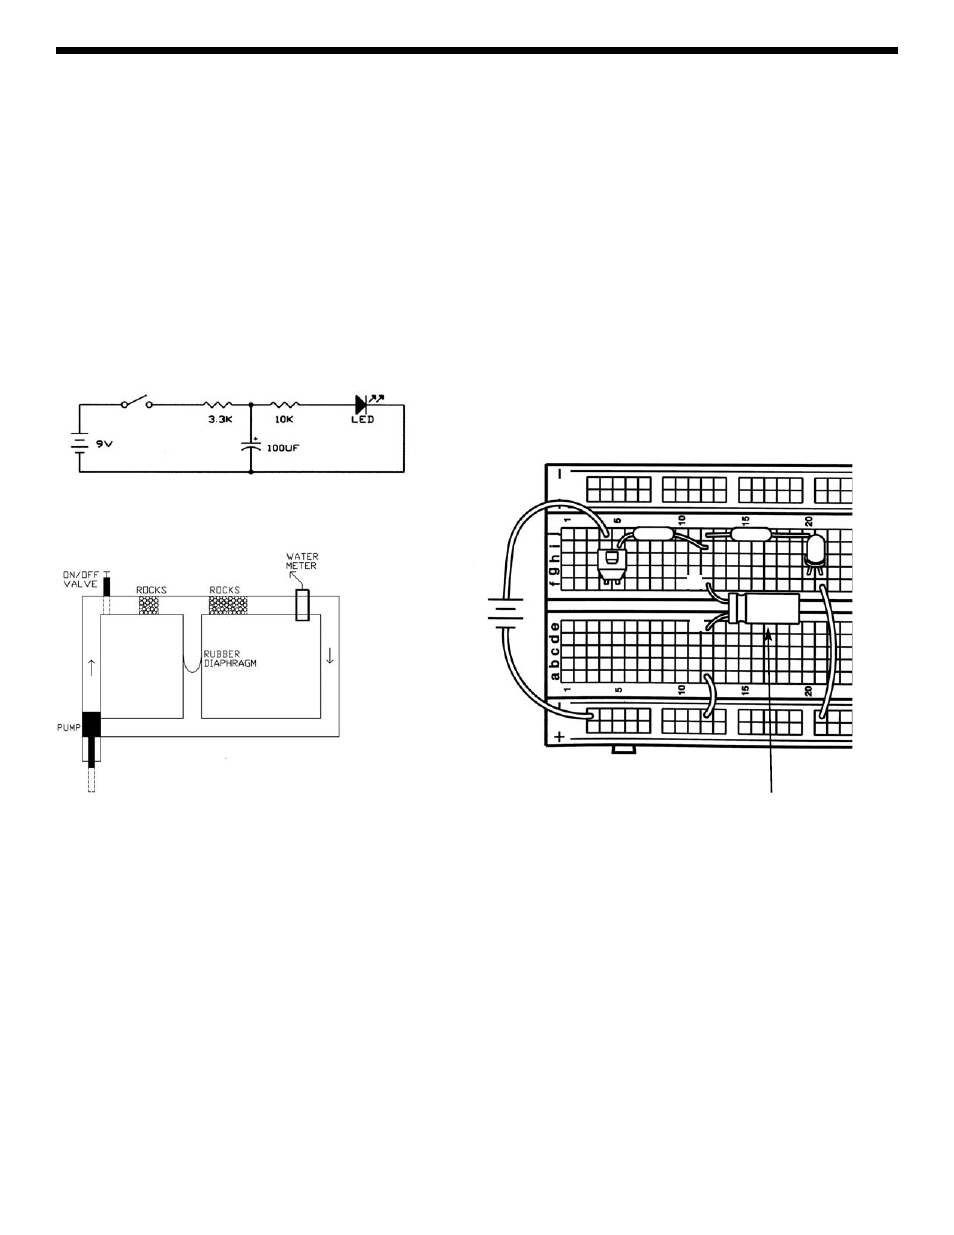
EXPERIMENT #8: SLOW LIGHT BULB
Starting with this experiment, we will no longer show you the Parts List or the Wiring Checklist. Refer back to the previous
experiments if you feel you need more practice in wiring the circuits. Refer back to page 10 if you need to review the resistor
color code. Connect the circuit according to the schematic and Wiring Diagram and press the switch several times. You
can see it takes time to charge and discharge the large capacitor because the LED lights up and goes dim slowly. Replace
the 3.3k
Ω resistor with the 1kΩ resistor; now the charge time is faster but the discharge time is the same. Do you know
why? When the switch is closed the battery charges the capacitor through the 1k
Ω resistor and when the switch is opened
the capacitor discharges through the 10k
Ω, which has remained the same. Now replace the 100μF capacitor with the 10μF.
Both the charge and discharge times are now faster since there is less capacitance to charge up. If you like you may
experiment with different resistors in place of the 1k
Ω and 10kΩ. If you observe the LED carefully, you might start to
suspect the relationship between the component values and the charging and discharging times - the charge/discharge
times are proportional to both the capacitance and the resistance in the charge/discharge path!
A simple circuit like this is used to slowly light or darken a room, such as a movie theater.
20
+9V
3.3k
Ω
10k
Ω
100
μF
CAPACITOR
+
-