Experiment #18: very slow light bulb – Elenco Basic Electronic Experiments User Manual
Page 31
31
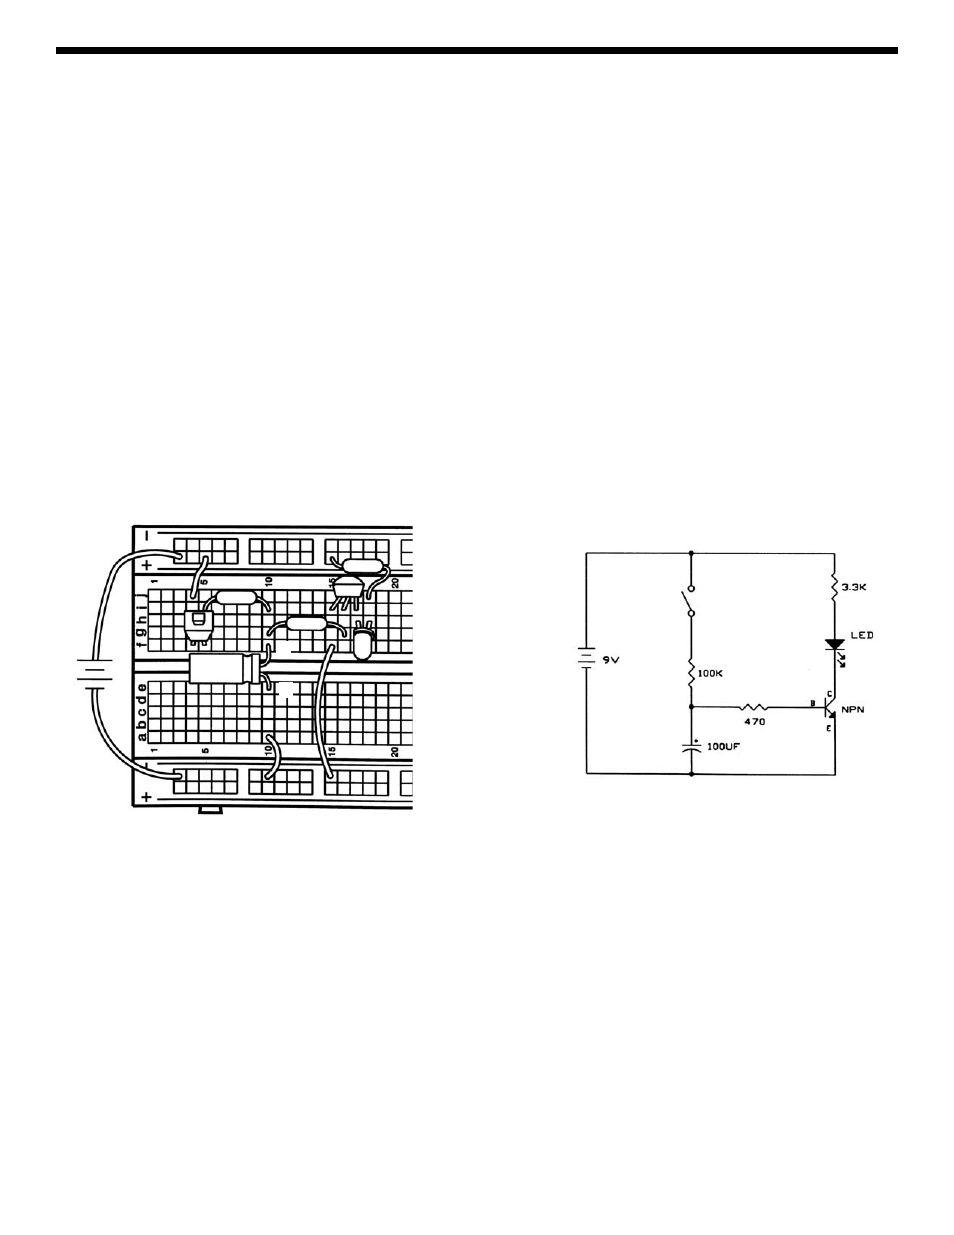
EXPERIMENT #18: VERY SLOW LIGHT BULB
Connect the circuit and press the switch, hold it down for several seconds. The LED will slowly light up. Release the switch
and the LED will slowly go dark.
When you first press the switch all of the current flowing through the 100k
Ω resistor goes to charge up the capacitor, the
transistor and LED will be off. When the capacitor voltage rises to 0.7V the transistor will first turn on and the LED will turn
on. As the capacitor voltage continues to rise the current flow through the 470
Ω resistor and into the transistor base will
increase. The current through the LED will then rise rapidly due to the transistor’s current gain.
When the switch is released the capacitor will discharge through the 470
Ω resistor and the transistor base, the LED will
dim as this discharge current decreases. When the capacitor voltage drops below 0.7V the transistor will turn off. If you
get impatient you may touch a wire between the two capacitor springs to discharge it instantly.
Do you know how to change the capacitor charge and discharge times? The 100k
Ω resistor controls the charge time, the
470
Ω controls the discharge, and the capacitor controls both the charge and discharge. Replace these parts with some
different values and observe the effects.
Compare this circuit to the one you used in Experiment 8 when we first introduced the capacitor. By adding a transistor
you can use a large resistor for a slow charge time and still have a bright LED!
+9V
470
Ω
100
μF
100k
Ω
3.3k
Ω
+
-