Stitch length control, Stitch width control, Adjusting stretch stitch balance – Sears 385.1883 User Manual
Page 47
Attention! The text in this document has been recognized automatically. To view the original document, you can use the "Original mode".
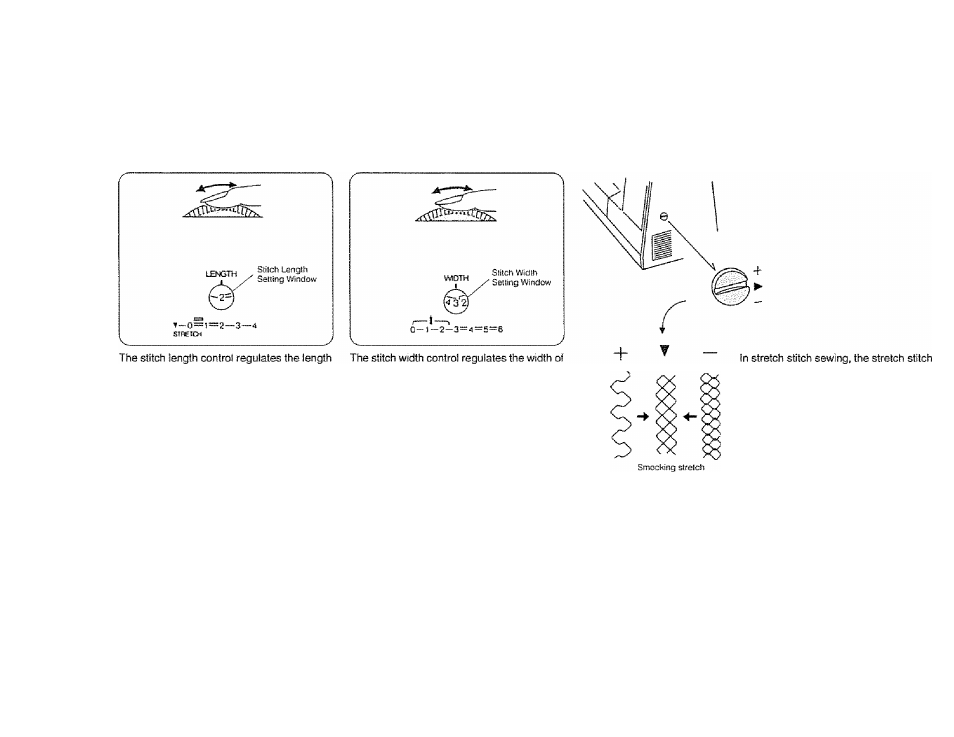
stitch Length Control
Stitch Width Control
Adjusting Stretch Stitch Balance
oi stitch, and also has a stretch stitch setting.
The higher the number, the longer the stitch.
0 means no teed.
To select the stretch stitches, set this control
at ' ¥ '■
NOTE:
When you select decorative
stitches
(green)
or
buttonhole
(blue), make sure that you do not
set the stitch length control at
" Stretch Stitch
Study the red, green, yellow and
blue sections around this control.
These are recommended zones of
stitch length and are color-coded
to the stitches pictured on the stitch
indicator panel.
the stitch you select.
The higher the number, the wider the stitch.
The " H " is the maKimum width tor twin
needle stitches.
The blue zone is the adjustable area for
button hole stitches.
Rickrack sretch
adjuster should usually be In a neutral
position ► or between "+"and "—”
position. When sewing some fabrics, you
may need to adjust this control to
balance the stitches for appearance
sake.
If the design seems open like the illust
rations to the left, adjust the control
slightly toward " — " until it looks like
the center design.
If the design appears to be closed as in
the right hand illustrations, turn the
control toward " + ” until stitching is as
you desire.
39