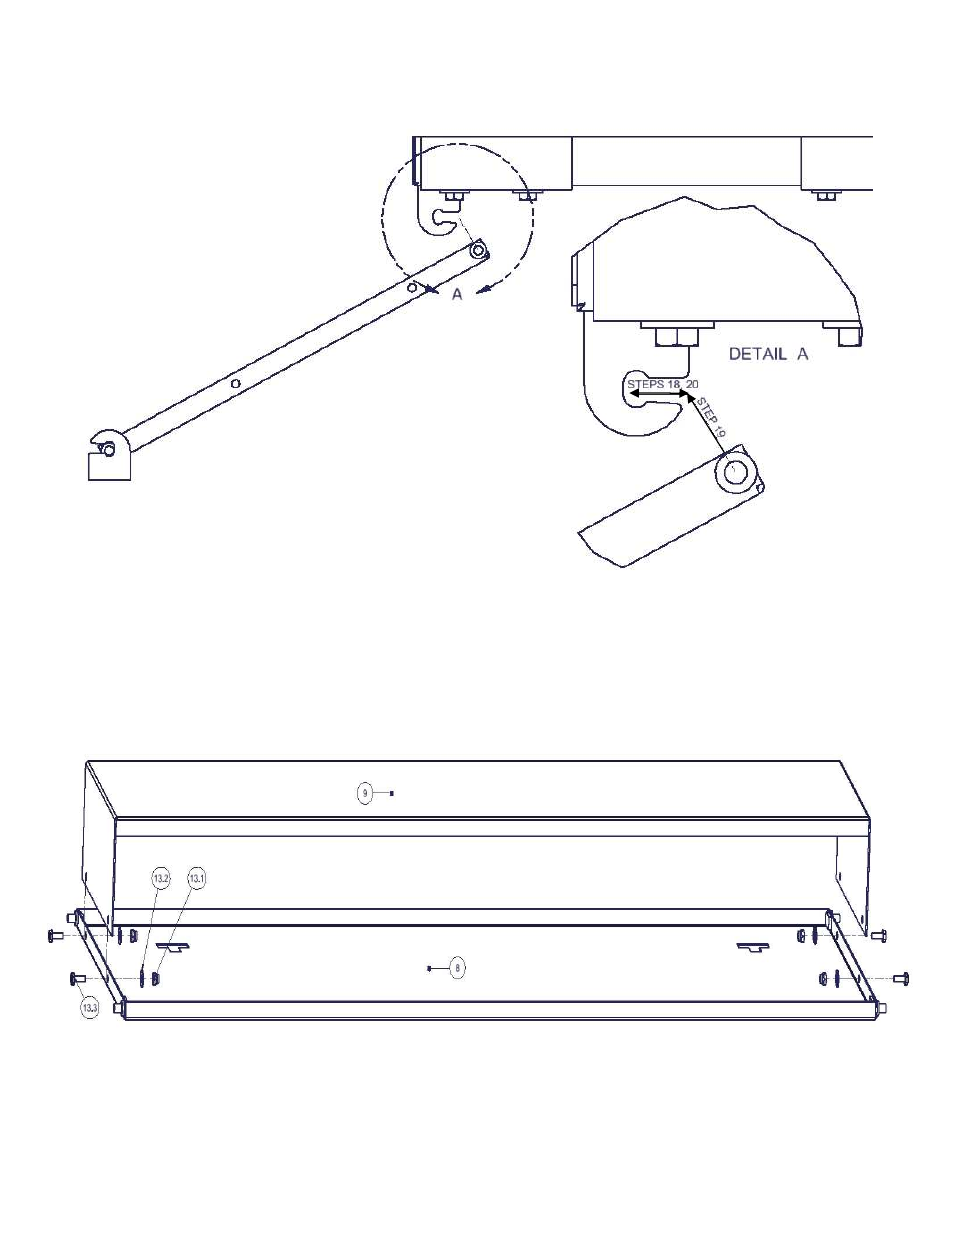
Figure 8, Auxiliary tray installation – Tuffy Security 304 User Manual
Page 7
Page 7 of 7 – 10/17/2013
20. Pull the upper Tray Mount Brackets toward the front of the enclosure and retighten the (4) Nuts loosened in Step 18
while maintaining pressure on the Brackets to prevent rattles(See Figure 8).
FIGURE 8
21. Reinstall/tighten the factory fasteners in the “Package Tray” that were loosened/removed in Steps 5/6. Reinstall
headliner onto the upper side of the “Package Tray”.
22. Replace rear seatback to factory location.
23. Install the drawer into the enclosure, using the procedure of Step 3 on Page 2 of these instructions in opposite order.
AUXILIARY TRAY INSTALLATION
1. Install the #9 Auxiliary Tray to the #8 Electronics Tray using (4) #13.3 10-32 x ½” Hexwasher Screws, (4) #13.2
10-32 Flat Washers, and (4) #13.1 10-32 Nylock Hexnut(All are included with Auxiliary Tray) through the pre-
punched holes.
Call (970) 564-1762 for Technical Support
- 082 (2 pages)
- 089 Manual (3 pages)
- 089 Installation Manual (1 page)
- 101 (2 pages)
- 073 (3 pages)
- 198 (2 pages)
- 189 (1 page)
- 292 (2 pages)
- 282-BTL (1 page)
- 137 (2 pages)
- 295 (3 pages)
- 862 (2 pages)
- 863 (3 pages)
- 311 (2 pages)
- 312 (2 pages)
- 046 (3 pages)
- 145 (4 pages)
- 131 (2 pages)
- 297 (3 pages)
- 296 (3 pages)
- 240 (10 pages)
- 238 (2 pages)
- 058 (3 pages)
- 219 (2 pages)
- 195 (2 pages)
- 144 (2 pages)
- 274 (10 pages)
- 139 (3 pages)
- 157 (10 pages)
- 052 (2 pages)
- 164 (1 page)
- 104 (1 page)
- 043 (1 page)
- 027 (2 pages)
- 035 (2 pages)
- 108 (2 pages)
- 149 (2 pages)
- 049 (2 pages)
- 036 (2 pages)
- 160 (3 pages)
- 289 (2 pages)
- 287 (3 pages)
- 283 (3 pages)
- 309 (2 pages)
- 182 (2 pages)