Figure 6, Figure 7 – Tuffy Security 304 User Manual
Page 6
Page 6 of 7 – 10/17/2013
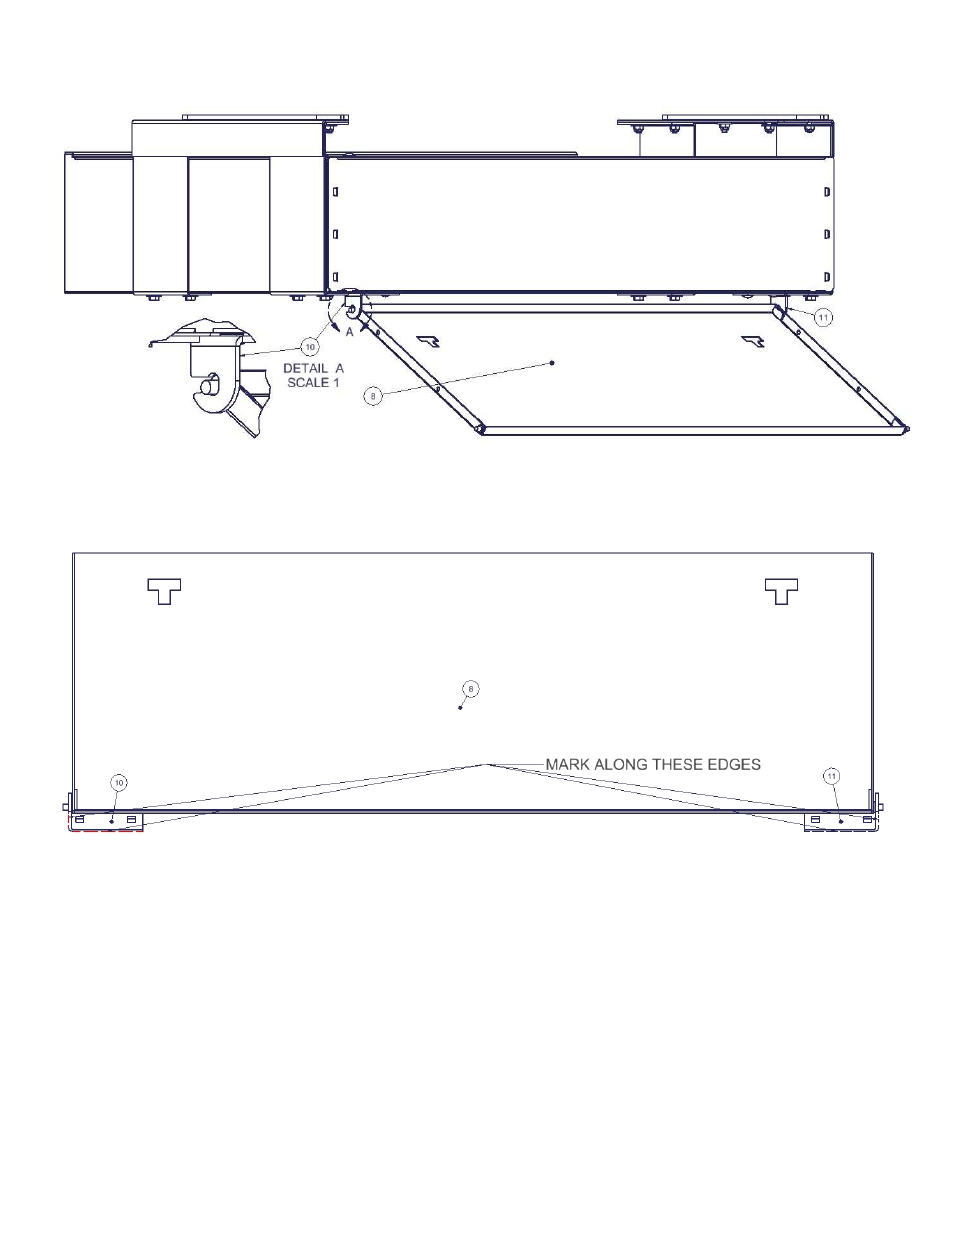
13. From the rear seat area of the vehicle, install the #8 Electronics Tray onto the Tray Mount Brackets attached to the
rear of the enclosure.(See Figure 6)
FIGURE 6
14. Place the remaining #10 and #11 Tray Mount Brackets at the lower end of the Electronics Tray, resting the tray on the
dimples in the Brackets, and making sure the rubber washers are within 1/16” of the Bracket. Mark lines on the
vehicle floor along the outside and the forward edges to correctly locate the Brackets in the next step(See Figure 7).
FIGURE 7
15. Remove the #8 Electronics Tray, realign the #10 and #11 Mount Brackets with the lines drawn in Step #14. Make a
mark at the center of each of the square holes in the Brackets. Remove the Brackets and drill (4) 3/16” diameter
holes through the sheet metal(making sure there is nothing directly below).
16. Permanently install the #10, and #11 Tray Mount Brackets using (4) #12.5 Self-Drilling Screws in the pre-drilled holes.
17. The electronics may now be installed onto the #8 Electronics Tray using appropriate hardware making sure that there
is enough slack in wires to allow the Electronics Tray to be moved to the rear section of the trunk for future
maintenance of electronic equipment. Refrain from using the upper 1” of the Electronics Tray as it may cause
interference when removing the Tray from the enclosure.
18. Loosen, but do not remove the (4) #12.4 Nylock Nuts that hold the Tray Mount Brackets to the enclosure, and slide
the brackets toward the rear of the enclosure(See Figure 8).
19. Place the Electronics Tray into the floor mounted Brackets, and lift/rotate the Tray into place pulling the Tray toward
the rear of the vehicle to insure contact with the lower Tray Mount Brackets(See Figure 8)