Tuffy Security 160 User Manual
Installation instructions, Mounting directions
Page 1 of 3 - 10/7/2008 – Rev122006
INSTALLATION INSTRUCTIONS
Flip-n-lock stereo cover and tray Part # 160
Please read and fill out the enclosed warranty registration card to activate your warranty.
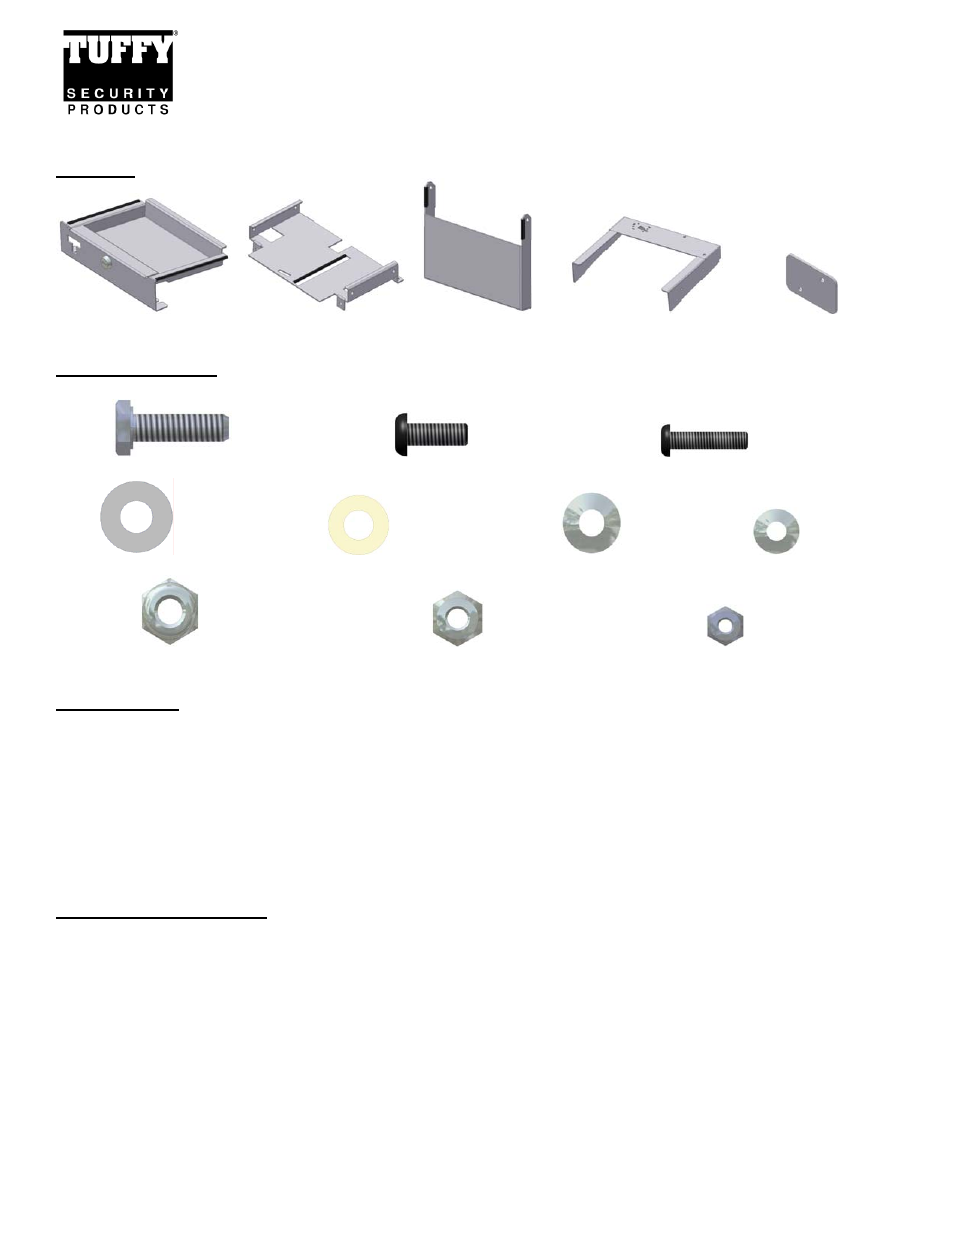
Parts list
#4 Tray
#2 Base
#3 Door
#1 Frame
#9 Cover
Shipping Package
#8.1 (2) ¼-20 x 7/8 Screws
#8.14 (4) 10-32 x ½” Screws #8.13 (4) #8-32 x ¾” Screws
#8.4 (4) ¼ Washers #8.5 (2) ¼” Nylon Washers #8.15 (4) #10 Washers #8.8 (4) #8 Washers
#8.3 (2) ¼-20 Nylock nuts
#8.16 (4) 10-32 Nylock nuts
#8.7 (4) #8-32 Nylock nuts
Tools Needed
Flat head screwdriver
1/8” Allen wrench
3/32” Allen wrench
3/8” Wrench
(2) 7/16” Wrenches, socket & ratchet, or nut driver
11/32” Wrench, socket & ratchet or nut-driver
7MM Socket & ratchet or nut driver
If the vehicle is equipped with the My Gig GPS a torx or small flat head screwdriver can work to remove screws
Mounting Directions
Note: Vehicles equipped with the compass may need to be manually recalibrated to operate properly
after installation, see owner’s manual for simple instructions. It also automatically recalibrates over
time.
1. Remove the factory plastic dash top #8.9. To do this pry up the end toward the front of the vehicle with a flat head
screwdriver as illustrated about 1” behind the front of the dash top on both sides and then remove it. Use a barrier
(like a piece of cardboard) to protect the dash when prying. (See Figure 1)
2. If the vehicle is equipped with the electrical box #8.10 unplug it and then unscrew it #8.12 from the factory dash top.
(See Figure 1)