Tuffy Security 035 User Manual
Installation instructions
Page 1 of 2 - 1/28/2008 – Rev122006
INSTALLATION INSTRUCTIONS
CJ Security Glove Box Part #035
Please read and fill out the enclosed warranty registration card to activate your warranty.
Shipping Package
(6) 10-32 x 1/2” bolts
(6) 10-32 locknuts
Tools Needed
o
(1) 5/16” wrench
o
(1) 3/8” wrench
Installation
1. Please read all instructions before starting installation.
2. Remove the old cardboard glovebox, latch, and lid.
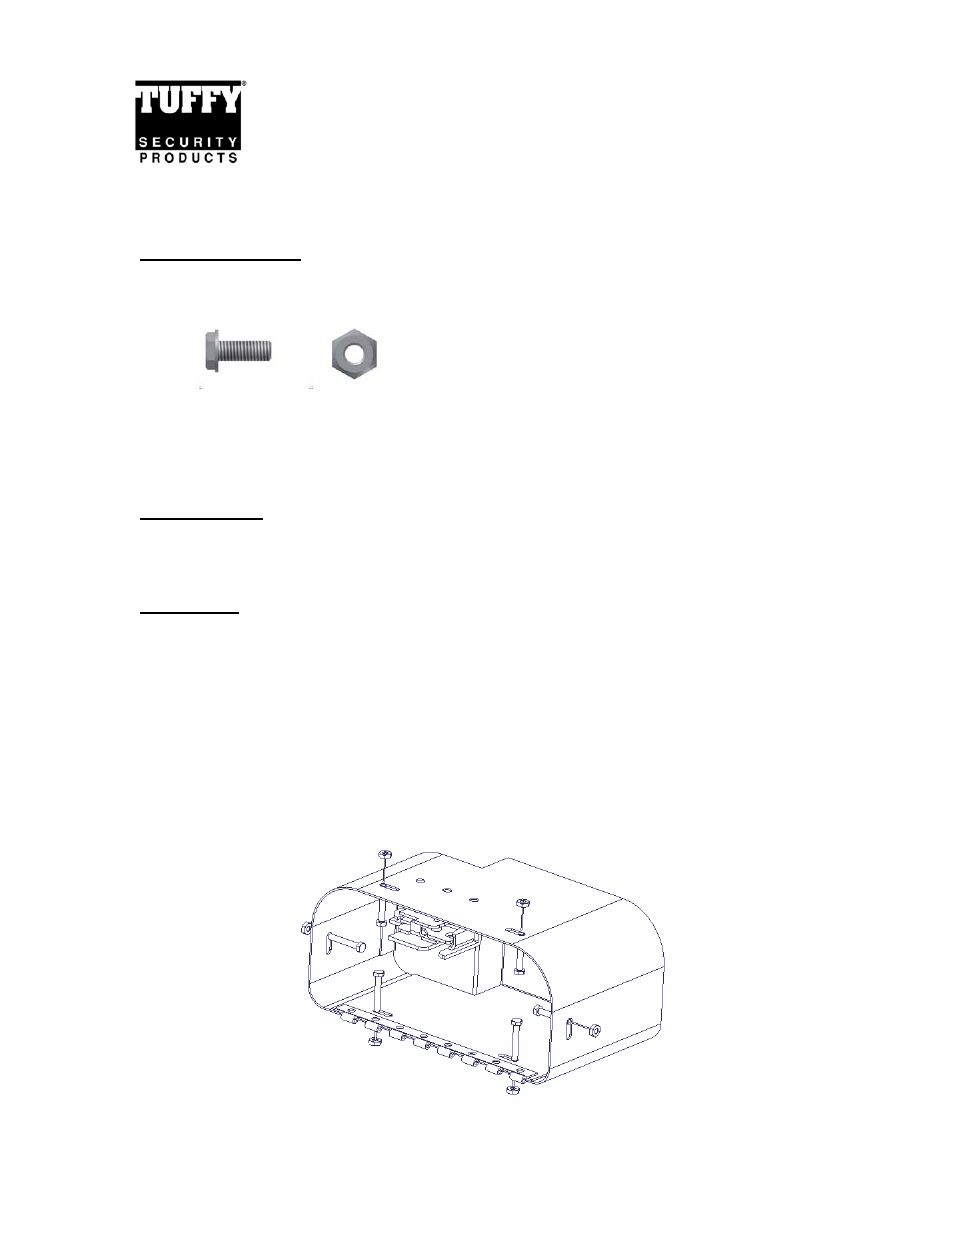
3. Insert the Tuffy glovebox line up the mounting holds with the holes in the dash.
4. Insert the (6) 10-32 x 1/2” bolts from inside the glovebox. Reach behind the dash and
fasten the (6) 10-32 locknuts starting with the bolts on the sides of the glovebox. See the
figure below (Shown without the lid).
5. Lock it up!
- 082 (2 pages)
- 089 Manual (3 pages)
- 089 Installation Manual (1 page)
- 101 (2 pages)
- 073 (3 pages)
- 198 (2 pages)
- 189 (1 page)
- 292 (2 pages)
- 282-BTL (1 page)
- 137 (2 pages)
- 295 (3 pages)
- 862 (2 pages)
- 863 (3 pages)
- 311 (2 pages)
- 312 (2 pages)
- 046 (3 pages)
- 145 (4 pages)
- 131 (2 pages)
- 297 (3 pages)
- 296 (3 pages)
- 240 (10 pages)
- 238 (2 pages)
- 058 (3 pages)
- 219 (2 pages)
- 195 (2 pages)
- 144 (2 pages)
- 274 (10 pages)
- 139 (3 pages)
- 157 (10 pages)
- 052 (2 pages)
- 164 (1 page)
- 104 (1 page)
- 043 (1 page)
- 027 (2 pages)
- 108 (2 pages)
- 149 (2 pages)
- 049 (2 pages)
- 036 (2 pages)
- 160 (3 pages)
- 289 (2 pages)
- 287 (3 pages)
- 283 (3 pages)
- 309 (2 pages)
- 182 (2 pages)