Figure 3b – Tuffy Security 304 User Manual
Page 4
Page 4 of 7 – 10/17/2013
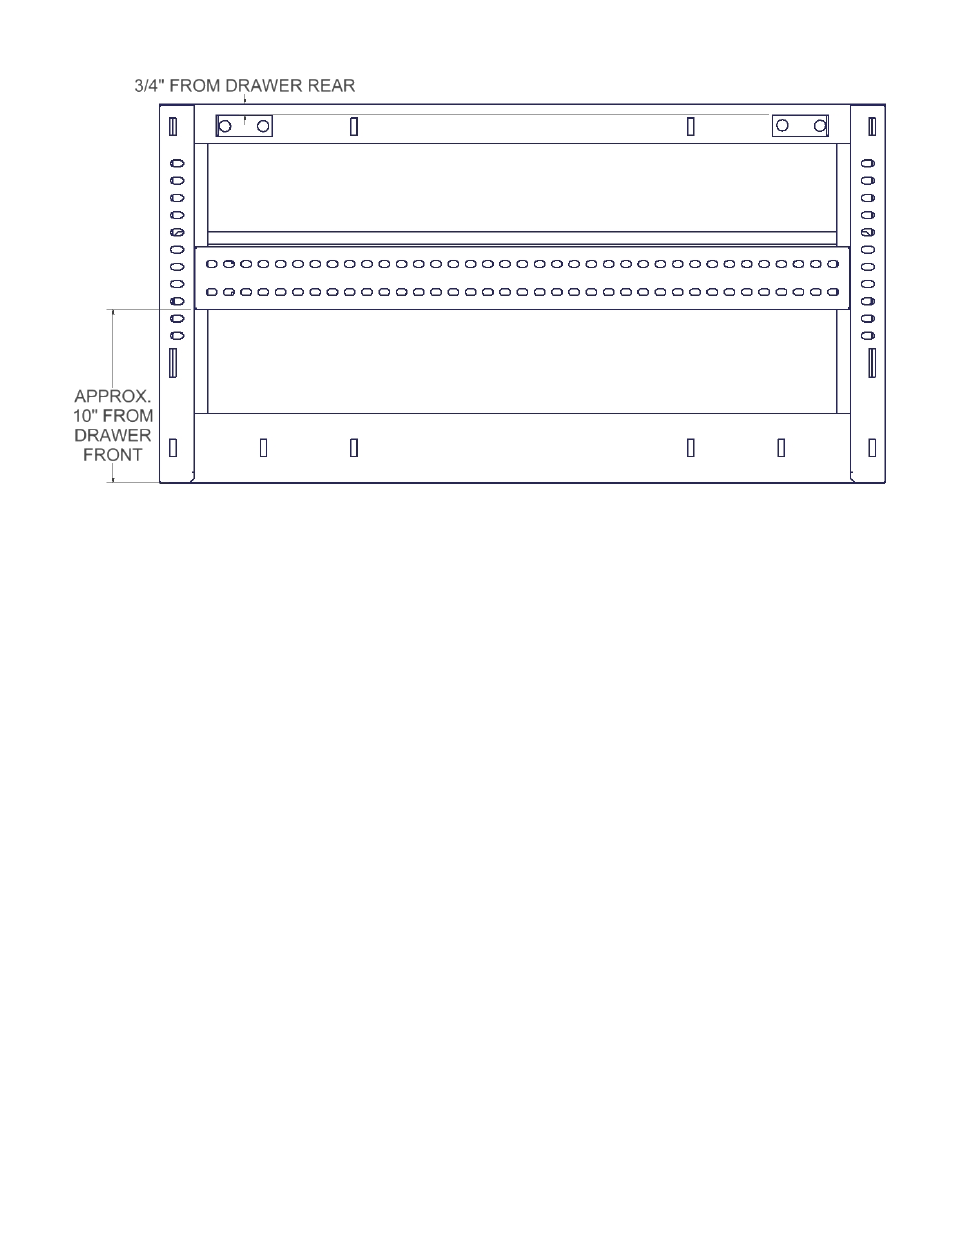
FIGURE 3B
3. Invert the enclosure and install (1) #11, and (1) #10 Tray Mount Bracket using the hardware and positions
illustrated(See Figures 3A/3B). In addition, attach (1) mounting bracket to the drawer enclosure with the illustrated
hardware. The location of the mounting bracket is secondary and may be moved forward or back depending on
customer preference for mounting of other equipment(fire extinguisher, etc). These bolts are difficult to reach; Use a
½” shallow socket with a long extension and a ratchet (Universal joint also helps) and a ½” wrench on the other end.
Unbolting the slide using a 7/16” wrench will make things easier as well. The Mounting Bracket parts and
fasteners are included with the drawer.
4. Place the enclosure in the trunk with the back of the enclosure facing the front of the car, and the tray mount brackets
facing down. Due to the shape of the trunk opening the enclosure must be placed in the trunk at a downward angle
from above(the widest portion of the trunk), and rotating it through this portion of the opening. Rest the enclosure on
the floor of the trunk.
5. Moving to the area between the “Package Tray” and the Rear Window, remove the Grounding Lug that is located in
the Package Tray pocket on the Driver’s Side of the car, also loosen the bolt that holds the electrical connector near
the forward end of the pocket. Both of these fasteners have 5/16” heads. Place the #2 Upper Support plate into the
pocket, slipping it under the wiring that runs across the package tray with the studs facing down into the openings and
the open hole in the plate centered on the threaded hole for the grounding lug bolt. Do not reinstall/tighten these
stock fasteners until after the enclosure is in place.
6. On the Passenger’s Side a single bolt(5/16”) needs to be loosened near the front of the pocket to make room for the
#1 upper support plate. Place the plate in the pocket with the studs facing down.
7. Lift the #17 Lower Passenger’s Side Assembly into place on the studs of the #1 Upper Support Plate in the orientation
shown in Figure 2. Install (2) #12.3 washers, and (2) #12.4 Nylock Nuts(1 set from Step #1, 1 from Shipping
Package) on the studs but only tighten hand tight as enclosure installation requires the brackets to be spread apart.
8. Lift the #16 Lower Driver’s Side Assembly into place on the studs of the #2 Upper Support plate as shown in Figure 1,
and use (2) #12.3 washers, and (2) #12.4 Nylock nuts(saved from Step #2)hand tighten to hold assembly in place.
9. With help spread the brackets and lift the enclosure into place under the “Package Tray”. Once in place, allow the
brackets to capture the enclosure and support its weight.
10. After making sure the Upper Support Plates are resting in their respective pockets, tighten the (4) #12.4 Nylock
Nuts(Steps #7/8) to 15 ft-lbs. To make this step easier the enclosure may be slid to the rear of the car and supported
to give access to the nuts from the back seat area of the vehicle.