Attention, Preparatory mounting directions, Figure a – Tuffy Security 304 User Manual
Page 2: Tools required
Page 2 of 7 – 10/17/2013
Tools required
•
½” Shallow socket with a long extension and a ratchet (Universal joint also helps)
•
½” Wrench
•
5/16” End Wrench/Socket
•
3/16” Drill Bit and Drill
•
3/8” End Wrench/Socket
Preparatory Mounting Directions
WARNING! This drawer/mount is rated to hold a maximum of 100# evenly distributed. This would include any
dividers mounted in the drawer. Never stand or sit on the Tuffy drawer or enclosure. The vehicle should not be
operated with the drawer opened and not secured shut. The drawer should not be operated/opened when not
level. Keep hands clear of moving parts and pinch points when maneuvering the drawer. Do not exceed the
rated weight capacity for this product.
THE DRAWER SHOULD ALWAYS BE EMPTY BEFORE REMOVING IT. CONSTANT SUPPORT MUST BE APPLIED
TO HOLD UP THE FRONT OF THE DRAWER THROUGHOUT THE ENTIRE REMOVAL PROCESS SO IT DOES NOT
CAUSE INJURY AND/OR DAMAGE.
1. Remove the rear seatback from the vehicle(see vehicle owners manual), as well as the headliner material above and
below the Package Tray (the area behind the rear seat and below the rear windshield) is accessible from both above
and below. The ¼” Upper Support Plates rest in pockets located in the top of the package tray, while the
corresponding Lower Assemblies are installed below the package tray “sandwiching” it to provide maximum strength
and weight distribution. When fully assembled, the mounting brackets suspend the drawer below the cooling fan and
speaker bottoms. It is designed to provide clearance for these items, while still allowing access to the spare tire and
the trunk floor.
2. The mounting bracket location measurements in these instructions are for the standard vehicles listed at the top of
Page 1. Due to the wide variety of options, models, and other variables your vehicle may be different. If the
dimensions in the vehicle where the drawer will be installed vary from those illustrated, the dimensions for the
mounting locations will need to be adjusted.
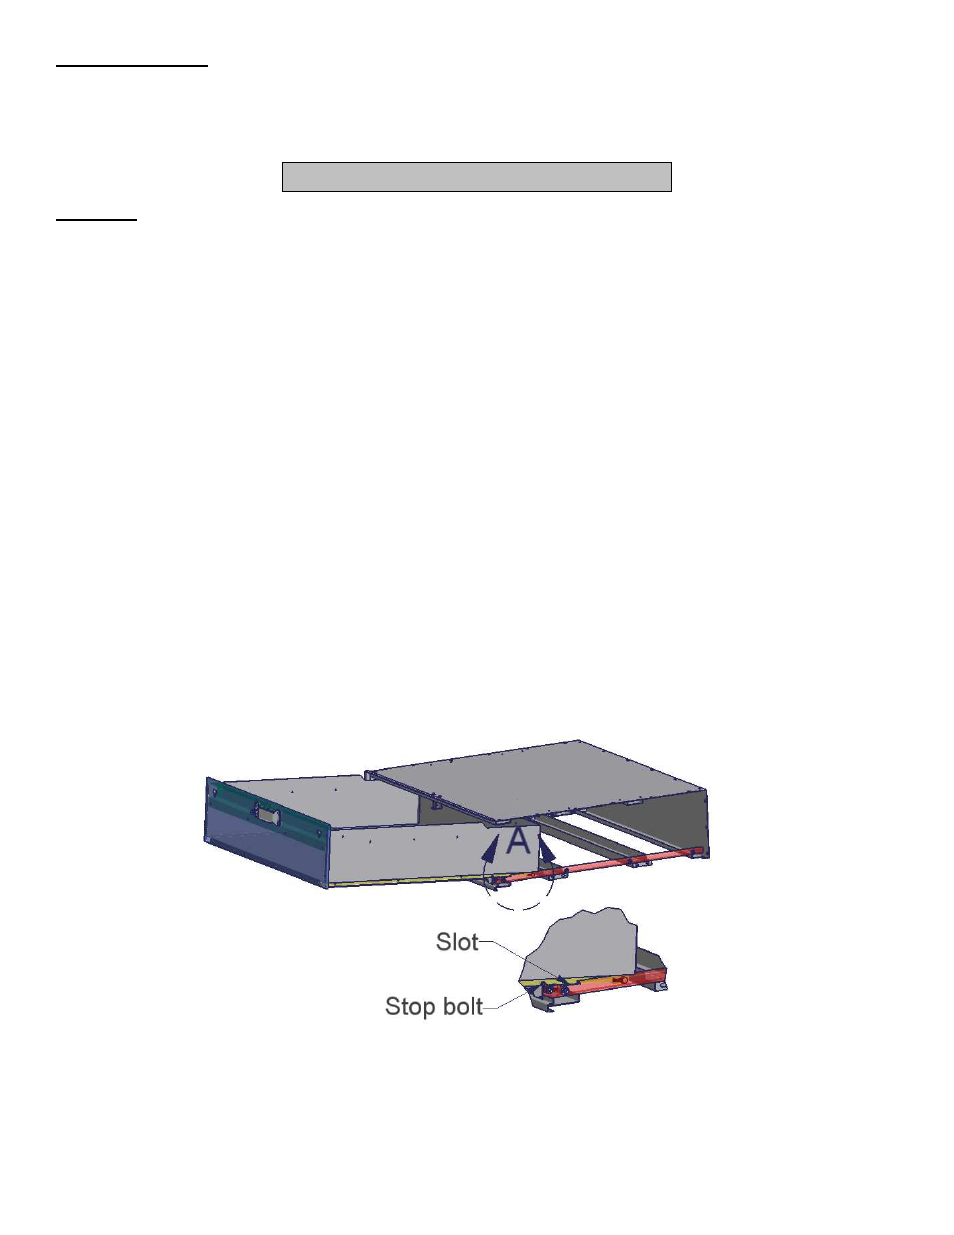
3. Remove the drawer from the enclosure. Pull the drawer out until it stops. Lift up the front of the drawer and pull it out
a few inches further until the stop bolts on the drawer slides clear the rollers on the enclosure slide. Pull the drawer
again until it stops, being sure to support the front of the drawer. Pivot the front of the drawer down and lift the rear
end of the drawer out so the rollers on the drawer slides pull free through the slots in the enclosure slides. Reverse
steps to install. (See Figure A)
FIGURE A
ATTENTION:
FREQUENT LUBRICATION IS NECESSARY ON THE LOCKING SYSTEM
The pushbutton lock contains an “O” ring seal to protect the interior from dust and water. If this mechanism is not
lubricated regularly it will become difficult to operate and it may not return to its home position preventing the key from
operating the lock. If this happens simply pull up on the pushbutton to manually bring it back to its home position.
Lubricate the pushbutton with a light lubricant such as silicone spray. The pushbutton may have to be periodically
disassembled and cleaned.
Call (970) 564-1762 for Technical Support