Top Flite TOPA0305 Part 2 User Manual
Page 7
V12. Sheet the other side of the turtle deck
the same way. Fill in the space between the two
turtle deck sheets on top near former F7A with a
leftover piece of 1/ 1 6 balsa.
V13. Apply hobby filler where needed. Use
masking tape to keep filler off the sheeting where it
isn't needed.
Do not build up a fillet.
V14. Trim, then sand the turtle deck sheeting
so
it
is
flush with former F7A and
The
sheeting at the front should be even with F7A
where it meets the
step
on the side stringer.
IMPORTANT NOTE: Some modelers prefer to
sand
as they build
instead of waiting until the
very end. If you prefer to do a little sanding now
to even the turtle deck sheeting with the fuse
sides, you may do
so
but
do not excessively
thin the 1/16" turtle deck sheeting because the
ABS
tail cone and ABS cabin have yet to be
fitted and must match the sheeting.
It's beginning to look like a Bonanza, isn't it!
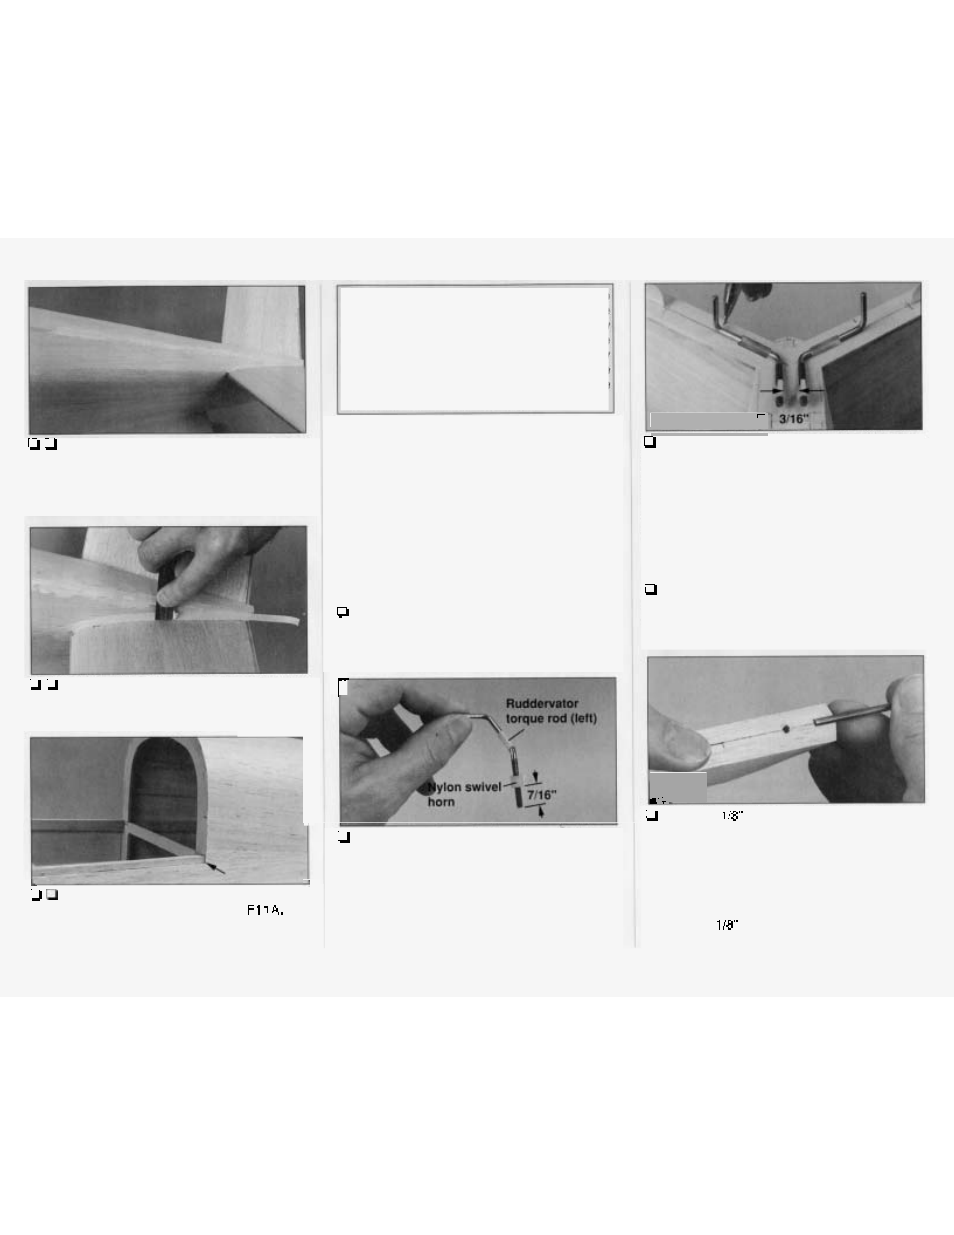
HOOK
UP THE RUDDERVATORS
V1. Cut the remaining
two hinge
slots
on
the TE
of the stabilizers. Test fit the ruddervators
to the
stab with the hinges.
V2. Tap threads into both nylon
swivel horns
with a 6-32 tap. Thread one of the swivel horns
onto one of the
ruddervator torque rods
so
the
bottom of the swivel is 7/16" from the end of the
torque rod. Thread the other swivel horn onto the
other ruddervator torque rod the same amount.
Compare the
two torque rods and make sure both
swivels are threaded on
the same amount.
V3. Use a straightedge and
a
ballpoint pen to
extend
the centerlines on the stab TE until they
meet in the center of F I l A . Position the torque
rods on the centerlines
so the swivels are 3/16"
apart. Accurately mark the location of the
arm
portion of the torque rods (that fit into the
ruddervators) on the TE of the stab.
V 4 . Remove the torque rods and fit the
ruddervators
to the stab with the hinges. Transfer
the marks
to the LE of the ruddervators.
V5. Drill a
hole in the
center of the leading
edge of the ruddervators at the marks you made.
Cut a groove in the
LE's to accommodate the
torque rods. Test fit the ruddervators
to the stab
with the torque rods.
Hint: Use a
brass tube sharpened at one end
to cut the grooves for the torque rods.
- 4 3 -