Top Flite TOPA0305 Part 2 User Manual
Page 24
SHEET THE BOTTOM
OF
THE WING CENTER SECTION
1. Install your servo extension cords,
"Y"
connectors and air lines
if
you are installing
retracts. The servo extension cords don't have to
be connected to the servos and the air lines don't
have to be connected to the retracts but they
should be installed
so
you can finish the sheeting.
Plan this carefully. Be certain you have connected
both aileron extension cords into the same "Y"
connector and both flap extension cords into the
same "Y" connector. Give yourself plenty of slack
on the wires and air lines
so
you will be able
connect everything after you cover your model.
2. Sheet the bottom of the wing center section
with two 3/32"
x
3"
x 30" balsa sheets and leftover
3/32" balsa if needed. Before you glue the sheet
that goes over the wing bolts, first cut two 1 "
lengths from the 9/16" diameter
x 8" cardboard
tube. Glue that sheet in position with the cardboard
tubes. Glue the cardboard tubes to the sheeting
and wing bolt plates. After the glue dries, cut and
sand the tubes flush with the sheeting.
Hint: Temporarily fit the flaps to the wing and cut
the ends of the bottom aft sheet to provide the
correct spacing at the ends of the flaps.
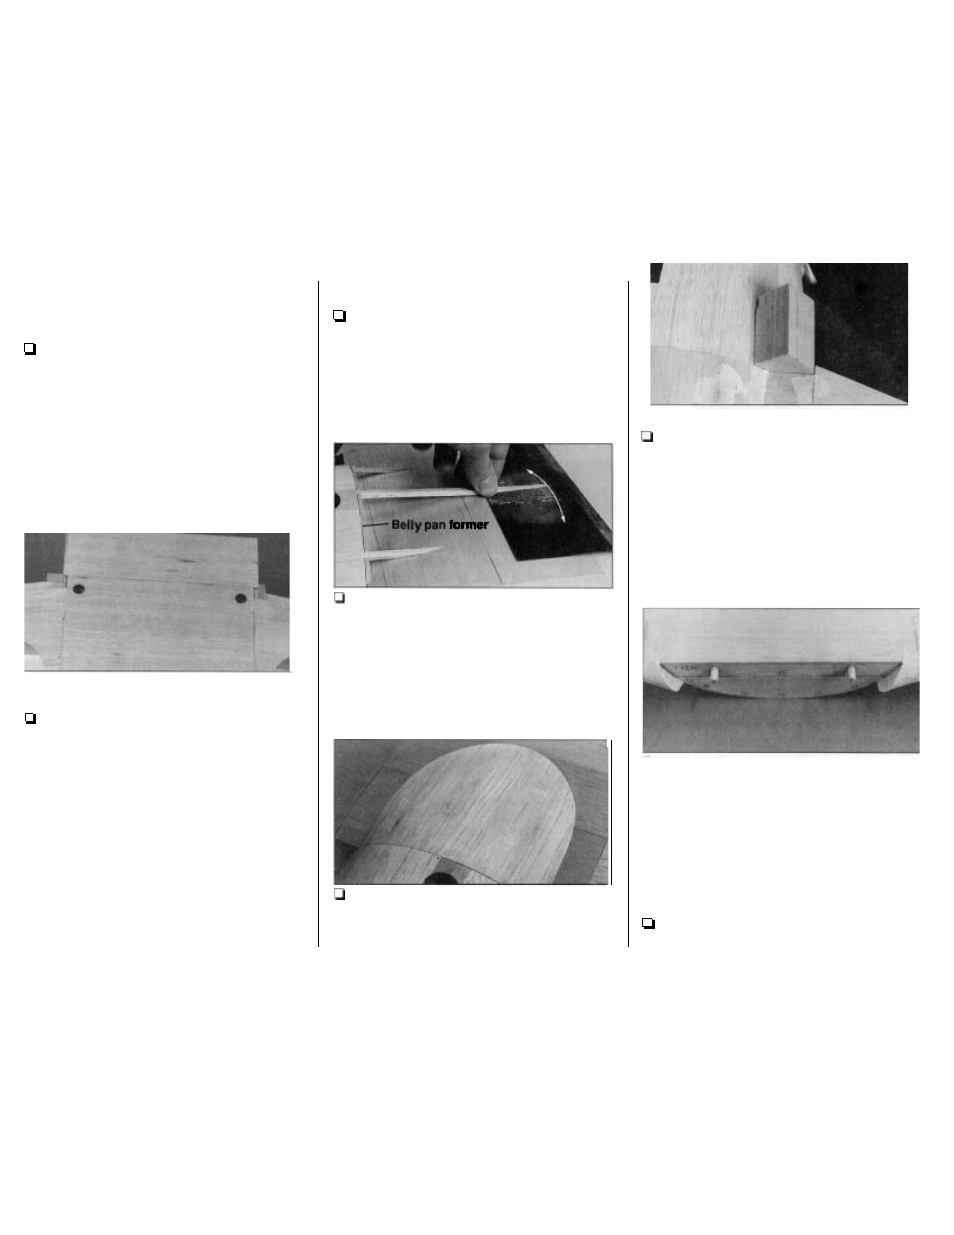
MAKE THE BELLY PAN
1. Bolt the wing
to
the fuselage. Place the die-
cut 1/8" plywood belly pan former F2W on the
front of the wing
so
it is resting against fuse former
F2. Trim the bottom of F2W
so
it sits 3/32" below
the bottom fuselage sheeting (to accommodate the
belly pan sheeting). Carefully glue
F2W to only
the wing.
pan
2. From a 3/16" x 3/16" x 30" balsa stick, cut one
6-1/2" piece, two 4-3/4" pieces and two 2-1/4"
pieces to make the belly pan stringers. Sand one
end of the stringers
so
they conform to the shape
of the bottom of the wing. Glue them in position.
Hint: Place a piece of sandpaper on the bottom of
the wing and move the stringers back and forth,
sanding them to the correct shape.
3. Sheet the belly pan with leftover 3/32" balsa
sheeting. Feather the edges with lightweight hobby
filler. After the filler dries, remove the wing and
sand the belly pan to blend with the fuse.
-
60
-
4. With the wing off the fuse, sand one of the 1"
x 1-3/4" x 2" wing fairing blocks to match the
curvature of the right side of the fuse at the leading
edge of the wing. Bolt the wing to the fuse. Sand
the side and rear of the wing fairing block
so
it fits
between the wing and the fuse as shown in
the photo. Glue the wing fairing block to the
wing only.
5. Remove the wing and sand the wing fairing
block to match the shape of the top of the wing.
The fairing block extends below the bottom
sheeting,
so
blend it to the belly pan and the
bottom of the wing with filler. Shape and fit the
other fairing block the same way.
6. Use lightweight hobby filler to blend the belly
pan to the wing and sand it smooth after it dries.