Finish construction – Top Flite TOPA0305 Part 2 User Manual
Page 19
swage to secure the cable. Fit the threaded rod into
one of the Screw-Lock connectors and temporarily
lock it down with a
4-40
x 118" socket head screw.
Connect another piece of cable to the other
Screw-Lock connector the same way, then thread
the cable through the guide tubes toward the nose
gear strut.
iteeringservo
-
R2.
Install a 0-80 threaded ball link ball (not
included) onto the arm on both sides of the nose
wheel strut with a 0-80 nut. Connect the other end
of both cables to the threaded ball links with the
swages. Tighten the loop in the cable just enough
so
it
will not come
off the ball. Crimp the swages.
Temporarily hook up the steering servo to your
radio system and test the movement. Adjust the
tension on the cables or make other adjustments if
needed.
Note: If your nose gear steering arms did not come
bent 90" as shown, do
so
now.
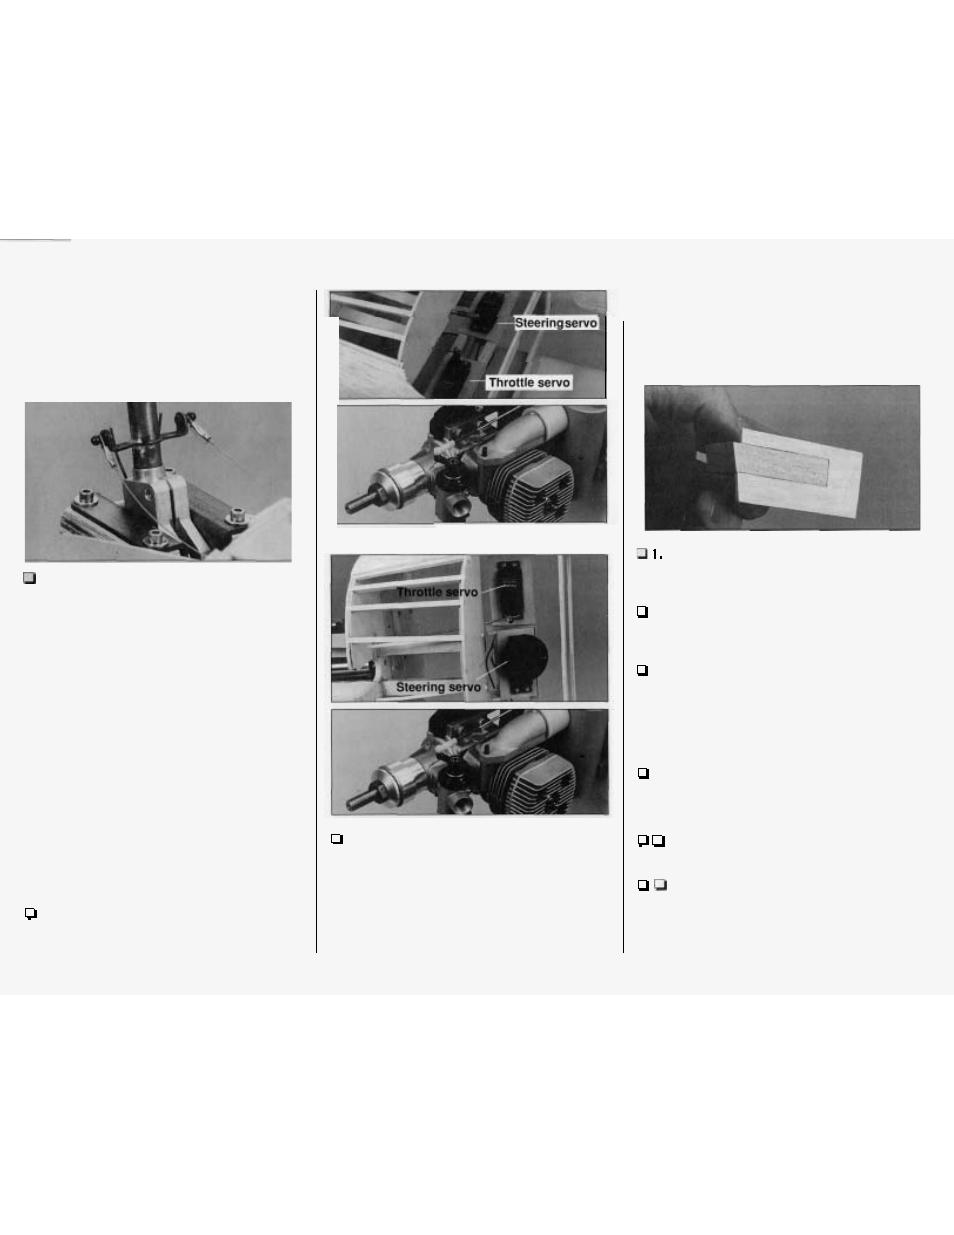
FINISH CONSTRUCTION
HOOK UP THE THROTTLE
1. Mount your engine mount and engine to the
firewall. Mount your muffler to make sure your
throttle pushrod will not interfere.
This is the throttle servo location for fixed gear,
This is the throttle servo location for retractable gear.
2.
Place your throttle servo tray with the servo in
the rails. Connect the
,074"
x 12" throttle pushrod
to your servo with a small, brass Screw-Lock
connector. Connect the other end of the throttle
pushrod to the engine with a nylon ball socket and
a 0-80 threaded ball and 0-80 nut. Use a drop of
thread lock on the nut. Glue the throttle servo tray
to the rails.
MOUNT THE WING TO THE FUSE
Remember the wing?
Go
get it
so
you
can mount it
to
the fuse.
Bevel the end of both
1/2"
x 1" x
2-1/4"
maple
wing bolt blocks
so they match the angle of the
die-cut 1/8" plywood wing bolt block holder.
2. Use 30-minute epoxy to glue the wing bolt
blocks and holders in the fuse where shown on the
plan. See the photo at step 8.
3. Place the wing in the wing saddle on the fuse.
Observe high spots in the saddle of the balsa fuse
sides that prevent the wing from fitting. Remove the
wing and sand the high spots
so the wing matches
the fuse as accurately as possible.
Do
not sand the
ply fuse side doublers.
4.
Remember the pin and
string method you
used to align the stab? Get your string out and stick
a T-pin in the center of the bottom, middle stringer
just ahead of the tail cone.
5.
Use the arrow on the tape to align the wing
with the fuse the same way you did the stab.
6.
Once you have the wing aligned, place
weights over the center section to keep it from
shifting during the next few steps. Keep your string
handy
so you can recheck alignment as
you proceed.
-
55
-