Reznor R6GP Unit Installation Manual User Manual
Page 45
45
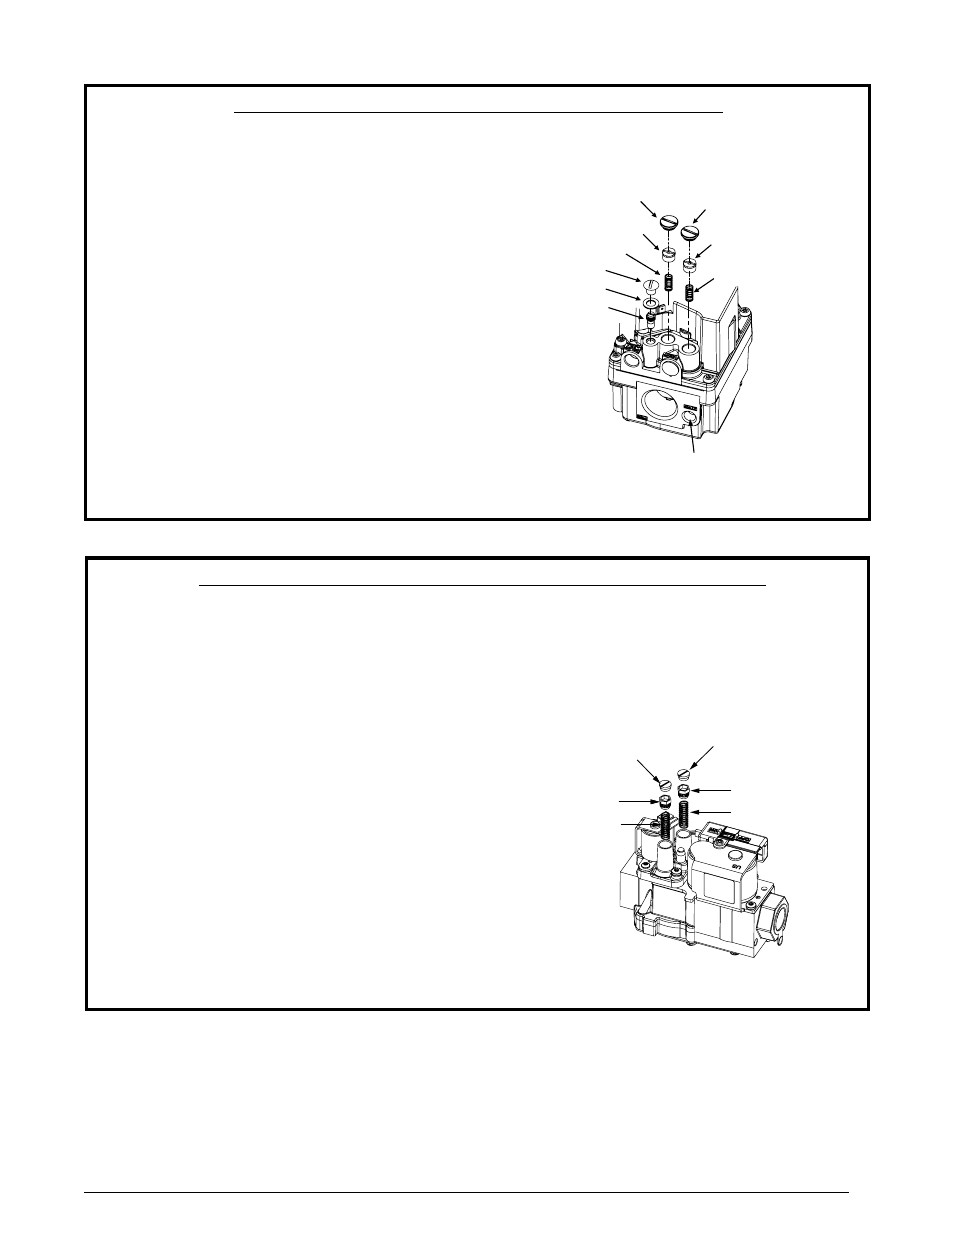
LOW REGULATOR COVER SCREW
(TWO STAGE ONLY)
REGULATOR ADJUST SCREW
REGULATOR SPRING
PILOT COVER SCREW
PILOT GASKET
PILOT ADJUST SCREW
REGULATOR SPRING
REGULATOR ADJUST SCREW
SINGLE STAGE AND TWO STAGE
HIGH REGULATOR COVER SCREW
MANIFOLD PRESSURE
TAP (OUTLET)
Figure 21. Regulator Spring & Adjustment Screw Removal
IMPORTANT NOTE: When converting to LP/Propane gas from natural gas, both springs from the gas
valve must be replaced by the white springs included in the kit. The LP Propane springs for HIGH and
LOW fire are the same size, shape, and color.
1. Remove both regulator cover screws. See Figure 21.
2. Remove both regulator adjustment screws from the gas
valve (located beneath the cover screws).
3. Remove both Natural Gas regulator springs (color coded
silver / Plain) from the regulator sleeves.
4. Install both L.P. regulator springs (provided in the
conversion kit and color coded white) into the regulator
sleeves.
5. Replace the HIGH regulator adjustment screw and
adjust approximately 12 turns to the bottom stop.
6. Relace the LOW regulator adjustment screw and adjust
approximately 8 turns.
7. Check and adjust both regulator settings (High and
Low fire) to the firing rates listed in Table 1 for factory
settings below 2,000 ft elevation or for reduced firing
rates based on final high altitude calculations
White Rogers - Model 36H64 - 10 Ton Units - (P/N 624695)
IMPORTANT NOTES:
• When converting to LP/Propane gas from natural gas, the springs from gas valve must be replaced by
the larger springs from the kit. The LP/Propane springs for both HIGH & LOW fire are the same size,
shape and color.
• Use only a Torx-25 or 3/16” flathead screwdriver when removing adjustment screws or during pressure
adjustment.
1. Remove the HIGH fire cap screw. See Figure 22.
2. Remove and discard the HIGH fire adjustment screw
from the gas valve.
3. Remove the spring from the gas valve and discard.
4. Install a larger spring from the conversion kit.
5. Install a new adjusting screw from the kit.
6. Repeat steps 1 - 5 for replacement of the LOW fire spring
and adjustment screw.
7. Check and adjust the regulator setting. See Gas Pressure
Adjustment Section.
8. Reinstall the cap screws on the HIGH and LOW regulators.
Plastic replacement cap screws are provided in the
conversion kit.
9. Affix the label from the conversion kit to the gas valve.
High Fire
Cap Screw
High Fire
Adjustment Screw
Low Fire
Cap Screw
Low Fire
Adjustment Screw
Spring
Spring
Figure 22. Pressure Regulator Spring & Adjustment Screw Removal
Honeywell - Model VR9205Q1127 - 6 & 7.5 Ton Units - (P/N 624787)