2 connecting the power, 3 connecting to monitors, 1 bnc connection – KGUARD Security TC801 User Manual
Page 13: 2 connecting the power 2.3 connecting to monitors, English chapter 2: installation, Dvr user’s manual 13, Press the power button to turn on the dvr, Channel dvr 8-channel dvr, Risk of electric shock do not open, Power supply wall outlet
ENGLISH
Chapter 2: Installation
DVR User’s Manual
13
CH4
CH3
CH2
CH1
AIN4
AIN3
AIN2
AIN1
VIDEO OUT
VIDEO IN
VIDEO IN
AUDIO OUT
AUDIO IN
VGA
A B G
NETWORK RS485
CAUTION
RISK OF ELECTRIC SHOCK
DO NOT OPEN
CH8
CH7
CH6
CH5
CH4
CH3
CH2
CH1
AIN8
AIN7
AIN6
AIN5
AIN4
AIN3
AIN2
AIN1
VIDEO OUT
VIDEO IN
VIDEO IN
AUDIO OUT
AUDIO IN
VGA
A B G
NETWORK RS485
CAUTION
RISK OF ELECTRIC SHOCK
DO NOT OPEN
DC 12V
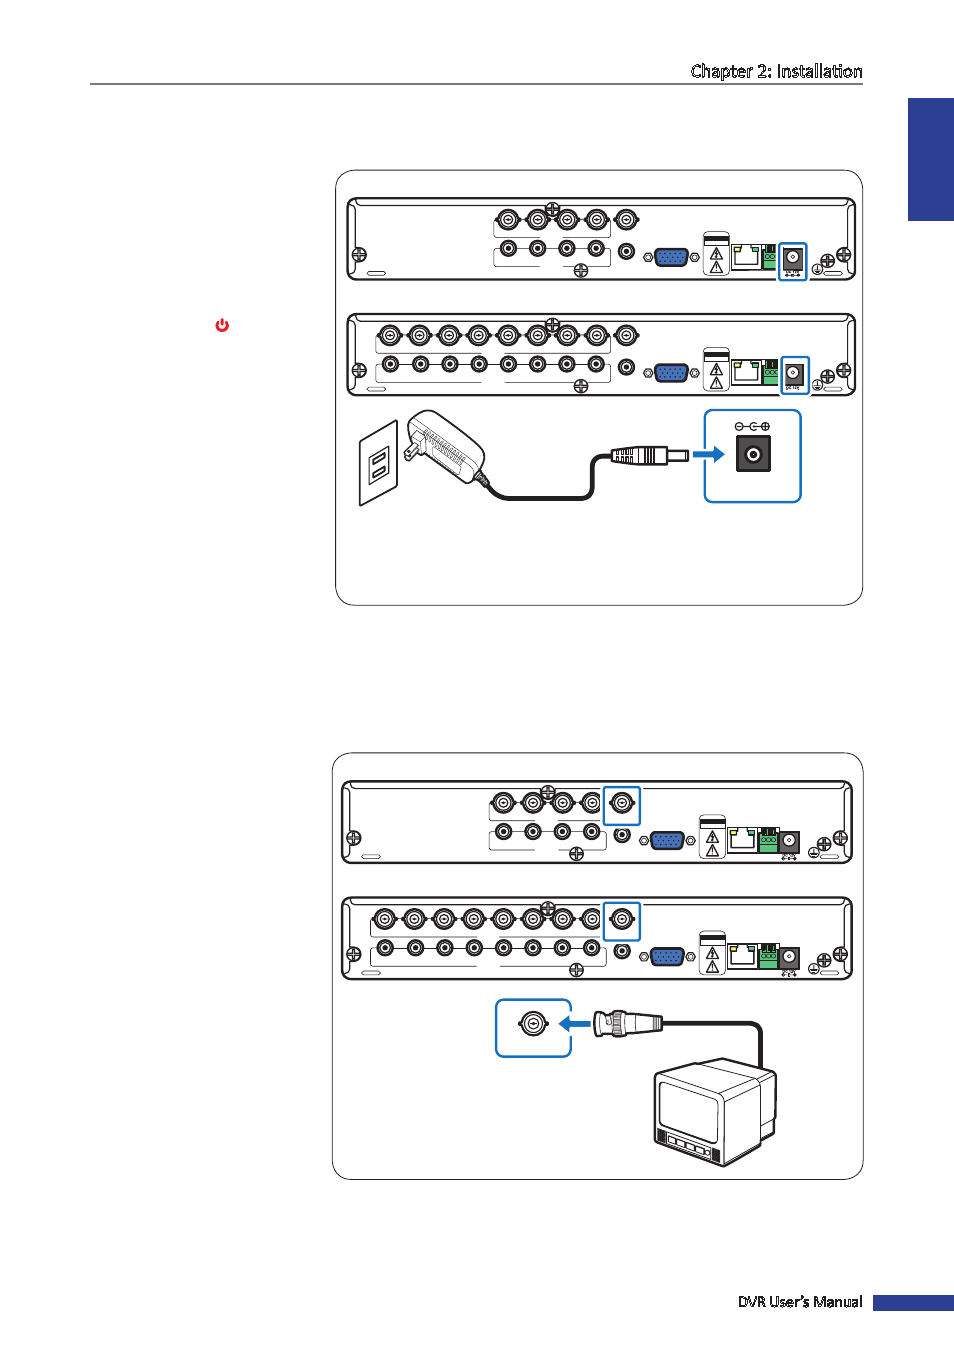
2.2 Connecting the Power
Use only the supplied power adapter and power cord that came with the DVR.
1
Connect one end of the power
supply to the power connector
on the back of the DVR.
2
Plug the other end of the power
supply into the wall outlet.
3
Press the Power button to
turn on the DVR.
Power supply
Wall outlet
4-Channel DVR
8-Channel DVR
2.3 Connecting to Monitors
The preview screen can be displayed on monitors via BNC VGA connection.
2.3.1 BNC Connection
Connect the video output of
the DVR to the monitor via BNC
connector as shown.
CH4
CH3
CH2
CH1
AIN4
AIN3
AIN2
AIN1
VIDEO OUT
VIDEO IN
VIDEO IN
AUDIO OUT
AUDIO IN
VGA
A B G
NETWORK RS485
CAUTION
RISK OF ELECTRIC SHOCK
DO NOT OPEN
CH8
CH7
CH6
CH5
CH4
CH3
CH2
CH1
AIN8
AIN7
AIN6
AIN5
AIN4
AIN3
AIN2
AIN1
VIDEO OUT
VIDEO IN
VIDEO IN
AUDIO OUT
AUDIO IN
VGA
A B G
NETWORK RS485
CAUTION
RISK OF ELECTRIC SHOCK
DO NOT OPEN
VIDEO OUT
Monitor
BNC cable
4-Channel DVR
8-Channel DVR