Build the stabilizer and elevator – Great Planes Spirit 100 Sailplane Kit - GPMA0550 User Manual
Page 7
D 6. Using a sanding block and coarse (50 or 80-gnt) sandpa-
per, sand the leading edge of the rudder to the V-shape as shown
on the plans (a small razor plane works great for initial shaping).
Sand the three remaining edges to a smooth rounded shape.*
Sand the top and the leading edge of the fin to a nice rounded
shape. The leading edge of the fin extends down through the fuse
so you don't need to sand below the edge of the fin bottom.
NOTE: The trailing edge of the FIN must remain square, do
not sand it!
D 7, Cut two 6" lengths of 1/4" Balsa Triangle(BAL141)and
glue them along the bottom of the fin. The bottom edges of the
triangle should be flush with the bottom of the fin. Sand the
triangle stock to blend with the leading and trailing edges of the
fin. Also, cut or sand the bottom of the triangle stock to match the
notch in the 1/4" balsa fin bottom.
* MAXIMUM PERFORMANCE TIP - Sand both sides of the
rudder to a taper as shown on the plans. This requires a little more
work but will help to reduce drag and thus increase performance
of the sailplane.
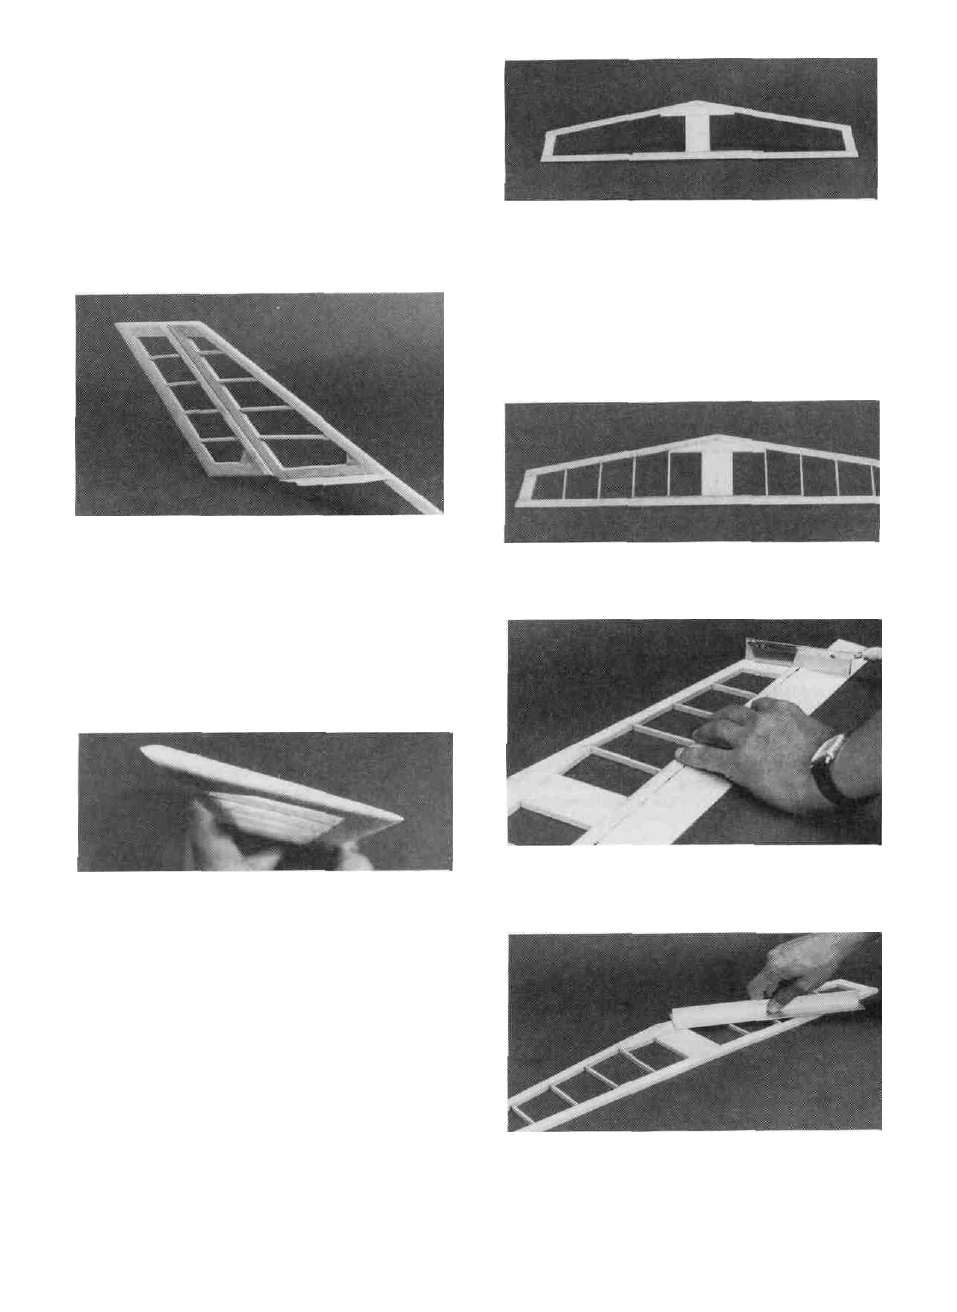
BUILD THE STABILIZER AND ELEVATOR
You'll need the following parts:
SPT1S01 1/4" x 1/2" x 30" Balsa Tail Frame
SPT1S02 1/4" x 3/4" x 24" Balsa Tail Tips
SPT1S03 1/4" x 1" x 15" Balsa Stab Center Piece
SFT1S04 1/8" x 1/4" x 30" Balsa Tail Ribs
SPT1S05 1/4" Balsa Tapered Elevator
D 1. Tape waxed paper over the stabilizer drawing on the
plan. Cut the leading and trailing edges from the 1/4" x 1/2" x
30" Balsa Tail Frame Stick (SPT1S01). Cut the lips from the
1/4" x 3/4" x 24" Balsa Tail Tips Stick (SPT1S02) and cut the
centerpieces from the 1/4" x 1" x 15" Balsa Stab Center Piece
Stick (SPT 1 S03). Pin these pieces in place over the plan and add
thin CA to each joint.
D 2. Cut the "ribs" from the 1/8" x 1/4" x 30" Balsa Stick
(SPT 1 S04) and glue them in place.
D 3. Pin or tape the 1/4" Balsa Tapered Elevator (SPT1 S05)
in place behind the stab and use your razor saw to cut the ends off
to match the angle of the stab lips.
D 4. Remove the slab from ihc plan and examine it for any
open or bad joints. Fill any gaps with medium or thick CA, then
7