Great Planes Spirit 100 Sailplane Kit - GPMA0550 User Manual
Page 31
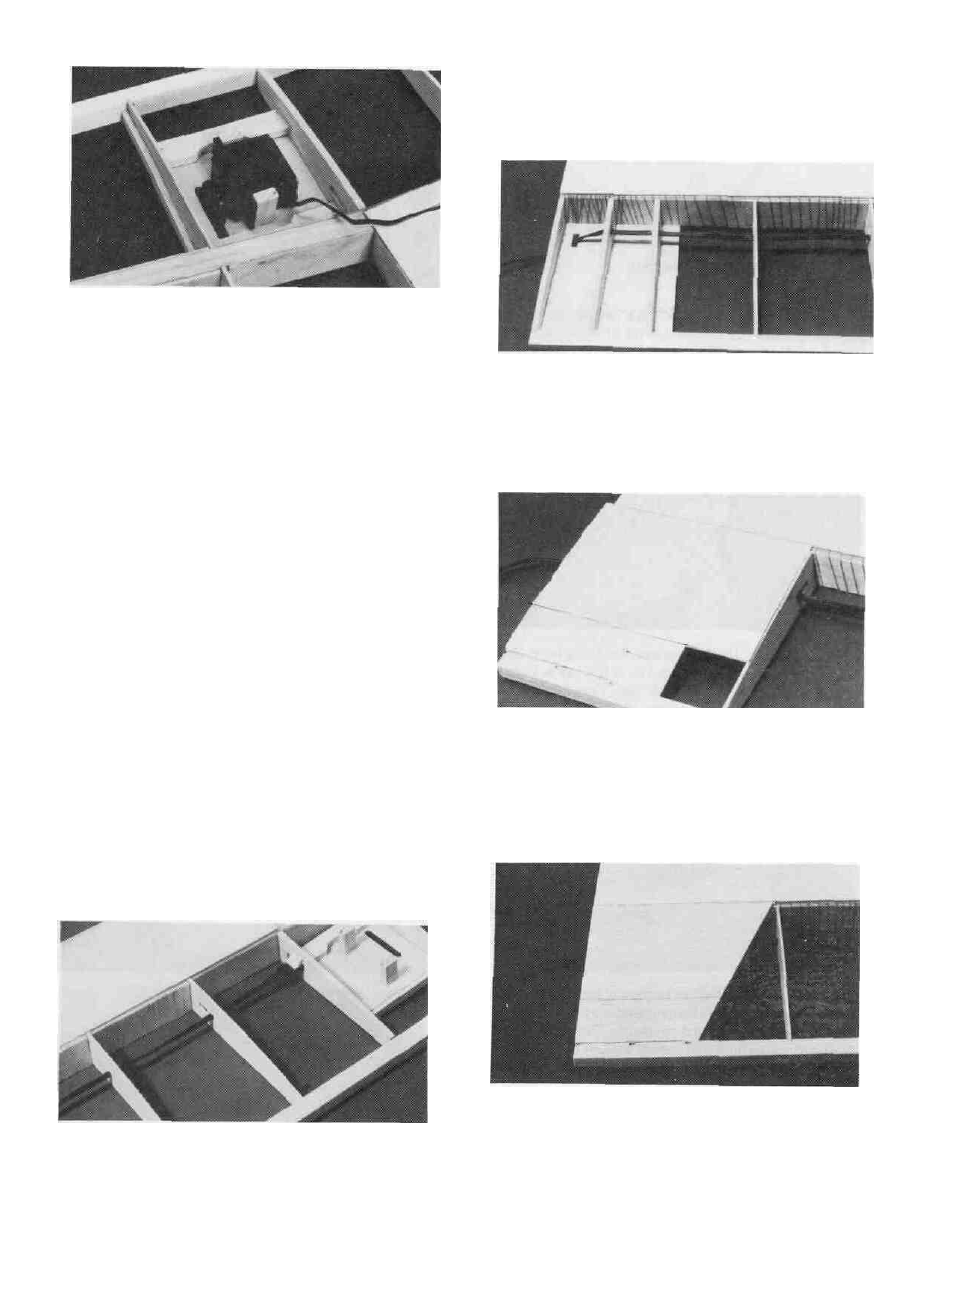
DD 6 Turn the wing right side up and position the aileron
servo on the hatch so the servo horn is centered in the slot Look
down the wing to make sure the servo does not extend past the top
of the ribs II if does you can move the servo forward and enlarge
the slot to accommodate it Put a drop of med or thick CA on one
end of two of the wing servo rails you cut earlier and glue them
in place next to the servo mounting flanges Remove the servo
and add med or thick CA around the rails to securely glue them
in place
removed later if needed Glue a piece of 1/4" balsa triangle stock
around the plug to secure it
DD 11 C u t a s l o t i n t h e b o t t o m s h e e t i n g n e x t t o t h e f i r s t W 1 B
rib for the extension to exit String the extension through the ribs
and out the slot in the bottom sheeting Glue the extension to each
rib with med or thick CA
D D 7 Remove the hatch from the wing and replace the
servo on the rails Drill 1/16" holes in the servo rails for the servo
mounting screws and mount the aileron servo flat against the
mounting plate using the screws provided with the radio
D D 8 Replace the hatch with the servo installed and check
to make sure the servo rails do not extend past the top of the ribs
Sand the rails if necessary The lower the rails and the servo, the
less chance they have of deforming the top wing covering when
it is applied
D D 9 The aileron servo extensions need to be installed
now You will need about 36" of extensions in each wing so
depending on the brand of radio you choose, you may need to join
a couple of smaller extensions If you will have two extensions
plugging together inside the inner panel put a drop of med or
thick CA on the plugs (after they are assembled) to hold them
together forever'
DD 10 Glue the servo end of the extension into the slot in
W3B It needs to be installed there so the aileron servo can be
DD12 Cut a 4" and a 5" piece of 1/16" sheeting for
the top inboard center section out to rib W2B as shown in the
photo Med or thick CA should be used for this step Glue the
5" piece near the spars and cut the 4" piece to fit between the first
piece and the sub TE Glue it in place
DD 13 Cut the sheeting off at an angle from the front of W2B
to within 1/4 of the rear of W 1 B as shown on the plans Sand the
sheeting flush with the W1B rib at the wing root
31