Great Planes Spirit 100 Sailplane Kit - GPMA0550 User Manual
Page 40
back flush with the bottom of the cockpit. Be careful not to sand
through the cockpit.
D 6. Tint the Canopy (CANPY048) if you wish, using regular
clothing dye you can buy at the grocery store (powdered Rit, etc).
Use very warm water (warmer than you can leave your hand in)
but do not use very hot water or the canopy may deform. The
warmer the water and the longer you leave the canopy in the dye,
the darker the tint will be.
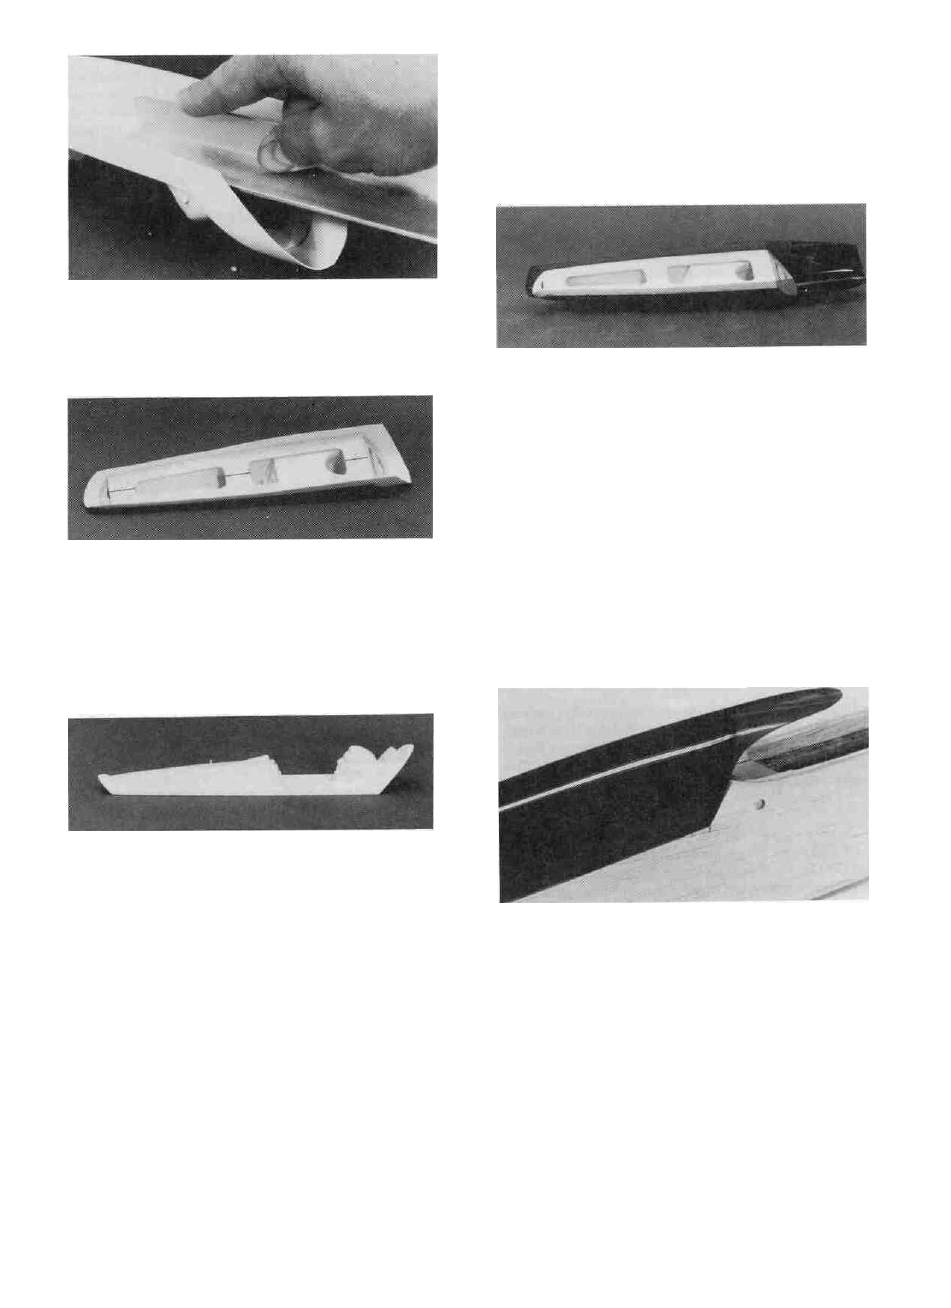
D 3. Punch out the 1/8" Die-Cut Balsa Cockpit Base Halves
(SPT1F02) and trial fit them together. Sand them if necessary to
get them to fit together nicely and then glue them together with
CA. Trial fit the base in the cockpit and sand the edges until is fits
easily. When satisfied with the fit glue it in place with med. or
thick CA.
D 7. Set the cockpit inside the canopy and line the cockpit up
with the scribe lines in the canopy. The scribe lines are only for
reference while positioning the cockpit, do not try to get the
cockpit to fit the scribe lines. Glue the canopy to the cockpit
using medium CA. Use the glue very sparingly by holding the
cockpit in place inside the canopy and apply glue one drop at a
time to the seam. NOTE: To keep the cockpit from bowing
during this step, put the first drop of glue at the very nose of the
cockpit and then put the second drop at the very top rear of the
cockpit without putting any pressure on the cockpit base until
the glue cures. The glue will seep in along the seam and provide
a nice clean g l u e j o i n t . Work your way around the canopy and
don't get in a hurry or you may get too much glue and it will run
down the canopy. Be careful not to twist or move the cockpit once
you start gluing it in place.
D 4. Trim and sand off the extra cockpit material flush with the
edges of the cockpit back, cockpit base, and cockpit front.
Saturate the front edge of the cockpit base with thin CA and allow
it to soak in and cure. This is where the canopy hold down dowel
will rest. Sand all edges of the cockpit flush with the cockpit front,
the cockpit back and the cockpit base.
D 5. Paint the cockpit with the color scheme of your choice. Test
the paint you are going to use on a scrap piece of the plastic you
cut off to make sure it will not affect the plastic. Regular plastic
model paints usually work well for this. Do not paint the edges of
the cockpit where the canopy will attach or the glue will not hold
as well. Striping tape can later be used to cover these areas.
Lightly sand the edges of the cockpit to help the canopy adhere.
D 8. Trim and sand the canopy flush with the base and the front
of the cockpit but do not trim the back yet! A small pair of
scissors works well for trimming the canopy. Temporarily mount
the wing in place on the fuse. VERY CAREFULLY trim the
back of the canopy, A LITTLE AT A TIME, to fit over the wing.
Take your lime and use the outlines on the canopy and the wing
for guides.
D 9. Test fit the canopy onto the fuse. You can sand the edges
of the canopy slightly or you can sand the fuse if needed to get it
40