Great Planes Spirit 100 Sailplane Kit - GPMA0550 User Manual
Page 10
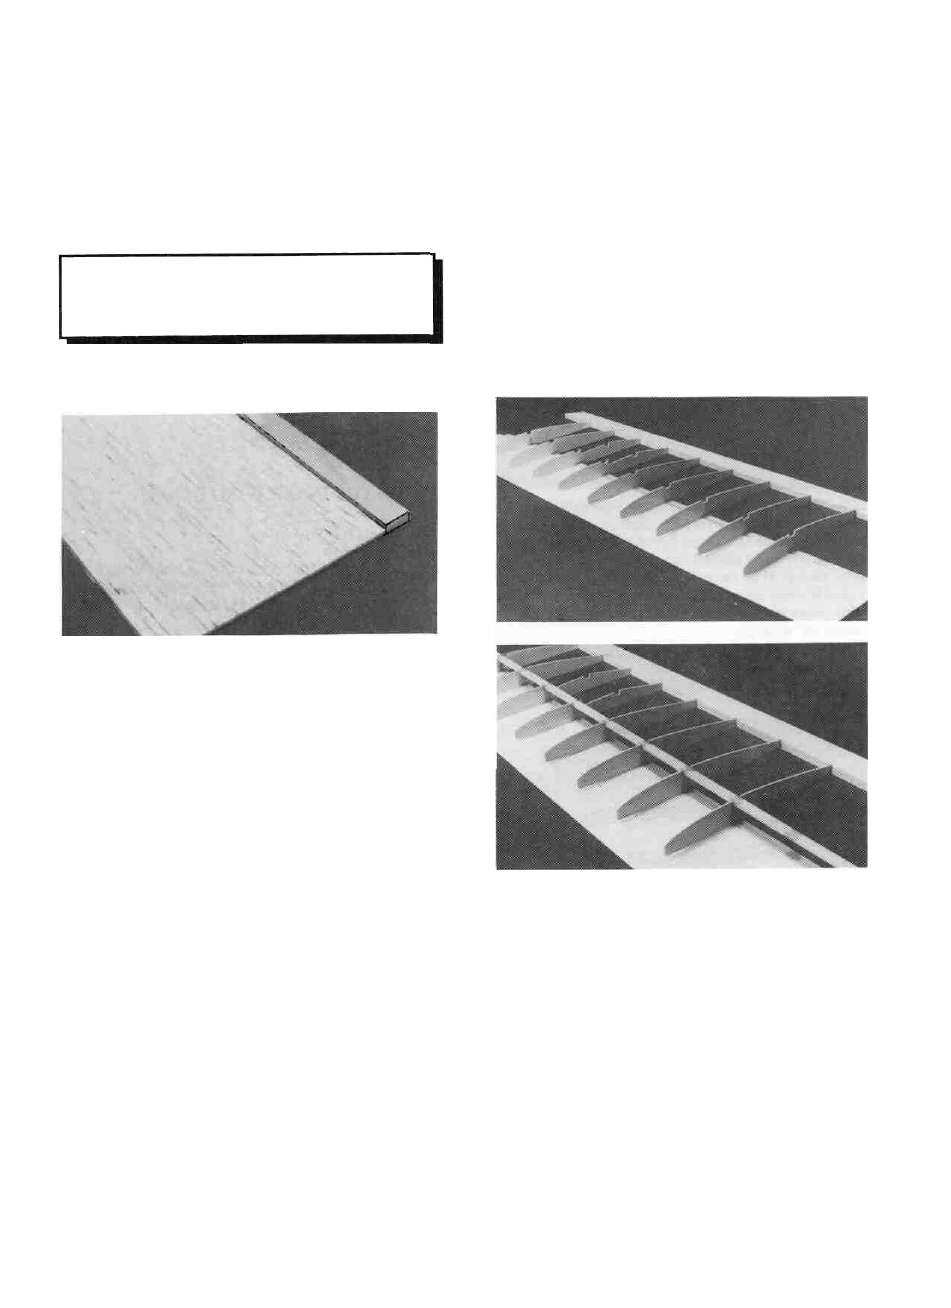
D 2. Son through the three 1/16" x 3" x 30" Balsa Wing
Sheeting (SPT1W20) and pick out the two sheets that most
closely match each other in weight and grain. These will be the
bottom sheeting for the inner wing panels. Check to make sure
the two "bottom" sheets have at least one straight edge. If' not,
use a metal straight edge to cut as little as possible off of one long
edge to make it straight.
DD 6. Place six W2S and two W2SS ribs (SPT1W01) on
the spar in their approximate positions, work the ribs into the
notches on the trailing edge but do not glue anythmg yet. NOTE:
The W2SS ribs should be installed where the spoiler will be
located.
NOTE: Follow the steps with two check boxes
to build the RIGHT wing panel, then repeat
these steps to build the LEFT wing panel.
D D 7. Make sure the ribs are properly positioned accord-
ing to the plans and glue them to the spar using med. or thick CA.
Do not purposely glue the ribs to the sheeting yet. Use the
square end of the rib gauge to keep the ribs perpendicular to the
work surface. Hold the TE and the ribs flat against the plan. With
the ribs inserted fully into the notches, add a drop of thin CA to
each joint.
D D 3. Glue one of the "Inner Bottom" wing sheets to the
edge of an 1/8" x3/8"x 30" Basswood Inner Spar (SPT1W12)
using the following procedure. With the spar in position on the
plan, hold the straight edge of the bottom wing sheet up against
it. Starling about 9 inches from the "root" end (where the second
W2S rib will be positioned), add thin CA along the joint. Be sure
to hold both the spar and the bottom wing sheet flat against the
work surface while the glue cures. Glue a 5" -6" section at a time
until you get within 4" of the other end (where the last W2S rib
will be installed). Do not glue the two ends yet as some of the
sheeting will be cut away later.
D D 4. Align the bottom spar/wing sheet assembly with the
"Inner Panel" drawing on the plan and pin it in place. This
assembly will be a little long but just center it over the inner panel
drawing.
D D 8. Trial fit the Top 1/8" x 3/8" x 30" Basswood Inner
Spar (SPT 1 W 12) into the notches in the ribs by carefully pushing
the spar completely down into the notches. Make sure the top spar
is lined up lengthwise with the bottom spar. Remove the spar and
apply med. or thick CA to the notches. Replace the spar and make
sure the spar is level with the front half of the rib so the sheeting
will lie flat on the spar.
D D 5. Pin one of the 11/32" Balsa Inner Trailing Edges
(SPT1W15) to the plan, lining up the notches in the TE wilh the
notches on the plan. Use a couple of W2S ribs to correctly space
the TE behind the spar. If the notches are off a little from the plan
it is due to the moisture content of the air. Just line up the root end
of the TE and space the ribs according to the TE, not the plans.
D D 9. Position a 1/8" x 3/8" x 23-1/2" Basswood Outer
Spar (SPT1W 13) under the front edge of the leading edge sheet
to hold it up against the front of the rib. Use weights or pins near
the spar to hold the panel flat on the work surface during this step.
Apply Am CA to glue the sheeting to the ribs. The outer spar is
10