Great Planes Spirit 100 Sailplane Kit - GPMA0550 User Manual
Page 27
it in p l a c e , just as you did for the inner panel, except start at ribs
W6 and W9. Add med or thick CA to each relief notch to fill in
any gaps.
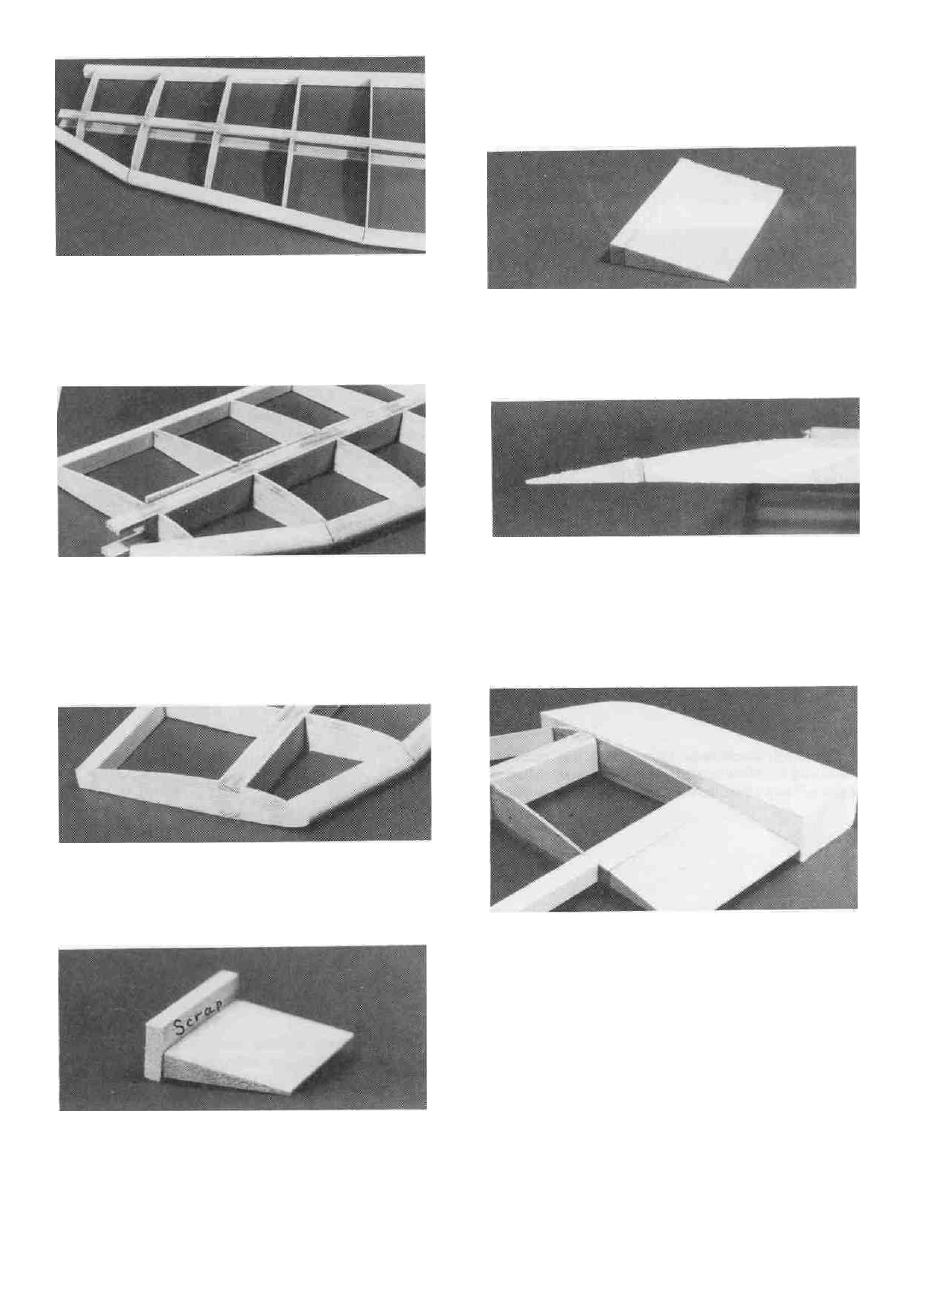
of 1/4" balsa (from tail wood) to the LE of the 2" piece of aileron
as shown in photo
DD 10 Trim and sand the 1/4 piece of balsa to match t h e
contour of the 2 piece of aileron
D D 7. With the panel flat on the work surface, install the
1/16" Shear Webs following the same procedure as you did on the
inner panel The webs will extend past the top spar, b u t jusl trim
them flush with the spars and sand the edges round so they do not
make a ridge when the covering is applied.
D D 11 Glue t h i s assembly to the back edge of the sub TE so
it extends slightly past W10 Notice that when the aileron piece
is glued on correctly, it w i l l droop slightly as shown in the photo
Sand the piece flush with rib W10
D D 8 Cut and sand the sub TE, spars and leading edge flush
with rib W10 Set the panel down on the plan and cut the root end
of the spars, LE and sub TE to the correct length.
D D 9. Cut a 2" long piece of 11/32" Balsa Outer TE/
Aileron (SPT1W16) from the UN-notched end. Glue a scrap piece
DD 12. Glue the 7/8" Balsa WingTip Blocks (SPT1W23) to
W10 with med or thick CA Line up the front of the tip block with the front of the LE.
Do not securely glue the tip to the TE piece.
DD 13. Carve and sand the w i n g tip to blend in wilh rib W 1 0
and the TE Be careful not to change the shape of W10 w h i l e
sanding the tip There are three section views on the left wing p l a n
27